Showing posts with label quick and easy. Show all posts

June 15, 2015

Chicken Lettuce Wraps

Okay, okay, this is definitely not soup. But it is easy, fast, delicious, healthy, and perfectly comforting on a warm day. A crisp bite of lettuce and a warm savory filling! There is not much better. I don't typically make a lot of Asiany food, I am always afraid it won't taste as good as it should. But this was pretty darn perfect. Topped with whatever you like or have on hand, this is definitely customizable. I want to eat everything inside a lettuce leaf now! Look out tacos, you have a fierce competitor! Ground turkey or pork would also work well here!

Chicken Lettuce Wraps
Recipe from The Kitchn </u>
Serves 4 as a main course, or 2 people for two meals!

3 tablespoons hoisin sauce (gluten-free, if needed)
2 tablespoons soy sauce (or 1 tablespoon tamari, if gluten-free)
2 tablespoons rice wine vinegar
1 teaspoon sesame oil
1 pound ground chicken, white meat or dark meat (or ground turkey)
2 teaspoons vegetable oil, divided
8 ounces mushrooms, chopped small
1 8-ounce can water chestnuts, rinsed, drained and chopped small
4 cloves garlic, minced
1-inch piece ginger, minced (about 1 tablespoon)
1/2 cup sliced green onions (from about 6 green onions), divided
2 small heads Bibb or butter lettuce (we ate one whole head of Boston lettuce for one 2-person meal, and will eat the other head with leftovers!)

Optional extras: chopped red onions, chopped bell peppers,  grated carrots, extra green onions, red pepper flakes, hot sauce 


Mix together the sauce: Combine 3 tablespoons of the hoisin sauce, soy sauce, rice wine vinegar, and sesame oil in a small bowl. Whisk to combine and keep near the stove. (If you'd like a thicker sauce, whisk in 1 teaspoon of cornstarch.)

Heat a teaspoon of oil in a skillet over medium heat. Add the ground chicken and cook until cooked through and no longer pink, 7 to 8 minutes. Break up the chicken into small crumbles as you cook. Transfer the cooked chicken to a clean bowl.

Warm the other teaspoon of oil in the skillet. Add the chopped mushrooms and cook until tender, about 5 minutes. Stir in the chopped water chestnuts, garlic, and ginger, and cook until aromatic, about 30 seconds.

Transfer the cooked chicken back to the pan with the vegetables, along with half of the green onions.

Pour the sauce over the top of the chicken mixture and stir to coat. Cook just until you hear bubbling and the sauce is warmed through, 30 to 60 seconds. Taste a spoonful of the mixture and add more hoisin sauce if you'd like a stronger flavor. (I found it to be perfect as is!)

Break off all the lettuce leaves and pile them on a plate in the center of the table, along with small dishes with hot sauce, red pepper flakes, and the remaining sliced green onions. Transfer the hot chicken mixture to a serving dish, or serve straight from the skillet. Give everyone a spoon and let them dig in — place a generous spoonful of chicken mixture in the middle of a lettuce leaf, top with whatever looks delicious, and dig in! 

Yum!

April 30, 2015

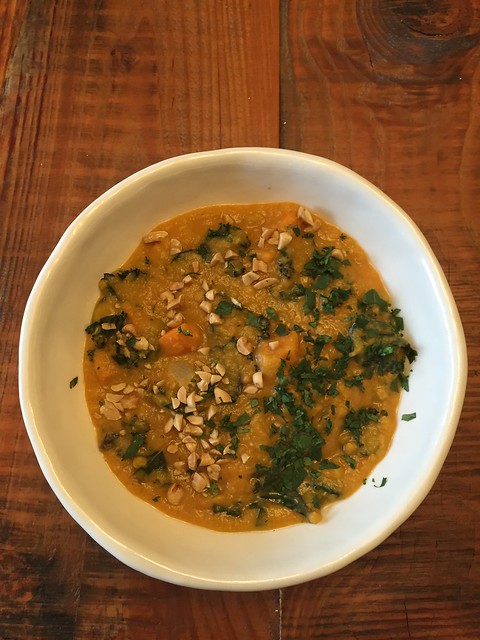
Yam and Peanut Stew with Kale

Around our house we've been feeling pretty uninspired to cook lately.  And there's one big culprit - we bought a house! So that means finding time or energy to think about or do anything has pretty much gone out the window.  Honestly even I get bored of how much we talk about house stuff but still we're super excited that we finally made this dream a reality.

When we have busted out with some cooking it's been for simple and healthy things to make up for all of the eating out we've been doing lately.  Up here in the PacNW we are also in between seasons weather wise so it can change daily what we're in the mood for.  We hit a cold and rainy spot earlier this week and that sent us hankering for some soup.  But healthy soup...and cheap soup...and quick soup.  So I found this recipe and it called my name immediately.

I really liked this soup but next time I'd pureed the whole thing and then add in the kale.  The texture was a little weird to have it a little of both.  Flavor wise this soup was top notch.  You may think, peanut butter in soup?  Are you sure?  And yes, I am sure - it's delicious!  Another thought is serving it with a nice lemon yogurt sauce on top to brighten it all.  Enjoy any which way you serve it.

Yam and Peanut Stew with Kale
found here

1 tablespoon Olive Oil
1 yellow onion, diced
2 cloves garlic, minced
1 1/2 tablespoons ginger, minced
1 cup dried red lentils
2 lbs of yams, peeled and cubed
3 ripe vine tomatoes, diced
1 teaspoon cinnamon
2 teaspoons cumin
1/2 teaspoon turmeric
dash of cayenne
5 cups vegetable stock
1/2 cup creamy peanut butter
1 head of curly kale
salt and pepper to taste
chopped green onions and peanuts for garnish, optional but highly recommended

1. Heat olive oil in large soup pot over medium heat.  Add onion and sautee until translucent, about 3 minutes.  Add garlic and ginger and sautee until fragrant.  Add the lentils, yams, tomatoes and spices and stir to combine.
2.  Add stock and bring to a boil.  Reduce soup to simmer and cook until yams are tender, about 35-40 minutes.
3.  Add peanut butter and stir well.  Puree soup with an immersion blender.  Add kale and cook until wilted.
4.  Check the seasoning and add salt and pepper.  Serve and garnish with peanuts and green onions, if using.


2015-04-28 19.29.42

March 3, 2015

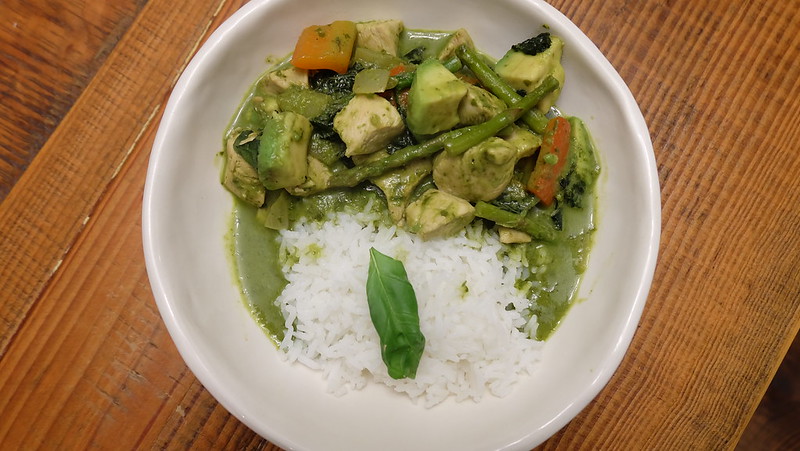
Chicken Avocado Green Curry

Whenever we order Thai food, which in Portland is one of the only abundant take out options, I often order this dish.  I love the warm but not mushy avocado and the spice level of the green curry is perfect for me.  And although it's not soup it sure is close enough and provides the same comforts.

I was brainstorming what to make for dinner a few nights ago and whenever I want tasty but healthy I usually veer towards a stir fry with lots of veggies and chicken or pork.   But then I saw that DP had stocked up on avocados over the weekend and those avocados were all perfectly ripe at the same time. So I immediately thought of one of my favorite Thai food take out dishes.  I went in search of a recipe and didn't come up with a whole lot for this dish.  So I found a green curry recipe and made up the rest on my own using my mad stir fry skills.  What I turned out was extremely good, and dare I say, better than the take out we usually get.  All the more reason to start making my own Thai food and probably spending a whole lot less.

I hope you enjoy this!  It would be a fun take on a St. Patrick's Day meal as it has loads and loads of green in it.

Chicken Avocado Green Curry
curry sauce adapted from here

  • 4 tablespoons green curry paste
  •  2 cans of coconut milk
  •  1 tablespoon soy sauce (or I use Bragg's liquid aminos)
  •  4 cloves of garlic, crushed
  •  1 tablespoon brown sugar
  • 4 oz of fresh basil
  • 2 tablespoons Sriracha, give or take depending on your desired spice level
  • 2 tablespoon canola or other light oil
  • 1.5 lbs of skinless boneless chicken breast, cut into 1" pieces
  • 1 yellow onion, medium dice
  • 2 medium carrots, cut into 1/2" coins
  • 1 bunch asparagus, fibrous ends discarded and cut into thirds
  • 1 large red bell pepper, cut into 1" pieces
  • 1 bunch of kale, stems discarded and chopped thin slices
  •  3 small avocados, cut into medium dice
  • cooked jasmine rice, for serving
First make the green curry sauce.  In a blender add green curry paste, coconut milk, soy sauce, crushed garlic, brown sugar, basil, and 1 tablespoon of Sriracha.  Blend until smooth and the basil is thoroughly blended.  Set aside. At this point you can start your rice, if using.

In a wok or large skillet, heat oil to almost smoking and add the chicken.  Cook until pieces are lightly browned, about 5 minutes.  Remove chicken from pan and set aside to add back in later.  Add some more oil to coat the bottom of the pan, turn down heat to medium high and add onion to pan.  Allow to caramelize and then add carrots.  Cook for 3 minutes.  Add in asparagus and bell pepper, cook for another 3-5 minutes until they start to soften.  Add kale and cook for 2 minutes until it starts to wilt.  Then add the cooked chicken and the green curry sauce.  Allow the sauce to come up to temperature.  Taste the curry sauce for desired spiciness and salt level.  Add more soy sauce or Sriracha if you'd like.  Last but not least, add in the diced avocado and allow to warm up, about 1-2 minutes.

Serve with jasmine rice if you'd like.

DSCF3953


February 10, 2015

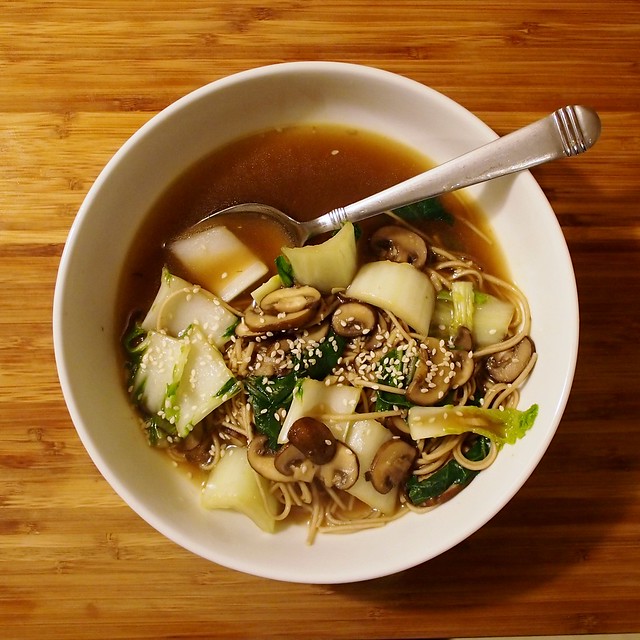
Soba Noodle Soup with Mushrooms and Bok Choy

I have not been sick in a very long time, so I guess you could say I had it coming.  When I started to have that tickly throat, extra tired, stuffy head feeling, I made this soup in an effort to ward off the impending plague.  It didn't quite work, unfortunately, but this soup was delicious, and it did make me feel a little better.  I even declared that I could eat it every day.   The recipe is simple and comes together so fast and with minimal prep, that even if you would rather be sitting on the couch watching Scandal than cooking dinner, you can whip it up without batting an eye and get back to cozy couch times, with this soup keeping you company.

I used more mushrooms than the recipe originally called for, because why the heck not. I also used chicken stock that I had made over the weekend instead of veggie broth, but if you did use veggie broth this would be vegan. The Sriracha is optional, and add more if you like spicy. I used only 1 teaspoon and it was just perfect. You could always add a little more when you serve it for varying spice preferences. Thinking about this soup is making me hungry! I wish I had more of this soup to eat right now!

Soba Noodle Soup with Mushrooms and Bok Choy
Modified slightly from The Kitchn
Serves 4
1 tablespoon olive oil
8 ounces sliced Crimini or Baby Bella mushrooms 

1 tablespoon minced ginger
2 cloves garlic, minced
1 teaspoons Sriracha, optional but highly recommended
3 tablespoons soy sauce
4 cups chicken broth
4 ounces soba noodles
1 bunch chopped Bok Choy or other hearty greens (Chard, Kale, Spinach)
Sesame seeds, for topping
Heat a dutch oven or other soup pot over medium heat. Add the olive oil and sliced mushrooms. Cook mushrooms for 4 to 5 minutes.

Stir in the garlic and ginger (and Sriracha, if using), cooking for another minute. Next, add in the soy sauce and stir, scraping up any parts of mushrooms stuck to the pan and continuing to cook for another 2 to 3 minutes. The mushrooms should be softening and smelling delicious.
Next add in the broth and bring to a boil, then reduce to a simmer, and add the noodles and greens. Cook until the noodles are tender, 5 to 6 minutes.

Remove from heat and serve with a sprinkle of sesame seeds.
2015-02-02 Mushroom Soba 003

January 18, 2015

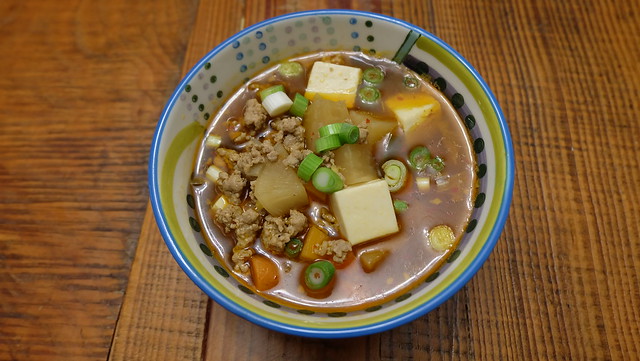
Kimchi and Tofu Soup with Ground Pork

This soup is what I would call the equivalent of an Asian chicken noodle soup.  It seemed like something of a go to comfort soup and was really soothing and used a lot of basic Asian ingredients.  We happen to love kimchi in our household and try to have it on hand to throw on top of eggs, takeout, and whatever else we can think of.  I think kimchi in general is creating quite a following right now and seems to be prevalent on a lot of restaurant's menus, Asian or not.

Another thing about this soup is that it had a very harmonious texture profile.  The tofu was silky, the kimchi added crunch, and the ground pork added a chewy meaty consistency.  It had a little bit of spice from the kimchi and overall was really satisfying for a weeknight meal.  And, as always, I try to pick recipes that have minimal prep for anything I'm making on a weeknight.  This totally fit that order.  It also looked good in my new soup bowls my family gave me for Christmas - thanks family!

I hope you enjoy this; it was fun to make and eat!

Kimchi and Tofu Soup with Ground Pork
adapted from Food 52
  • 1 tablespoon toasted sesame oil
  • 1/2 pound ground pork
  • 4 cloves garlic, minced
  • 1 tablespoon ginger, minced
  • 2 cups kimchi
  • 6 cups chicken stock 
  • 3 medium carrots, cut into medium dice 
  • Bragg's liquid aminos, to taste
  • 7 ounces soft tofu, chopped into cubes
  • Green onion, to serve
  1. In a medium saucepan, heat oil on high until hot. Add ground pork and cook, breaking up clumps, until no longer pink. Add garlic and ginger and stir until fragrant. Add kimchi and cook for a few minutes until hot. Pour in stock and about a tablespooon of liquid aminos.
  2. Let soup come to a boil, then turn heat to a low simmer and gently add the tofu and carrots. Continue cooking for about 15 minutes. Add more liquid aminos to taste as you go.
  3. Distribute the soup evenly into bowls. Garnish each with a sprinkle of green onion right before serving.
DSCF3853

November 19, 2014

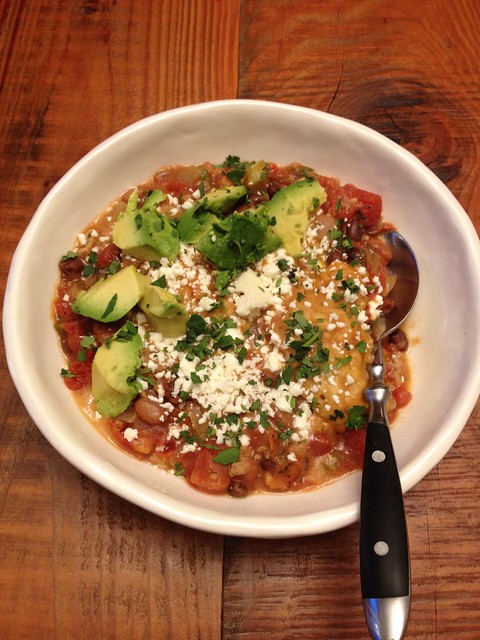
Black Bean Stew

This is no groundbreaking feat of a stew, but it was easy, quick, cheap, just a tad spicy (my mister did not even kick up a fuss), and super comforting on a freezing cold November night.  I tend to think of black bean soups as either too boring-just a cup full of beans, or super Mexican flavored.  This was somewhere else on the spectrum.  Not too spicy, not too much of my beloved Cumin, no chili powder to be found, no cilantro or lime either. What really grabbed my interest was the addition of orange zest right at the end, it just sounded so good and different and I just had to make it right away.

I found this recipe on a random round-up of one pot meals, and the original source was Runner's World, which I am not an avid reader of, or practiced runner.  In any case, I always love the idea of one pot meals, and saved a bunch of soups from this page to make later.

This Black Bean Stew in particular, was noted as a quick stew to help you shed pounds, as this stew is packed full of protein and fiber from the beans and then the spiciness from the chipotle is supposed to be good at curbing appetite and boosting calorie-burning.  Who can say no to that? Add in some other fresh veggies and you are golden.

I made a few changes and additions, but nothing too crazy. Instead of roasting the pepper and slicing it up, I diced it up and cooked it in the pot. I liked this change because the peppers kept up a bit of their crunch.  I also threw in a diced sweet potato that I had laying around and it also was a great addition, due to the texture and slight sweetness, but I would not have missed it much if I had left it out (and if I did leave it out, I would have used two bell peppers, one each of orange and red). This is a great base soup that could easily be modified in tons of ways.  The absolute best part is the orange zest, it really livens up the dish, adding a hint of summer to this cold weather staple.

Black Bean Stew
Serves 6

2 tsp Canola oil
1 onion, diced
1 carrot, sliced thin
1 small sweet potato, diced
1 red pepper, diced
1-2 garlic cloves, diced
2 15 oz cans drained and rinsed black beans
2 15 oz cans diced tomatoes
3 cups chicken stock (or veggie broth)
1 Tbls minced chipotle pepper in adobo sauce
1 Tbls cumin
1 Tbls fresh thyme
Zest from one orange
1/2 bunch of shredded dino kale
salt & pepper to taste
Diced avocado (optional)

Heat Canola oil in a Dutch oven or other soup pot over medium heat.

Add the onion and carrot, sauteeing for 5 minutes. Add the sweet potato and let it cook for another 5 minutes. Add the diced red pepper and let all of this cook about 10 minutes until the sweet potatoes are just barely tender.

Add to the pot the black beans, tomatos, broth, minced chipotle, and cumin.  Bring to a boil and reduce to a simmer.  Taste broth and add salt and pepper to taste.

Simmer 20 minutes until the sweet potatoes are tender.  Toss in the shredded kale, fresh thyme, and orange zest.  Ladel into bowls and top with diced avocado.  Enjoy!

2014-11-12 Black Bean Stew

p.s. This photo looks terrible. I think I must have accidentally changed some setting without noticing, but I was so anxious to eat that I didn't bother messing with it. Forgive me?

October 16, 2014

Chinese Style One Pot Beef Stew

Being in the mood for stew a lot recently is sometimes tough.  Tough in that it can often take forever to get that fall apart texture to your meat when it's a week night and you just don't have all day to make it.  I live for that meat texture - it's definitely my favorite when the meat seems to melt away.  This Chinese style one pot meal makes for a good rendition of a week night stew recipe.

It doesn't take too long, the meat texture was good, and there's minimal chopping which seems to get your meat a-stewin' quicker. I also liked doing something a little off the beaten path as far as flavor profile. The shot of greenery in the form bok choi is also a nice touch and I think broccoli would work just as well.  Hope you enjoy!

Chinese Style One Pot Beef Stew
from BBC's goodfood blog

  • 3-4 tablespoons olive oil
  • 6 cloves garlic, thinly sliced
  • 1 bunch green onions
  • good thumb size piece of ginger root, peeled and minced
  • 1 red chili, seeded and thinly sliced (I used a jalapeno since I couldn't find a red pepper)
  • 3 1/5 lbs stew beef, cut into large pieces (I used
  • 2 tablespoons all purpose flour
  • 1 teaspoon chinese five spice powder
  • 2 star anise 
  • 2 teaspoons sugar
  • 3 tablespoons dry white wine or cooking sherry
  • 3 tablespoons soy sauce
  • 2 cups beef stock
  • 1 bunch bok choi, chopped and steamed
1.  Heat 2 tbsp of oil in large dutch oven or stock pot.  Sautee the garlic, onions, ginger and chili until soft and fragrant, about 3 minutes.  Put onto a large plate.  Toss the beef in the flour and salt and pepper generously.  Add 1 more tbsp of oil to the pot and brown the meat in two batches, adding the last tbsp of oil in between batches.  Put on the plate with the garlic sautee mixture.

2.  Add the five spice and the anise to the pot, fry for 30 seconds, then add the sugar.  Keep the heat high and add the wine or sherry, scraping up any meaty bits.  Put the meat and garlic sautee mixture back in the pot, add the stock and soy sauce (it won't cover the meat completely), and bring to a simmer.  Cook for 1 1/2 hours or until meat is very soft and sinewy bits have melted away.

3.  When the stew is close to finished, steam your bok choi and make some rice to serve stew over.  Add the bok choi to the plate with stew and rice and sprinkle with sesame seeds, if desired.

IMG_2334[1]

July 22, 2014

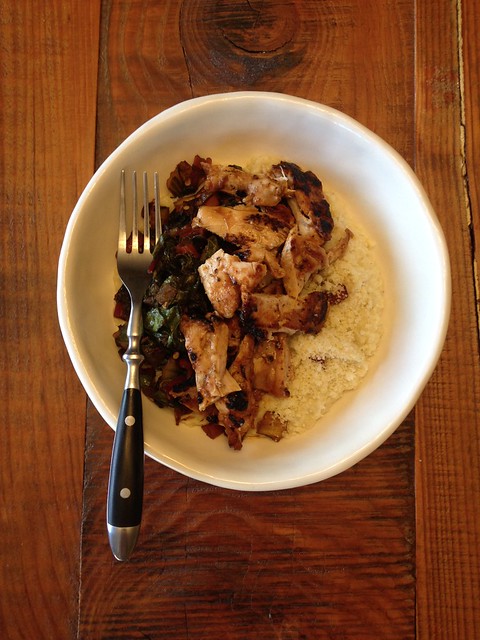
Fresh Corn Polenta - with a side of BBQ Chicken and Balsamic Pepper Flake Chard

Let's just get one thing straight right off the bat.  This post is all about the Fresh Corn Polenta.  When I stumbled across this recipe I thought - must try, immediately.  This recipe is the epitome of summer.  I'd say if it didn't require turning on the stove (for like 10 minutes, tops) it might be the king of the summer recipes.  But we can't all be perfect, can we?  Anyhow, please do give this recipe a go.  It requires little work, few ingredients, and a huge pay off.  Summer corn is one of life's simple pleasures and this, this my friends, is the way to highlight it.

As I grated the corn for the polenta I had one of those "no duh" moments with the realization that the starch that's hiding in the cob of the corn pockets is what naturally thickens this polenta right up.  I mean, where the heck did I think corn starch comes from? Tomatoes? Don't answer that.

I decided to top my polenta off with some super simple chicken marinated in BBQ sauce and a sautee of rainbow chard.  I dressed the chard with red pepper flakes and balsamic to give it some heat and acid to bounce off the super sweet corn polenta.  This meal was so good.  I give it two very enthusiastic thumbs up.

Fresh Corn Polenta
from here
Serves 3

  • 5 ears of corn - I used sweet white but feel free to use the less sweet yellow
  • 1 tablespoon of butter + 1 tablespoon olive oil
  • Salt and Pepper
  • Parmesan, grated (optional)

Clean the corn, removing all husks and silk threads. Working over a bowl, grate the corn using the large grate side of a box grater.  You will end up with a pulpy wet mixture.  Melt the butter and olive oil in a saucepan over medium heat.  Add the grated corn, stir in some salt and pepper. Allow mixture to cook over medium low heat, stirring it often so it doesn't burn, until it becomes thick.  Serve immediately with some grated parmesan, if using.

To make a full meal of this, add whatever sauteed green suits your fancy and some protein.  Really you can't go wrong with whatever you decide to whip up and add on top.  Happy Summer!

2014-07-21 19.33.43

July 2, 2014

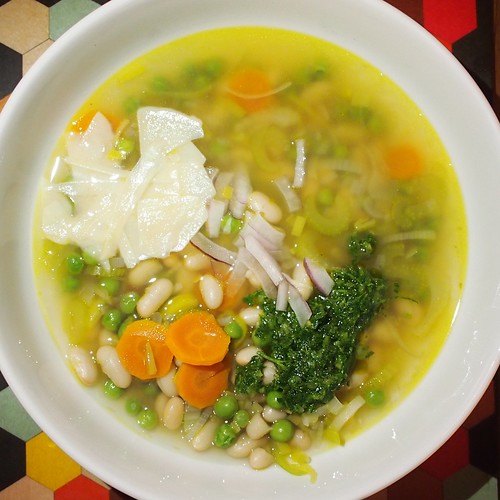
White Bean Summer Soup

This soup was super easy and fast to make, not to mention very light, flavorful, and fresh!  A perfect soup for summer. I even ate it after it got cold because I took too long trying to take a picture, and it was still slurptastic. 

The original recipe called this Green Minestrone, but I am not too sure what makes it a minestrone. Also, I was pretty set on eliminating the pasta entirely and wanted either potatoes (would be delicious) or white beans (was voted in by my mister) instead, so a renaming seemed appropriate.

White Bean Summer Soup
Slightly adapted from Bon Appetit
  • 6 tablespoons olive oil, divided
  • 1 leek, white and pale-green parts only, chopped into half moons
  • ½ small fennel bulb, finely chopped
  • ½ small yellow onion, finely chopped
  • 2 celery stalks, thinly sliced
  • 4 cups vegetable or chicken broth (I used home made stock)
  • 2 small carrots, peeled, thinly sliced into rounds
  • 1 cup peas (fresh or frozen)
  • salt and freshly ground black pepper
  • 2 cans white beans (Cannelini or Great Northern)
  • cups (lightly packed) fresh flat-leaf parsley leaves
  • ½ shallot, roughly chopped
  • ¼ small red onion, thinly sliced
  • Shaved Parmesan (for serving)

Heat 2 Tbsp. oil in a large heavy pot over medium heat. Toss in the leek, fennel, yellow onion, and celery, stirring occasionally, until softened but not taking on any color, about 5 minutes. 
 
Add broth and bring to a boil.  Reduce heat and simmer until vegetables are just tender, 10-15 minutes.
 
Add carrots, peas, and beans, and simmer until carrots are just tender and peas and beans are warmed through, about 5-10 minutes.  Season with salt and pepper.
 
While your soup is simmering, blend parsley, the remaining 4 Tbsp. oil, and the chopped shallot with an immersion blender into a paste.  Season this pesto with salt and pepper. 
 
Serve soup topped with a scoop of pesto, sliced red onions, and shaved parmesan.  Don't forget a good loaf of bread for dunking!

One more note: 
When I put away the leftovers, I mixed the rest of the pesto into the soup and when we ate it on the second day, I made parmesan croutons to put into the soup with the leftover bread, which worked wonderfully and would have photographed better than the shaved parm. To make these, dice up your bread, toss it with olive oil and a tiny bit of salt. Spread on a parchment-lined cookie sheet and shred some parmesan on top.  Put into a 425 degree oven for about 10-15 minutes until the cheese is all melty and slightly browned. I almost ate all of the croutons before they had a chance to go into the soup!
 
2014-06-28 004


May 26, 2014

Turkey Green Pepper Chili with Masa Dumplings

For some reason that's never been explained to me DP is constantly suggesting chili when I ask him what he wants for dinner.  I guess when I think about it it doesn't need much explaining other than chili is a delicious thing to eat.  However, it does leave me in the position of needing to come up with different ways of making chili, which I'm all too happy to be tasked to do.

So on such an occasion of a chili suggestion I decided that I'd made this dish often enough to not need a recipe for the base of it.  That I could wing no problem but what I did need was a clever pièce de résistance.  So having a huge bag of masa in the cupboard from a recent tortilla making spree I went in search of a masa related idea.  I had heard of adding masa to chili before to thicken it up but making a masa dumpling was so much more interesting and happened to thicken the chili at the same time.  It was certainly a win-win.  I also used turkey instead of beef to lighten the caloric intake.  Add in some veggies, beans and tomatoes and you're on your way to a great chili night.  I hope it's one of many for you just as it is for us.

Turkey Green Pepper Chili with Masa Dumplings
chili improvised. masa dumplings from here

  • 1 lb. ground turkey (or any other ground meat you fancy)
  • 1 yellow onion, diced
  • 2 tblsp. olive oil
  • 3 cloves garlic, minced
  • 1 green bell pepper, diced
  • 1 jalapeno, de-seeded and minced
  • 2 (15 oz.) cans of cooked black beans, rinsed
  • 1 (15 oz.) can of pinto beans, rinsed
  • 1 (28.5 oz.) can of diced tomatoes with juices
  • 1 (15 oz.) can of roasted tomatoes with juices
  • 1 tblsp. cumin
  • 1 tblsp. ground ancho chili powder
  • water
  • salt and pepper
  • cilantro for garnish (optional)
  • 3/4 cup masa
  • 1/4 cup flour
  • 1 tsp. baking soda
  • 1/4 tsp. baking powder
  • 1/4 tsp. salt
  • 1/4 cup butter
  • 3/4 cup buttermilk

Heat olive oil in large dutch oven over medium heat.  Add chopped onion and saute until translucent.  Add garlic, bell pepper and jalapeno and saute until bell pepper is soft.  Add turkey and break up into small pieces with spoon until most of the pink is cooked out of the meat.  Add cumin, chili powder and S&P until fragrant.  Add black beans, pinto beans, diced and roasted tomatoes and cover with just enough water that all veggies and beans are submerged.  Bring to a boil and then reduce heat to a simmer until soup thickens just slightly.  Check seasonings and adjust if necessary. 

While that simmers make the masa dumplings.  In large bowl combine masa, flour, baking soda, baking powder and salt.  Add butter and work into flour mixture with a pastry cutter (or fork) until butter resembles corn meal with a few large chunks.  Stir in buttermilk just to combine.

Add dumplings by the tablespoon to the simmering soup.  Cover with a lid and let simmer for 10 minutes.  Serve soup with a dumpling or two in each bowl and garnished with cilantro.  I also slipped in a few avocado chunks and some cotija cheese I had on hand for good measure.  Enjoy!

2014-05-19 20.54.11


April 25, 2014

Ham Bone Split Pea Soup

Ham bone sure is fun to say isn't it? Let's see how many times I can sneak it into this post. Like many a family we made a giant ham for Easter.  This was of course after my brother told me he was bringing ham to Easter brunch and yet I still felt the need to purchase a 9 pound monstrosity.  I think I have that Girard gene for sure - no matter how much food people are bringing it's never enough - must. buy. more.  Maybe it's more like a disease. 

This subject matter is not a new one for this blog, see here.  However this version is more a rich man's version.  It's got the luxurious addition of chunks of ham and the bone as well as some fancy tri color potatoes and leeks.  Usually I'm leery of recipes that say to add water instead of broth and I end up subbing broth in every time.  But this one I trusted to be flavorful at the end because of the bone cooking right in the soup for almost 2 hours.  It didn't disappoint, I really loved this soup and am coming to realize that I like these creamy/chunky versions of soup the most.  If you saved your ham bone from Easter or come across one in the near future you should definitely make this soup or at the very least ham stock because the ham bone is prolific my friend.

Split Pea Soup
adapted from Bon Appetit

  • 2 tablespoons olive oil
  • 1 medium onion, chopped
  • 2 medium leeks, white and pale green parts only, chopped
  • 2 celery stalks, chopped
  • 4 garlic cloves, minced
  • kosher salt and black pepper
  • 1 lb tri-color potatoes (or yukon gold), diced
  • 1 cup leftover ham, diced
  • 1 ham bone
  • 6 sprigs thyme
  • 2 bay leaves
  • 2 cups split green peas
  • 2 tablespoons Worcestershire sauce
  • Sour cream and whole grain mustard for garnish, optional

Heat oil in large stock pot or dutch oven over medium heat. Add onion, leeks, celery and garlic; season with salt and pepper and cook until vegetables are soft, stirring occasionally.  Add potatoes and ham.  Cook, stirring occasionally until potatoes are soft.  Add ham bone, thyme sprigs, bay leaves, and split peas.  Add enough water to cover all ingredients.  Bring to a boil, reduce heat, then simmer until split peas are very soft and falling apart, about 1.5 hours.

Remove ham bone,thyme sprigs, and bay leaves.  Add Worcestershire sauce and season with any additional salt and pepper needed.  Serve with sour cream and mustard, if desired.

(ham bone count = 9)


2014-04-24 20.43.55-1


February 20, 2014

Gumbo - Portland Style

Even though the original recipe did not come from a Portlander I ended up thinking how quintessentially Portland this gumbo ended up being.  It's definitely not traditional and with the addition of quinoa instead of rice and oil instead of butter it felt healthier and a bit modernized.  While we really enjoyed the end product a lot I think there are a few additional tweaks I'd make for the next round but this recipe is a great jumping off point.

The dish wasn't too spicy but for those who want an extra kick you can easily add hot sauce or a spicy pepper to the bell pepper mix.  I personally loved the crab meat and shrimp in it but next time I will also add an Andouille sausage to round out the meat profile and to also kick up the spice.  For a week night meal I also love recipes where the chopping is kept to a minimum and this fits the bill with only one chopping step and the rest comes together in a cinch.

When I originally read the recipe I saw that one of the ingredients was file powder.  Now being someone who wasn't raised anywhere near the south I thought that was a misprint.  Then when preparing my shopping list I figured it was another name for some spice I probably already owned.  Boy was I wrong when I looked it up and discovered that file powder is a spicy herb made from dried and ground leaves of the sassafrass tree.  That was intriguing and I'm definitely going to try it out next time I prepare gumbo!

I changed some of the cooking times from the original recipe. Below as I made it.  Enjoy!

Seafood Gumbo
recipe adapted from here

1/4 cup canola oil
1/4 unbleached flour
3 small bell peppers, differing colors
1 gumbo seasoning packet or make your own
1/4 teaspoon cayenne pepper
1 (14 ounce) can diced tomatoes
4 cups chicken broth
1 lb shrimp, peeled and de-veined
1 lb cooked crab meat
1 cup frozen okra
salt and pepper to taste
1/2 cup fresh parsley, chopped
3 cups cooked quinoa
file powder, for garnish

Dice up the bell peppers and set aside. Combine the oil and flour in a large soup pot or dutch oven over medium-low heat. Cook, whisking constantly, for about 10 minutes or until it's dark brown. Carefully add the bell peppers, okra, gumbo seasoning and cayenne pepper. Give it a good stir and let the vegetables cook for about 5 minutes or until softened.  Add the tomatoes and chicken broth, bring to a boil.

Start cooking your quinoa according the package instructions in a separate sauce pan.  Once the gumbo is boiling add the shrimp and cook for 5-7 minutes or until pink.  Add the crab meat and reduce to a simmer for 30 minutes or until thickened.  Remove from heat and add the fresh parsley.  Serve with cooked quinoa and file powder.

Watch:


Look:

IMG_1982[1]


February 6, 2014

Mushroom Barley Soup + A Thickening Trick

I was surprised that we haven't posted a classic mushroom barley soup yet.  Mushrooms being quite famous around these parts, in that Michelle and I often have long conversations regaling their merit.  DP also happens to be a huge fan so when anything has mushrooms, or mushrooms can be added, we know it's going to be a hit.  Mushroom barley happens to be one of my favorite soups because it's so simple but really hearty and filling as well.  Because there's no meat it also feels healthy and light.

I found a recipe that looked good on Saveur's site.  What appealed to me most about it was the finish with lemon; I love that touch in most anything to give the dish a brightness and a small hit of acid at the end.  However, I could tell that this soup was quite broth-y with 8 cups of stock and also the addition of the mushroom water from soaking the dried mushrooms.  So I decided to use one of my favorite tricks on thickening soups or even sauces at the very end of cooking - a Beurre Manié.  This method works essentially the same as a roux however you don't need to cook the fat and flour separately and can just knead the two together.  Also I've read that a roux can lose its thickening ability over long periods of cooking time so a beurre manie works a lot better in soups.  I like to use the pestle from my mortar and pestle set and work it together in a small dish.  A fork also works just great for this as well.  Just make sure you're working with softened butter instead of melted.  I like to nuke my butter for 20 seconds if I don't have any pre-softened. 

This soup with the addition of the thickener turned out so wonderful.  Adding the butter gave it a richness and then the lemon brightened the whole soup up to create a great balance.  I really loved it and will keep this as my go to mushroom barley from now on.  I served it with some garlic bread loaded with fresh garlic, olive oil, fresh parsley and S&P. And some red wine, natch. All in all a great winter meal!

Mushroom Barley Soup
adapted from Saveur

1 oz. dried porcini mushrooms (I used shiitake because my grocer was out of porcini)
1/4 cup olive oil
8 garlic cloves, finely chopped
2 ribs celery, finely chopped
2 medium carrots, finely chopped
1 large yellow onion, finely chopped
1 lb. white button mushrooms, thinly sliced
1/4 cup sherry
8 cups beef stock
1/2 cup pearl barley
2 tsp. fresh thyme
2 tbsp. lemon juice
Kosher salt and black pepper, to taste
fresh parsley, for garnish

 Beurre Manié
3 tbsp. unsalted butter, softened
3 tbsp. unbleached flour

1.  Place dried mushrooms in a bowl and cover with boiling water.  Cover the bowl with a lid and let sit for 30 minutes.  While these are brewing chop up your veggies and garlic.  After 30 minutes take the rehydrated mushrooms out with a slotted spoon and finely chop.  Pour soaking liquid through a fine mesh sieve into another bowl, leaving a small amount to retain any dirt or sediment.

2.  Heat oil in a large soup pot or dutch oven over medium-high heat.  Add garlic, celery, carrots and onion; saute until soft, about 5 minutes.  Add re-hydrated mushrooms and sliced button mushrooms; saute until liquid is released and evaporated, about 14 minutes.  Add sherry and cook until evaporated, about 2 minutes.  Add reserved mushroom water, beef broth, barley and thyme and bring to a boil. Reduce heat to medium-low and cook covered for about 30 minutes or until barley is tender.  Prepare beurre manie by blending together butter and flour in a small bowl until fully incorporated.  Add to soup pot at the very end of cooking and mix until melted.  Allow to thicken for a few minutes then add lemon juice.  Ladle into bowls and garnish with parsley.

IMG_1962[1]


January 24, 2014

Cheesemaking 101 - Mozzerella

Here's a post off the beaten path as this most definitely is not soup.  However it is fairly easy yet something that will make you feel accomplished in the end - much like soup.  DP and I hosted a classical music listening night at our house and picked Mozart for our first gathering.  When deciding upon snacks there were many puns including Mozart-ella sticks, Wolfgang Puck Amadeus pizza, Don Juan almonds and the like.  I saw the shining star as clearly being Mozart-ella so I took the opportunity to teach myself how to make this easy cheese.  It turned out really good despite my worry throughout the process that it wouldn't come together.  But come together it did and served with fresh basil and garlic, our best olive oil (from here), balsamic, and a sprinkle of red pepper flakes and it was a party hit.  It turns out that the adage used when making beer applies to making cheese as well - don't worry, have a homebrew cheeseball.

Even though this recipe might require a stop at a home brewing store the two off the wall supplies needed, rennet and citric acid, are cheap and easy to find.  Also you use so little of each ingredient in each batch that I'll be able to stretch the amounts I purchased for many more cheese making adventures.  Up next, goat cheese...or maybe feta!  A little aside about the whey too; I read from the recipe that the leftover whey can be used in place of water in any bread recipe for an enhanced flavor so I saved mine and will be whipping up a fresh batch of bread this weekend.  Cheese making yields many treats my friends.

Homemade Mozzerella
recipe from The Pioneer Woman

1 gallon of whole milk - preferably raw and unpasteurized if you can find it (I couldn't)
1 1/2 teaspoons of citric acid powder
1/4 teaspoon vegetable rennet
kosher salt to taste

Sprinkle the citric acid powder into a large non-reactive stockpot then add 1/4 cup of water and swirl to dissolve.  Pour the gallon of milk into the pot and stir to combine.  Put the pot over medium-low heat and attach a thermometer to the side of the pot and allow to heat to 90 degrees F.  You may notice a little curdling but this is a good thing.  While that heats up combine the vegetable rennet with 1 cup of water.

When the milk comes to temp remove from the burner and add the rennet/water mixture.  Very gently stir together for about 30 seconds.  Place a lid on the pot and walk leave it alone for exactly 5 minutes - don't touch it in the meantime! After 5 minutes the mixture should resemble a very soft custard.  A note on this - mine looked more like large curds and didn't congeal as much as the recipe pictures looked.  I think this is because I didn't use raw milk so if you don't either and it just looks like a bunch of large curds, don't worry it will still come together.  Return to the burner over medium heat and place the thermometer on once again and bring up to 105 degrees F.

Remove from heat and with a slotted spoon remove all of the curds from the whey (the watery looking part) and place in a colander.  Press down with a spoon or your clean hands to remove as much of the whey from the curds as possible. Place in a microwaveable bowl and microwave on high for 1 minute.  Without burning your hand press on the cheese to drain all of the whey off.  Microwave for 30 seconds a few more times to keep removing as much of the watery whey as possible.  I only did this two times total.  Then knead in salt to taste.  Stretch out the cheese curd to get any more whey that you can out of it.  Shape into a ball and place in a bowl of ice water until completely cool.  Afterwards eat as is or add herbs, seasonings and serve with a crusty baguette as we did.

The final product before it was devoured:
IMG_1909[1]

Video of the making:

January 7, 2014

Tuxedo Chicken Chili and Baked Polenta

New years day is sometimes more of a mixed bag than New Year's Eve is.  I find that there tends to be a little bit of regret - from the night before, hopefulness - for the year to come, and some relief - for getting to wipe the slate clean.  This year a group of us got together at the Adrift Hotel in Long Beach, WA to eat a good meal, spend some time together gussied up and drink way too much because of the short distance it takes to stumble back to your room.

The next day left me going through my mixed bag of emotions which led me to make this soup.  It had a fancy title, sounded healthy, and little chopping was required for my hungover lazy self.  I expected this soup to be good but it actually turned out to be incredible.  I measure that based off of the number of times DP and I both swoon and mmmm while scarfing it down.  There were a lot of those on this one my friends.

I ended up adding the baked polenta for a few reasons.  I wanted something to dip in the soup but there's always that moment when we're on our best behavior when one of us decides that bread is just too unhealthy.  I was still determined though so I thought about making some simple focaccia but alas, I was almost out of flour.  So I landed on polenta which is so easy to whip up.  Because I wanted it to have a crispy exterior to mimic bread I let it cool in the fridge then sliced it up and baked it on a cookie sheet at high heat.   It did the trick! Every time I make polenta, either in soft or baked form, I always remind myself not to overlook this gem for any other suitable application.  The only thing I'd do differently is cut it up smaller so it has more crispiness and then bake it a little longer and finish it off with a few minutes under the broiler.

The original recipe for the chili comes from Food 52 and the baked polenta recipe is an adaptation of this one.  Below are the recipes as I made them.

Tuxedo Chicken Chili
Serves 6
  • 1 medium white onion
  • 2 cloves garlic
  • 1 tablespoon vegetable oil
  • 1 lb ground chorizo chicken (available at New Seasons Market)
  • 1 lb ground dark meat chicken (feel free to just sub 2 lbs of this and crank up the spices if you can't find chorizo chicken above)
  • 2 teaspoons dried oregano (preferably Mexican)
  • 2 teaspoons cumin
  • 1 1/2 teaspoon chili powder
  • 1 teaspoon ground black pepper
  • 1/2 teaspoon cinnamon
  • 1 cup water
  • 3 (15) ounces cans canellini beans
  • 4 cups chicken broth
  • 1 (16) ounce can black beans
  • 1 (16) ounce package frozen corn
  • 1 (4.5) ounce can chopped green chiles
  • Garnishments - sour cream, cheddar cheese, cilantro, and/or baked polenta below 
  1. Chop the onion and garlic finely. Add to the oil in a large Dutch oven. Saute over medium high heat until soft and translucent. Do not brown. Remove the onions and garlic to a bowl and set aside. (If the onions brown and overcook, the final color of the chili will be muddy. It will still taste delicious, but won’t look as nice). Add all of the ground chicken to the pan and cook until browning slightly, breaking it up into small pieces.
  2. Sprinkle the oregano, cumin, chili powder, pepper and cinnamon over the chicken. Add the onions and garlic. Pour in two cups of chicken broth and one cup of water and bring to a boil. Lower heat to a simmer and cook until the water has reduced by half and the chicken is cooked through.
  3. Meanwhile, drain and rinse two cans of white beans. Place the beans in a blender (don't be an idiot like me and think a food processor will work just as well, you'll end up with stock all over your counter) with the chicken broth and puree until smooth. Drain and rinse the remaining white beans and the black beans. Pour the pureed beans into the chicken mixture, stir well and bring to a boil. Lower the heat to medium, add the remaining drained beans, corn, and green chiles and simmer until cooked through and thickened, about 30 minutes.
  4. Serve in big bowls topped with grated cheddar cheese, polenta squares and some cilantro if you've got it (I didn't).
Crispy Baked Polenta
  • 2 cups polenta (also known as corn grits)
  • 8 cups water
  • kosher salt and black pepper
  • 3 tbs butter
  • 1/4 cup buttermilk, cheese, or anything else creamy you may have on hand
  1. Bring the water to a boil in a large pot with 1 tbs kosher salt.  Gradually whisk in the polenta and whisk after all the polenta has been added to make sure no lumps form.  Turn heat down and simmer for 30 minutes until thick, stirring frequently.
  2. Remove from heat and whisk in butter and any creamy item you may be adding to the mixture.  Add salt and pepper to taste.
  3. Pour into 9x13 casserole pan and put in refrigerator to cool for at least 30 minutes.  Preheat oven to 450 degrees.
  4. Remove the polenta from the refrigerator and slice the cooled polenta into long 1 inch strips. Slice the strips perpendicular to create 1 inch pieces. Place the polenta squares onto a baking sheet lined with parchment paper and put into the preheated oven for about 20 minutes or until they have turned golden and browned on the edges. Remove the baked polenta squares from oven and place on a cooling rack. The polenta squares can be served warm with a dipping sauce or at room temperature. To reheat the squares, place in oven at 200 degrees for several minutes. Can be stored in an airtight container for several days.
Only one picture of the end result was required because honestly, I chopped two things, sauteed some meat and dumped some other stuff in a pot.  SO simple!
IMG_1890[1]

I did also manage to take this video for you:


January 21, 2012

Sausage and White Bean Cassoulet

This is one of those recipes that you would be proud to serve to company yet it's ridiculously simple. My favorite recipe type by far. While it could definitely be gussied up by adding some confit, some homemade bread crumbs, or maybe serving it over some sort of puree, I liked it just the way it was. Served with some french bread torn right off the loaf, a glass of wine and a simple salad with nothing more than red leaf lettuce and some homemade vinaigrette. Yup, this was winter Friday night staycation worthy alright. Follow it up with a documentary and some downloading of Nico records and I'm in heaven.

I modified the recipe a little and added some spices to the tomatoes before they went into the oven. I also added much more than a "glug" of wine...I like to drink my wine in as many ways as possible. Enjoy!

Sausage and White Bean Cassoulet
recipe from Sweet Sugar Bean

2 pints of cherry tomatoes
4-6 hot Italian sausages OR Chorizo sausages
4 large garlic cloves, smashed
1 onion, cut into wedges
extra virgin olive oil
balsamic vinegar
coarse salt and pepper
few sprigs fresh thyme OR rosemary
3 cups cooked white navy beans or white kidney beans OR 1 19 oz can (540ml) of white beans, rinsed and drained well
chicken broth or white wine(optional)

Adjust oven rack to lowest position and heat oven to 425 *F.
Scatter tomatoes over bottom of dish (reserve about 1/2 cup to add later). Add garlic, onion and sausages over top. Drizzle with balsamic and olive oil. Toss on rosemary and sprinkle with S & P and other spices if using. Bake about 25-30 minutes, for sausages to be golden and tomatoes start to burst. Remove from oven and stir in beans and reserved 1/2 cup of cherry tomatoes. If you'd like a bit more sauce with your beans, add a glug or white wine or chicken stock. Return to oven and bake 20 minutes longer or until beans are cooked through. Serve with bread and butter for dunking; green salad on the side. Makes enough for 4.

DSC02968
Snug as a bug

DSC02974
In go the beans

DSC02981
C'est fini


September 25, 2011

Chicken and Orzo Stew

If you find yourself home alone on a Sunday with a bit of rain outside and a hankering for an easy, delicious and hearty soup, this is the recipe for you.

I got this recipe out of The Big Book of Soups and Stews and went to the store during a brief sun break to get a few ingredients.

Here is the recipe as I made it.

Ingredients:
-2 tablespoons of butter or olive oil
-2 cans (14.5 oz each) diced tomatoes with juice
-1 can (14.5 oz) chicken broth
-3 cloves garlic, minced
-1 teaspoon dried basil
-1/2 teaspoon dried thyme
-1/2 teaspoon dried marjoram
-1 teaspoon salt
-pepper to taste
-2 boneless skinless chicken breasts (about 1 pound), cut into bite-sized chunks
-1/4 cup dry white wine
-1 1/4 cups uncooked orzo
-1/2 of an onion, diced
-8 oz mushrooms, quartered
-2 medium zucchini, cut into 1/2 inch slices
-2 large handfuls of baby spinach
2011-09-25 Chicken Orzo Stew 005

Directions:
1. Warm butter in large soup pot or dutch oven over medium heat. Add onion, saute until soft. Add mushrooms, saute for about 5 minutes until mushrooms are soft.
2011-09-25 Chicken Orzo Stew 007

2. Add broth, tomatoes, garlic, basil, thyme, marjoram, salt and pepper. Bring to a boil.
2011-09-25 Chicken Orzo Stew 013

3. Add chicken, wine, orzo, and zucchini. reduce heat to one step above low and simmer, covered, until chicken is cooked through and orzo is tender.
2011-09-25 Chicken Orzo Stew 017

4. Stir in spinach.
2011-09-25 Chicken Orzo Stew 018

5. Once spinach is wilted, serve and enjoy!
2011-09-25 Chicken Orzo Stew 019

This was seriously so quick and delicious. I would recommend cutting the zucchini slices into half moons so they would get a tad squishier, they were a bit too crunchy for me.

Enjoy!

March 4, 2011

Crack Cake aka Pineapple Upside Down Cake Reinvented

Lately I've got a case of the winter blues. I thought Portland was going to skip over its rainy storm weather since we've had a very mild winter thus far. But after 5 years I should have known better 'cause we've been getting slaughtered lately. It's enough to make a girl start looking at last minute plane tickets outta here and spend long periods of time dreaming of warm sun and fruity drinks. So when I saw a large pineapple display at the store this week I thought, well, it's a start. I got that pineapple home and starting chopping it up only to realize it's not quite pineapple season and that sucker was tart. Like lip puckering, tawlk lawk dis tawt. So I immediately thought what if I made a pineapple upside down cake, not like the ones of olden days with canned pineapple and maraschino cherries, but a really amazing fresh and well done version.

I went in search of a recipe and whaddya know that wonderful blog
Smitten Kitchen had a perfect recipe, yup, of course it did. And it just so happened I had all the ingredients I needed at home. Any recipe that starts with a homemade caramel is aces in my book and this one did NOT disappoint. I took it out of the oven and the smell was intoxicating. I waited until it was just cool enough, slapped some vanilla ice cream on a slice, and immediately proclaimed (to no one at all) "that's some crack cake right there!". This is going to make many a reappearance come pineapple season. Mark my words.

Pineapple Upside Down Cake
Source:
Smitten Kitchen

Topping:

1/2 medium pineapple, peeled, quartered lengthwise, and cored
3/4 stick unsalted butter
3/4 cup packed light brown sugar

Batter:
1 1/2 cups all-purpose flour
2 teaspoons baking powder
1/4 teaspoon salt
3/4 stick unsalted butter, softened
1 cup granulated sugar
2 large eggs
1 teaspoon vanilla
1 tablespoon dark rum
1/2 cup unsweetened pineapple juice
2 tablespoons dark rum for sprinkling over cake

Preheat oven to 350°F.

Make topping: Cut pineapple crosswise into 3/8-inch-thick pieces. Melt butter in a small saucepan. Add brown sugar and simmer over moderate heat, stirring, four minutes. Remove from heat and pour into a 9" cake pan. Arrange pineapple on top of sugar mixture in concentric circles, overlapping pieces slightly.

Make batter: Sift together flour, baking powder, and salt. Beat butter in a large bowl with an electric mixer until light and fluffy, then gradually beat in granulated sugar. Add eggs, one at a time, beating well after each addition. Beat in vanilla and rum. Add half of flour mixture and beat on low speed just until blended. Beat in pineapple juice, then add remaining flour mixture, beating just until blended. (Batter may appear slightly curdled.)

Spoon batter over pineapple topping and spread evenly. Bake cake in middle of oven until golden and a tester comes out clean, about 45 minutes. Let cake stand for five minutes. Run a knife around the edges to loosen the cake. Invert a plate over cake pan and invert cake onto plate (keeping plate and pan firmly pressed together). Replace any pineapple stuck to bottom of pan. Sprinkle rum over cake and cool on plate on a rack.

Serve cake just warm or at room temperature. And add some vanilla ice cream, you won't regret it.

Do ahead: Cake may be made one day ahead and chilled, covered. Bring to room temperature before serving.

makingcaramelallnestledin

Caramel making and nesting

thebatterready

Batter making

krakencloseup

Some rum for sprinkling on the final cake

readytoeat

Pretty as a picture

February 21, 2011

Winter Comfort in a Bowl-Vegetable and Sausage Cobbler

This is one of those recipes that surprises you with its astounding goodness. In search of something wintery and cozy to serve my craft night buddies I had been sitting on this recipe from Moosewood Cookbook called Vegetable Cobbler. It sounded a tad strange since I've only had cobblers of the sweet kind. But I figured it had biscuits on top and well, as you may know from my last post, biscuits are one of my favorite foods.

The result was something so cozy and delicious that it sent some folks back for seconds. We decided it was a cross between Shepard's pie and chicken pot pie. I'm really glad I took a chance on this one as it's definitely something I'll be making again and again (I ended up making it again 5 nights later). I added some basil garlic chicken sausage to the recipe and altered the vegetables I used a bit as I wasn't in the mood for corn or white potatoes. And if you don't fancy yourself a baker don't let the biscuit part scare you; drop biscuits don't require any rolling out or cutting. Here is the recipe as I made it.

Vegetable and Chicken Sausage Cobbler
adapted from the Moosewood Classics Cookbook
Serves 6
  • 2 tablespoon olive oil (or butter)
  • 1.5 lbs bulk basil garlic chicken sausage (or any type of ground meat you prefer)
  • 1 1/2 cups coarsely chopped onions (about 1 large onion)
  • 1 fennel bulb, core removed, thinly sliced
  • 2 or 3 garlic cloves, minced
  • 1 teaspoon salt
  • 1 to 2 teaspoons dried thyme
  • 1/2 teaspoon crushed red pepper flakes
  • 4 to 5 cups sliced mushrooms
  • 1 tablespoon Dijon mustard
  • 2 cups peeled and chopped sweet potatoes (or butternut squash)
  • 2 cups peeled and chopped carrots (or parsnips)
  • 1/2 teaspoon ground black pepper
  • 3 cups mushroom stock
  • 3 tablespoons cornstarch dissolved in 1/2 cup cold water
  • 1 cup fresh or frozen green peas
  • 1 tablespoon soy sauce
  • 1/2 teaspoon salt
  • Dash of hot sauce (optional)

Biscuit Topping:

  • 2 cups unbleached all-purpose flour
  • 1/2 teaspoon salt
  • 1 tablespoon baking powder
  • 1/2 teaspoon baking soda
  • 6 tablespoons melted butter
  • 1 cup buttermilk or plain yogurt (I used nonfat yogurt)
  • 1 teaspoon chopped fresh dill (or any herb you have on hand)

1. Preheat the oven to 400 degrees F. Lightly oil a 9 X 13-inch baking dish.

2. Warm 1 tablespoon of the oil in a Dutch oven or soup pot. Add the sausage and saute just until all of the pink is gone. Remove the sausage and all of its juices and set aside in a bowl to add back later. Warm the other tablespoon of oil in the same pan. Add the onions, fennel and garlic, cover, and cook on medium heat for 10 to 12 minutes, stirring occasionally.

3. Add the salt, thyme, crushed red pepper flakes, mushrooms and mustard. Cook until the mushrooms start to release their juices, about 5 minutes.

4. Add the sweet potato, carrot, black pepper and water or stock, and bring to a boil. Then reduce the heat, cover, and simmer for 15 to 20 minutes, until the vegetables are just tender.

5. Stir the dissolved cornstarch mixture into the simmering vegetables, stirring constantly. When the liquid starts to thicken, mix in the peas, soy sauce and salt. Add the cooked sausage back to the pot. Taste and adjust the seasonings, if needed. (You can also add a dash of hot sauce.)

6. Pour the vegetable/sausage mixture into the prepared baking dish, and set aside.

7. In a mixing bowl, sift together the flour, salt, baking powder, and baking soda. In a separate bowl, mix together the melted butter and buttermilk or yogurt. Combine the wet and dry ingredients with as few strokes as possible to make a soft dough.

8. Drop the biscuit batter over the vegetables in the dish in six equal mounds. Sprinkle the dill over the dough.

9. Bake for 25 to 30 minutes, or until a knife inserted into the center of a biscuit comes out clean. Serve immediately.

intotheoven

Into the oven it goes

baked

Done!


November 9, 2010

Cranberry Apple Butter

I remember my grandmother making apple butter year after year when I was a kid, always thinking it tasted nothing like butter (and a tad disappointed with that fact). I'm not sure how she was making hers but I remember thinking how insanely talented my grandmother was. If only I knew how easy she was getting off. This is one of the easiest recipes you'll ever make. I guarantee it. That fact is largely due to using a crock pot and an immersion blender but you can still make this recipe even if you don't have those tools.

This recipe was very good. I would've preferred it a little bit thicker, however, I loved how the tartness of the cranberry played off the sweetness of the apple. This recipe made quite a bit of apple butter so this would be a perfect gift to jar up and hand out for the holidays. Impress your friends with your grandma-like skills. We ate this on pumpkin bread and regular toast for breakfast for weeks. Enjoy!

Slow Cooker Cran Apple Butter
source: Mommie Cooks

10-12 Apples, Chopped
3 Cups of Whole Cranberries
1/2 Cup of Brown Sugar
1/2 Cup of White Sugar
1 tsp of Cinnamon
1/2 tsp of Nutmeg
1/4 tsp Ginger
1/4 tsp Cloves
4 Shakes of Salt

Instructions

Throw it all in your slow cooker and cook it on low for 12 hours. You can also do this using a dutch oven in your regular oven at 400 degrees. Emulsify it smooth with an immersion blender or by batches in a regular blender.

DSC01131
All lined up ready to be chopped

DSC01137
The beginning

DSC01143
12 hours later

DSC01148
Pretty in jars

DSC01152
Even better on pumpkin bread