Showing posts with label basic. Show all posts

January 5, 2015

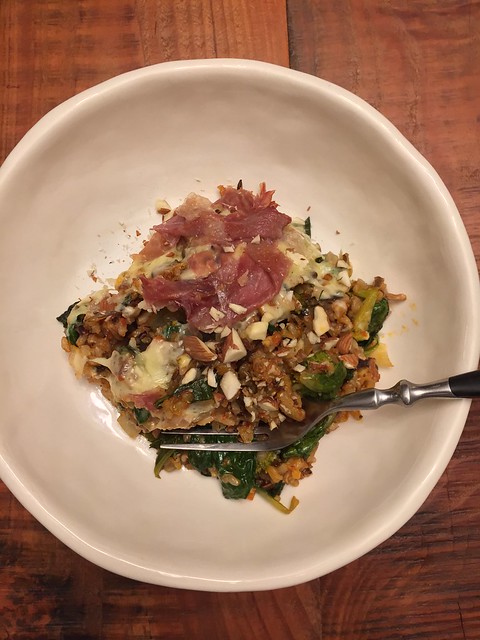
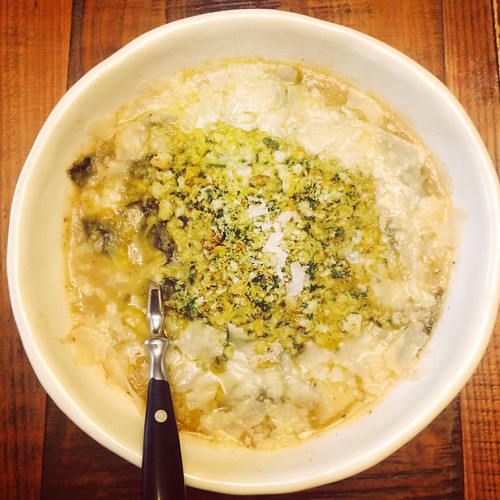
Harissa and Veggie Wild Rice Pilaf with Crispy Prosciutto

This recipe was very compelling to me even though it could come off as confusing to some.  I was in search of something indulgant, which for me means cheese, but still somewhat healthy and also weeknight friendly.  I recalled seeing this recipe and it checked all of those boxes for me. Also if you aren't already following the Half Baked Harvest blog then please do, I just love her stuff.

The result of this was very satisfying.  I was really in love with this dish.  The crispy prosciutto on top was so good and it would've never occurred to me to crisp it up like that but it added an extra treat to the dish.  If you are trying to go lighter with it you could always leave it off. I also loved the wild rice and it reminded me of a wild rice "stuffing" my mom always made at Thanksgiving time. Also this dish is very versatile in that you could use whatever veggies and cheese you wanted to the mix and still come up with something great.  This would also make a lovely side dish but I ate it as my main.  I went back for seconds of course because it was just that good.  I ate it all week for dinner and it stands up really well for leftovers.

A really great weeknight meal for the new year - enjoy!

Harissa and Veggie Wild Rice Pilaf with Crispy Prosciutto
slightly adapted from Half Baked Harvest

  • 1/4 cup olive oil
  • 1/2 medium yellow onion, chopped
  • 2 cloves garlic, minced
  • 4 cups cooked wild rice
  • 1/3 cup store bought (or try homemade) harissa
  • 1/2 cup fresh broccoli, cup into small pieces
  • 12 oz. fresh spinach
  • 1 tsp. dried dill
  • 1/4 cup fresh cilantro, chopped. plus more for garnish
  • 4 oz. dill cheddar cheese
  • 2 oz. gouda cheese
  • 5 oz thinly sliced prosciutto
  • 2 tblsp. toasted and chopped almonds
  • salt and pepper
Grease a 2-3 quart baking dish with butter or olive oil.  Preheat oven to 375 degrees.  Cook wild rice and set aside.  Heat a very large skillet or wok over medium-high heat.  Once hot add 2 tblsp. of olive oil, the chopped onions and minced garlic.   Cook 8-10 minutes or until onion is soft and lightly caramelized. Add the broccoli, spinach, cilantro and dill and cook about 3-5 minutes longer or until spinach is wilted and broccoli is slightly softened. Remove from heat and stir in the cooked wild rice, harissa and remaining 2 tblsp. of olive oil.  Pour mixture into prepared casserole dish and cover with grated cheeses.  Lay out prosciutto evenly over top of cheese.  Bake for about 20-30 minutes until prosciutto is crispy.  Remove and sprinkle with cilantro and almonds.  Serve immediately.

2014-11-21 19.37.14 HDR

December 30, 2014

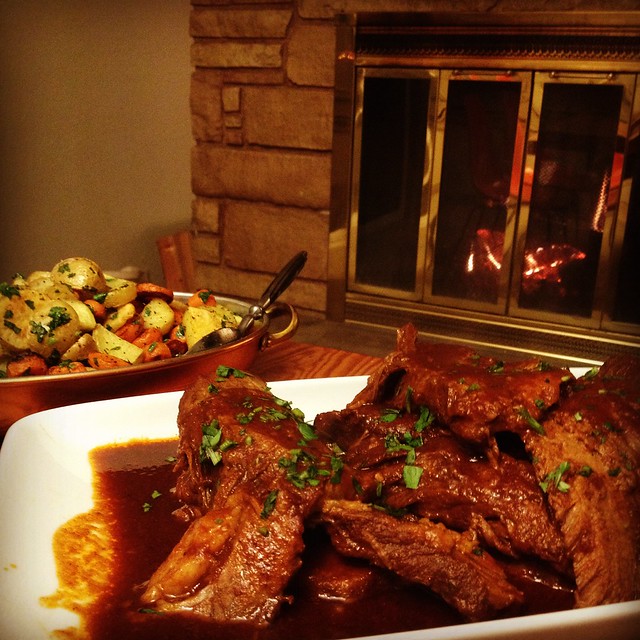
Sweet and Sour Beef Brisket - 100th Post!

Happy 100th post to us!  We've been through our ups and downs with this blog over the years but Mostly Soup is still kicking.  Thanks to all those who read our stuff.  We like keeping this blog up for a reference journal of our own accord and those who follow along are icing on the cake.  So raise a glass to you - THANK YOU!

I made this classic beef brisket when the rain first started in and paired with some red wine and a warm fire it was just the trick for coziness.  It would be the perfect dish to make for a stay at home New Years Eve celebration.  It feels decadent and rich but is really hands off and easy.  I didn't feel the need to make any sort of adjustments to this recipe; it was great just the way it is.  Just a heads up that you do need to start this recipe the night before you plan to serve it, or in the morning time so you have the whole day to rest it.

I roasted up some carrot and potato "coins" to go along with it.  If you have the Smitten Kitchen cookbook this recipe is in there but it's as easy as cutting up the potatoes and carrots in coin shapes and roasting until done with your favorite seasonings.

In any case I hope you get to try this out before winter is over.  Have a very happy New Years (with or without this brisket)!!

Sweet and Sour Beef Brisket
not adapted at all from Smitten Kitchen cookbook

•  4-to-5-pound (1¾ to 2¼ kg) piece beef brisket
•  1½ teaspoons kosher salt, plus more for initial seasoning of meat
•  Freshly ground black pepper
•  1 cup (235ml) beef stock
•  3 tablespoons (50 grams) tomato paste
• 1/4 cup (50 grams) brown sugar, light or dark
•  4 teaspoons paprika
•  2 teaspoons Worcestershire sauce
•  1/8 teaspoon red chili flakes
•  1 teaspoon garlic powder
•  2 tablespoons (15 grams) onion powder

Season the meat generously on both sides with salt and pepper.  Whisk all of the remaining ingredients together in a bowl.  Preheat your oven to 350 degrees.  Place the meat in a dutch oven (or any other sturdy pot with a lid) and pour the sauce over it.  Put the lid on and roast for 3 hours, or tender enough to pull apart with a fork.

Chill the entire dish in the fridge for several hours or up to one day.  This resting time will enhance the flavor and texture of the meat.  An hour before you are ready to serve it heat the oven to 300 degrees and remove the dish from the fridge.  Skim off any fat that has congealed at the top of the meat.  You can leave some if you like but I skimmed it all for a less oily finish.  Remove the meat and slice into 1/4-1/2 inch slices and put back into the sauce in the pan.  Replace the lid and put into the pre-heated oven.  Reheat until the sauce is bubbly around the edges.  Serve immediately with sauce on the side to pour or spoon over meat.

2014-11-10 19.45.59-1

July 22, 2014

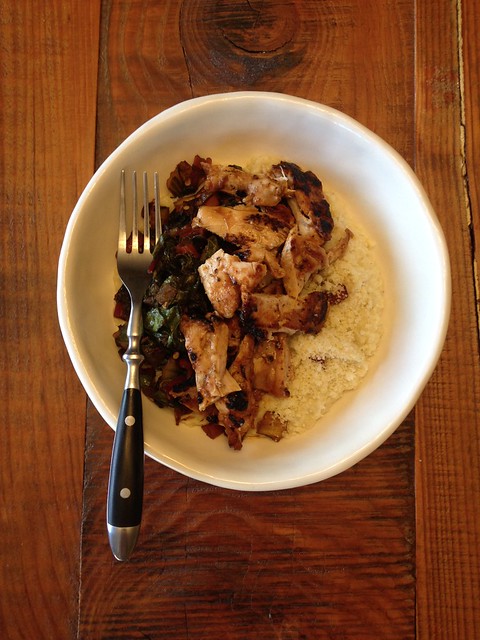
Fresh Corn Polenta - with a side of BBQ Chicken and Balsamic Pepper Flake Chard

Let's just get one thing straight right off the bat.  This post is all about the Fresh Corn Polenta.  When I stumbled across this recipe I thought - must try, immediately.  This recipe is the epitome of summer.  I'd say if it didn't require turning on the stove (for like 10 minutes, tops) it might be the king of the summer recipes.  But we can't all be perfect, can we?  Anyhow, please do give this recipe a go.  It requires little work, few ingredients, and a huge pay off.  Summer corn is one of life's simple pleasures and this, this my friends, is the way to highlight it.

As I grated the corn for the polenta I had one of those "no duh" moments with the realization that the starch that's hiding in the cob of the corn pockets is what naturally thickens this polenta right up.  I mean, where the heck did I think corn starch comes from? Tomatoes? Don't answer that.

I decided to top my polenta off with some super simple chicken marinated in BBQ sauce and a sautee of rainbow chard.  I dressed the chard with red pepper flakes and balsamic to give it some heat and acid to bounce off the super sweet corn polenta.  This meal was so good.  I give it two very enthusiastic thumbs up.

Fresh Corn Polenta
from here
Serves 3

  • 5 ears of corn - I used sweet white but feel free to use the less sweet yellow
  • 1 tablespoon of butter + 1 tablespoon olive oil
  • Salt and Pepper
  • Parmesan, grated (optional)

Clean the corn, removing all husks and silk threads. Working over a bowl, grate the corn using the large grate side of a box grater.  You will end up with a pulpy wet mixture.  Melt the butter and olive oil in a saucepan over medium heat.  Add the grated corn, stir in some salt and pepper. Allow mixture to cook over medium low heat, stirring it often so it doesn't burn, until it becomes thick.  Serve immediately with some grated parmesan, if using.

To make a full meal of this, add whatever sauteed green suits your fancy and some protein.  Really you can't go wrong with whatever you decide to whip up and add on top.  Happy Summer!

2014-07-21 19.33.43

May 26, 2014

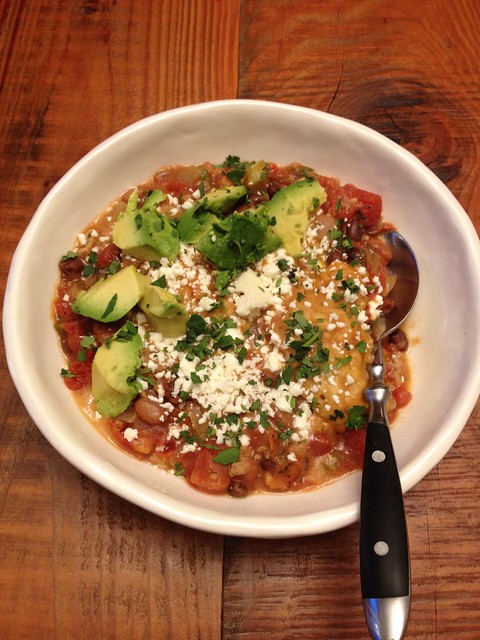
Turkey Green Pepper Chili with Masa Dumplings

For some reason that's never been explained to me DP is constantly suggesting chili when I ask him what he wants for dinner.  I guess when I think about it it doesn't need much explaining other than chili is a delicious thing to eat.  However, it does leave me in the position of needing to come up with different ways of making chili, which I'm all too happy to be tasked to do.

So on such an occasion of a chili suggestion I decided that I'd made this dish often enough to not need a recipe for the base of it.  That I could wing no problem but what I did need was a clever pièce de résistance.  So having a huge bag of masa in the cupboard from a recent tortilla making spree I went in search of a masa related idea.  I had heard of adding masa to chili before to thicken it up but making a masa dumpling was so much more interesting and happened to thicken the chili at the same time.  It was certainly a win-win.  I also used turkey instead of beef to lighten the caloric intake.  Add in some veggies, beans and tomatoes and you're on your way to a great chili night.  I hope it's one of many for you just as it is for us.

Turkey Green Pepper Chili with Masa Dumplings
chili improvised. masa dumplings from here

  • 1 lb. ground turkey (or any other ground meat you fancy)
  • 1 yellow onion, diced
  • 2 tblsp. olive oil
  • 3 cloves garlic, minced
  • 1 green bell pepper, diced
  • 1 jalapeno, de-seeded and minced
  • 2 (15 oz.) cans of cooked black beans, rinsed
  • 1 (15 oz.) can of pinto beans, rinsed
  • 1 (28.5 oz.) can of diced tomatoes with juices
  • 1 (15 oz.) can of roasted tomatoes with juices
  • 1 tblsp. cumin
  • 1 tblsp. ground ancho chili powder
  • water
  • salt and pepper
  • cilantro for garnish (optional)
  • 3/4 cup masa
  • 1/4 cup flour
  • 1 tsp. baking soda
  • 1/4 tsp. baking powder
  • 1/4 tsp. salt
  • 1/4 cup butter
  • 3/4 cup buttermilk

Heat olive oil in large dutch oven over medium heat.  Add chopped onion and saute until translucent.  Add garlic, bell pepper and jalapeno and saute until bell pepper is soft.  Add turkey and break up into small pieces with spoon until most of the pink is cooked out of the meat.  Add cumin, chili powder and S&P until fragrant.  Add black beans, pinto beans, diced and roasted tomatoes and cover with just enough water that all veggies and beans are submerged.  Bring to a boil and then reduce heat to a simmer until soup thickens just slightly.  Check seasonings and adjust if necessary. 

While that simmers make the masa dumplings.  In large bowl combine masa, flour, baking soda, baking powder and salt.  Add butter and work into flour mixture with a pastry cutter (or fork) until butter resembles corn meal with a few large chunks.  Stir in buttermilk just to combine.

Add dumplings by the tablespoon to the simmering soup.  Cover with a lid and let simmer for 10 minutes.  Serve soup with a dumpling or two in each bowl and garnished with cilantro.  I also slipped in a few avocado chunks and some cotija cheese I had on hand for good measure.  Enjoy!

2014-05-19 20.54.11


April 25, 2014

Ham Bone Split Pea Soup

Ham bone sure is fun to say isn't it? Let's see how many times I can sneak it into this post. Like many a family we made a giant ham for Easter.  This was of course after my brother told me he was bringing ham to Easter brunch and yet I still felt the need to purchase a 9 pound monstrosity.  I think I have that Girard gene for sure - no matter how much food people are bringing it's never enough - must. buy. more.  Maybe it's more like a disease. 

This subject matter is not a new one for this blog, see here.  However this version is more a rich man's version.  It's got the luxurious addition of chunks of ham and the bone as well as some fancy tri color potatoes and leeks.  Usually I'm leery of recipes that say to add water instead of broth and I end up subbing broth in every time.  But this one I trusted to be flavorful at the end because of the bone cooking right in the soup for almost 2 hours.  It didn't disappoint, I really loved this soup and am coming to realize that I like these creamy/chunky versions of soup the most.  If you saved your ham bone from Easter or come across one in the near future you should definitely make this soup or at the very least ham stock because the ham bone is prolific my friend.

Split Pea Soup
adapted from Bon Appetit

  • 2 tablespoons olive oil
  • 1 medium onion, chopped
  • 2 medium leeks, white and pale green parts only, chopped
  • 2 celery stalks, chopped
  • 4 garlic cloves, minced
  • kosher salt and black pepper
  • 1 lb tri-color potatoes (or yukon gold), diced
  • 1 cup leftover ham, diced
  • 1 ham bone
  • 6 sprigs thyme
  • 2 bay leaves
  • 2 cups split green peas
  • 2 tablespoons Worcestershire sauce
  • Sour cream and whole grain mustard for garnish, optional

Heat oil in large stock pot or dutch oven over medium heat. Add onion, leeks, celery and garlic; season with salt and pepper and cook until vegetables are soft, stirring occasionally.  Add potatoes and ham.  Cook, stirring occasionally until potatoes are soft.  Add ham bone, thyme sprigs, bay leaves, and split peas.  Add enough water to cover all ingredients.  Bring to a boil, reduce heat, then simmer until split peas are very soft and falling apart, about 1.5 hours.

Remove ham bone,thyme sprigs, and bay leaves.  Add Worcestershire sauce and season with any additional salt and pepper needed.  Serve with sour cream and mustard, if desired.

(ham bone count = 9)


2014-04-24 20.43.55-1


April 14, 2014

Charred Cauliflower, Potato and Kale Soup with Gremolata Breadcrumbs

I know what you're thinking.  That this recipe sounds either too boring or exactly like something you've made before.  But hear me out because I happen to think this is one of the most perfect soups I've ever made.  That's a bold statement, yes, but it's true. 

When I think of my most perfect soup I have a lot of items that need checking off the list.  First, it must be fairly easy because let's be real here, soup should not be something that you slave for hours over. Which in and of itself might be why it's one of the more perfect dinners to make.  Then I want it to be healthy, lots of veggies and not too much fat.  But at the same time it needs to be rich and interesting and flavorful.  Then, and I know this makes me sound crazy, but I want the soup to be creamy and have some bite to it all at the same time.  I am one demanding soup eater.  But this recipe, well it has it all.  It even has just the right amount of spice to it as well.  Have I hooked you yet?  I hope so because I waited until the end of this post to tell you that this recipe is also vegan and gluten free.  Hook, line and sinker.

Below is the recipe as I made it but if you don't care about being vegan I think adding some ground sausage to the recipe would work marvelously.  Just brown the meat as the very first step, set it aside, and add back in at the very end.  You can use the fat rendered from the sausage in place of the oil to char the cauliflower in.  And also, I used gluten free bread for the gremolata because I had some left over but regular day old bread works just as well here.  Enjoy!

Smoky Charred Cauliflower, Kale and Potato Soup
adapted from here

  • 2 tablespoons olive oil
  • 1 small head of cauliflower, cut into 1 inch pieces
  • 1 medium yellow onion, diced
  • 3 cloves garlic, minced
  • 2 chipotle chiles packed in adobo sauce, finely chopped
  • 2 quarts veggie broth (or any other broth you like)
  • 2 lbs of yukon gold potatoes, cut into 2 inch pieces
  • 1/2 lb lacinato kale, thick stems removed and julienned
  • 2 bay leaves
  • salt and pepper to taste
Heat olive oil in dutch oven over high heat.  Add cauliflower and cook, stirring often until charred on most sides, about 10 minutes.  Reduce heat if it starts to burn or smoke.  Reduce heat to medium low and add onions.  Cook until soft and translucent, about 2 minutes.  Add garlic and chipotles and cook 2 more minutes.  Add half of broth and bring to a boil.  Cook until cauliflower is soft, about 5 minutes.  Using a hand blender puree mixture completely until all chunks are gone.  Add remaining broth, potatoes, kale and bay leaves.  Bring to a boil over high heat, reduce to a simmer and cook until potatoes can be easily smashed, about 30 minutes.  Remove bay leaves and smash potatoes with a spoon to your liking.  Serve with the gremolata below, and maybe some Parmesan cheese if you'd like.

Gremolata Breadcrumbs
  • 1/2 loaf of stale crusty bread, cut into cubes
  • 2 teaspoons of olive oil, or more as needed
  •  1 large garlic clove
  • 1 teaspoon lemon zest
  • 1 tablespoon minced parsley
Add bread to a food processor and process until it turns to breadcrumbs.  Add garlic, lemon zest and parsley.  Pulse until mixed in and chopped fine.  With the processor on slowly stream in olive oil until bread crumbs are coated but not drenched. 

2014-04-01 19.28.59-1


February 6, 2014

Mushroom Barley Soup + A Thickening Trick

I was surprised that we haven't posted a classic mushroom barley soup yet.  Mushrooms being quite famous around these parts, in that Michelle and I often have long conversations regaling their merit.  DP also happens to be a huge fan so when anything has mushrooms, or mushrooms can be added, we know it's going to be a hit.  Mushroom barley happens to be one of my favorite soups because it's so simple but really hearty and filling as well.  Because there's no meat it also feels healthy and light.

I found a recipe that looked good on Saveur's site.  What appealed to me most about it was the finish with lemon; I love that touch in most anything to give the dish a brightness and a small hit of acid at the end.  However, I could tell that this soup was quite broth-y with 8 cups of stock and also the addition of the mushroom water from soaking the dried mushrooms.  So I decided to use one of my favorite tricks on thickening soups or even sauces at the very end of cooking - a Beurre Manié.  This method works essentially the same as a roux however you don't need to cook the fat and flour separately and can just knead the two together.  Also I've read that a roux can lose its thickening ability over long periods of cooking time so a beurre manie works a lot better in soups.  I like to use the pestle from my mortar and pestle set and work it together in a small dish.  A fork also works just great for this as well.  Just make sure you're working with softened butter instead of melted.  I like to nuke my butter for 20 seconds if I don't have any pre-softened. 

This soup with the addition of the thickener turned out so wonderful.  Adding the butter gave it a richness and then the lemon brightened the whole soup up to create a great balance.  I really loved it and will keep this as my go to mushroom barley from now on.  I served it with some garlic bread loaded with fresh garlic, olive oil, fresh parsley and S&P. And some red wine, natch. All in all a great winter meal!

Mushroom Barley Soup
adapted from Saveur

1 oz. dried porcini mushrooms (I used shiitake because my grocer was out of porcini)
1/4 cup olive oil
8 garlic cloves, finely chopped
2 ribs celery, finely chopped
2 medium carrots, finely chopped
1 large yellow onion, finely chopped
1 lb. white button mushrooms, thinly sliced
1/4 cup sherry
8 cups beef stock
1/2 cup pearl barley
2 tsp. fresh thyme
2 tbsp. lemon juice
Kosher salt and black pepper, to taste
fresh parsley, for garnish

 Beurre Manié
3 tbsp. unsalted butter, softened
3 tbsp. unbleached flour

1.  Place dried mushrooms in a bowl and cover with boiling water.  Cover the bowl with a lid and let sit for 30 minutes.  While these are brewing chop up your veggies and garlic.  After 30 minutes take the rehydrated mushrooms out with a slotted spoon and finely chop.  Pour soaking liquid through a fine mesh sieve into another bowl, leaving a small amount to retain any dirt or sediment.

2.  Heat oil in a large soup pot or dutch oven over medium-high heat.  Add garlic, celery, carrots and onion; saute until soft, about 5 minutes.  Add re-hydrated mushrooms and sliced button mushrooms; saute until liquid is released and evaporated, about 14 minutes.  Add sherry and cook until evaporated, about 2 minutes.  Add reserved mushroom water, beef broth, barley and thyme and bring to a boil. Reduce heat to medium-low and cook covered for about 30 minutes or until barley is tender.  Prepare beurre manie by blending together butter and flour in a small bowl until fully incorporated.  Add to soup pot at the very end of cooking and mix until melted.  Allow to thicken for a few minutes then add lemon juice.  Ladle into bowls and garnish with parsley.

IMG_1962[1]


January 24, 2014

Cheesemaking 101 - Mozzerella

Here's a post off the beaten path as this most definitely is not soup.  However it is fairly easy yet something that will make you feel accomplished in the end - much like soup.  DP and I hosted a classical music listening night at our house and picked Mozart for our first gathering.  When deciding upon snacks there were many puns including Mozart-ella sticks, Wolfgang Puck Amadeus pizza, Don Juan almonds and the like.  I saw the shining star as clearly being Mozart-ella so I took the opportunity to teach myself how to make this easy cheese.  It turned out really good despite my worry throughout the process that it wouldn't come together.  But come together it did and served with fresh basil and garlic, our best olive oil (from here), balsamic, and a sprinkle of red pepper flakes and it was a party hit.  It turns out that the adage used when making beer applies to making cheese as well - don't worry, have a homebrew cheeseball.

Even though this recipe might require a stop at a home brewing store the two off the wall supplies needed, rennet and citric acid, are cheap and easy to find.  Also you use so little of each ingredient in each batch that I'll be able to stretch the amounts I purchased for many more cheese making adventures.  Up next, goat cheese...or maybe feta!  A little aside about the whey too; I read from the recipe that the leftover whey can be used in place of water in any bread recipe for an enhanced flavor so I saved mine and will be whipping up a fresh batch of bread this weekend.  Cheese making yields many treats my friends.

Homemade Mozzerella
recipe from The Pioneer Woman

1 gallon of whole milk - preferably raw and unpasteurized if you can find it (I couldn't)
1 1/2 teaspoons of citric acid powder
1/4 teaspoon vegetable rennet
kosher salt to taste

Sprinkle the citric acid powder into a large non-reactive stockpot then add 1/4 cup of water and swirl to dissolve.  Pour the gallon of milk into the pot and stir to combine.  Put the pot over medium-low heat and attach a thermometer to the side of the pot and allow to heat to 90 degrees F.  You may notice a little curdling but this is a good thing.  While that heats up combine the vegetable rennet with 1 cup of water.

When the milk comes to temp remove from the burner and add the rennet/water mixture.  Very gently stir together for about 30 seconds.  Place a lid on the pot and walk leave it alone for exactly 5 minutes - don't touch it in the meantime! After 5 minutes the mixture should resemble a very soft custard.  A note on this - mine looked more like large curds and didn't congeal as much as the recipe pictures looked.  I think this is because I didn't use raw milk so if you don't either and it just looks like a bunch of large curds, don't worry it will still come together.  Return to the burner over medium heat and place the thermometer on once again and bring up to 105 degrees F.

Remove from heat and with a slotted spoon remove all of the curds from the whey (the watery looking part) and place in a colander.  Press down with a spoon or your clean hands to remove as much of the whey from the curds as possible. Place in a microwaveable bowl and microwave on high for 1 minute.  Without burning your hand press on the cheese to drain all of the whey off.  Microwave for 30 seconds a few more times to keep removing as much of the watery whey as possible.  I only did this two times total.  Then knead in salt to taste.  Stretch out the cheese curd to get any more whey that you can out of it.  Shape into a ball and place in a bowl of ice water until completely cool.  Afterwards eat as is or add herbs, seasonings and serve with a crusty baguette as we did.

The final product before it was devoured:
IMG_1909[1]

Video of the making:

January 7, 2014

Tuxedo Chicken Chili and Baked Polenta

New years day is sometimes more of a mixed bag than New Year's Eve is.  I find that there tends to be a little bit of regret - from the night before, hopefulness - for the year to come, and some relief - for getting to wipe the slate clean.  This year a group of us got together at the Adrift Hotel in Long Beach, WA to eat a good meal, spend some time together gussied up and drink way too much because of the short distance it takes to stumble back to your room.

The next day left me going through my mixed bag of emotions which led me to make this soup.  It had a fancy title, sounded healthy, and little chopping was required for my hungover lazy self.  I expected this soup to be good but it actually turned out to be incredible.  I measure that based off of the number of times DP and I both swoon and mmmm while scarfing it down.  There were a lot of those on this one my friends.

I ended up adding the baked polenta for a few reasons.  I wanted something to dip in the soup but there's always that moment when we're on our best behavior when one of us decides that bread is just too unhealthy.  I was still determined though so I thought about making some simple focaccia but alas, I was almost out of flour.  So I landed on polenta which is so easy to whip up.  Because I wanted it to have a crispy exterior to mimic bread I let it cool in the fridge then sliced it up and baked it on a cookie sheet at high heat.   It did the trick! Every time I make polenta, either in soft or baked form, I always remind myself not to overlook this gem for any other suitable application.  The only thing I'd do differently is cut it up smaller so it has more crispiness and then bake it a little longer and finish it off with a few minutes under the broiler.

The original recipe for the chili comes from Food 52 and the baked polenta recipe is an adaptation of this one.  Below are the recipes as I made them.

Tuxedo Chicken Chili
Serves 6
  • 1 medium white onion
  • 2 cloves garlic
  • 1 tablespoon vegetable oil
  • 1 lb ground chorizo chicken (available at New Seasons Market)
  • 1 lb ground dark meat chicken (feel free to just sub 2 lbs of this and crank up the spices if you can't find chorizo chicken above)
  • 2 teaspoons dried oregano (preferably Mexican)
  • 2 teaspoons cumin
  • 1 1/2 teaspoon chili powder
  • 1 teaspoon ground black pepper
  • 1/2 teaspoon cinnamon
  • 1 cup water
  • 3 (15) ounces cans canellini beans
  • 4 cups chicken broth
  • 1 (16) ounce can black beans
  • 1 (16) ounce package frozen corn
  • 1 (4.5) ounce can chopped green chiles
  • Garnishments - sour cream, cheddar cheese, cilantro, and/or baked polenta below 
  1. Chop the onion and garlic finely. Add to the oil in a large Dutch oven. Saute over medium high heat until soft and translucent. Do not brown. Remove the onions and garlic to a bowl and set aside. (If the onions brown and overcook, the final color of the chili will be muddy. It will still taste delicious, but won’t look as nice). Add all of the ground chicken to the pan and cook until browning slightly, breaking it up into small pieces.
  2. Sprinkle the oregano, cumin, chili powder, pepper and cinnamon over the chicken. Add the onions and garlic. Pour in two cups of chicken broth and one cup of water and bring to a boil. Lower heat to a simmer and cook until the water has reduced by half and the chicken is cooked through.
  3. Meanwhile, drain and rinse two cans of white beans. Place the beans in a blender (don't be an idiot like me and think a food processor will work just as well, you'll end up with stock all over your counter) with the chicken broth and puree until smooth. Drain and rinse the remaining white beans and the black beans. Pour the pureed beans into the chicken mixture, stir well and bring to a boil. Lower the heat to medium, add the remaining drained beans, corn, and green chiles and simmer until cooked through and thickened, about 30 minutes.
  4. Serve in big bowls topped with grated cheddar cheese, polenta squares and some cilantro if you've got it (I didn't).
Crispy Baked Polenta
  • 2 cups polenta (also known as corn grits)
  • 8 cups water
  • kosher salt and black pepper
  • 3 tbs butter
  • 1/4 cup buttermilk, cheese, or anything else creamy you may have on hand
  1. Bring the water to a boil in a large pot with 1 tbs kosher salt.  Gradually whisk in the polenta and whisk after all the polenta has been added to make sure no lumps form.  Turn heat down and simmer for 30 minutes until thick, stirring frequently.
  2. Remove from heat and whisk in butter and any creamy item you may be adding to the mixture.  Add salt and pepper to taste.
  3. Pour into 9x13 casserole pan and put in refrigerator to cool for at least 30 minutes.  Preheat oven to 450 degrees.
  4. Remove the polenta from the refrigerator and slice the cooled polenta into long 1 inch strips. Slice the strips perpendicular to create 1 inch pieces. Place the polenta squares onto a baking sheet lined with parchment paper and put into the preheated oven for about 20 minutes or until they have turned golden and browned on the edges. Remove the baked polenta squares from oven and place on a cooling rack. The polenta squares can be served warm with a dipping sauce or at room temperature. To reheat the squares, place in oven at 200 degrees for several minutes. Can be stored in an airtight container for several days.
Only one picture of the end result was required because honestly, I chopped two things, sauteed some meat and dumped some other stuff in a pot.  SO simple!
IMG_1890[1]

I did also manage to take this video for you:


January 21, 2012

Sausage and White Bean Cassoulet

This is one of those recipes that you would be proud to serve to company yet it's ridiculously simple. My favorite recipe type by far. While it could definitely be gussied up by adding some confit, some homemade bread crumbs, or maybe serving it over some sort of puree, I liked it just the way it was. Served with some french bread torn right off the loaf, a glass of wine and a simple salad with nothing more than red leaf lettuce and some homemade vinaigrette. Yup, this was winter Friday night staycation worthy alright. Follow it up with a documentary and some downloading of Nico records and I'm in heaven.

I modified the recipe a little and added some spices to the tomatoes before they went into the oven. I also added much more than a "glug" of wine...I like to drink my wine in as many ways as possible. Enjoy!

Sausage and White Bean Cassoulet
recipe from Sweet Sugar Bean

2 pints of cherry tomatoes
4-6 hot Italian sausages OR Chorizo sausages
4 large garlic cloves, smashed
1 onion, cut into wedges
extra virgin olive oil
balsamic vinegar
coarse salt and pepper
few sprigs fresh thyme OR rosemary
3 cups cooked white navy beans or white kidney beans OR 1 19 oz can (540ml) of white beans, rinsed and drained well
chicken broth or white wine(optional)

Adjust oven rack to lowest position and heat oven to 425 *F.
Scatter tomatoes over bottom of dish (reserve about 1/2 cup to add later). Add garlic, onion and sausages over top. Drizzle with balsamic and olive oil. Toss on rosemary and sprinkle with S & P and other spices if using. Bake about 25-30 minutes, for sausages to be golden and tomatoes start to burst. Remove from oven and stir in beans and reserved 1/2 cup of cherry tomatoes. If you'd like a bit more sauce with your beans, add a glug or white wine or chicken stock. Return to oven and bake 20 minutes longer or until beans are cooked through. Serve with bread and butter for dunking; green salad on the side. Makes enough for 4.

DSC02968
Snug as a bug

DSC02974
In go the beans

DSC02981
C'est fini


March 4, 2011

Crack Cake aka Pineapple Upside Down Cake Reinvented

Lately I've got a case of the winter blues. I thought Portland was going to skip over its rainy storm weather since we've had a very mild winter thus far. But after 5 years I should have known better 'cause we've been getting slaughtered lately. It's enough to make a girl start looking at last minute plane tickets outta here and spend long periods of time dreaming of warm sun and fruity drinks. So when I saw a large pineapple display at the store this week I thought, well, it's a start. I got that pineapple home and starting chopping it up only to realize it's not quite pineapple season and that sucker was tart. Like lip puckering, tawlk lawk dis tawt. So I immediately thought what if I made a pineapple upside down cake, not like the ones of olden days with canned pineapple and maraschino cherries, but a really amazing fresh and well done version.

I went in search of a recipe and whaddya know that wonderful blog
Smitten Kitchen had a perfect recipe, yup, of course it did. And it just so happened I had all the ingredients I needed at home. Any recipe that starts with a homemade caramel is aces in my book and this one did NOT disappoint. I took it out of the oven and the smell was intoxicating. I waited until it was just cool enough, slapped some vanilla ice cream on a slice, and immediately proclaimed (to no one at all) "that's some crack cake right there!". This is going to make many a reappearance come pineapple season. Mark my words.

Pineapple Upside Down Cake
Source:
Smitten Kitchen

Topping:

1/2 medium pineapple, peeled, quartered lengthwise, and cored
3/4 stick unsalted butter
3/4 cup packed light brown sugar

Batter:
1 1/2 cups all-purpose flour
2 teaspoons baking powder
1/4 teaspoon salt
3/4 stick unsalted butter, softened
1 cup granulated sugar
2 large eggs
1 teaspoon vanilla
1 tablespoon dark rum
1/2 cup unsweetened pineapple juice
2 tablespoons dark rum for sprinkling over cake

Preheat oven to 350°F.

Make topping: Cut pineapple crosswise into 3/8-inch-thick pieces. Melt butter in a small saucepan. Add brown sugar and simmer over moderate heat, stirring, four minutes. Remove from heat and pour into a 9" cake pan. Arrange pineapple on top of sugar mixture in concentric circles, overlapping pieces slightly.

Make batter: Sift together flour, baking powder, and salt. Beat butter in a large bowl with an electric mixer until light and fluffy, then gradually beat in granulated sugar. Add eggs, one at a time, beating well after each addition. Beat in vanilla and rum. Add half of flour mixture and beat on low speed just until blended. Beat in pineapple juice, then add remaining flour mixture, beating just until blended. (Batter may appear slightly curdled.)

Spoon batter over pineapple topping and spread evenly. Bake cake in middle of oven until golden and a tester comes out clean, about 45 minutes. Let cake stand for five minutes. Run a knife around the edges to loosen the cake. Invert a plate over cake pan and invert cake onto plate (keeping plate and pan firmly pressed together). Replace any pineapple stuck to bottom of pan. Sprinkle rum over cake and cool on plate on a rack.

Serve cake just warm or at room temperature. And add some vanilla ice cream, you won't regret it.

Do ahead: Cake may be made one day ahead and chilled, covered. Bring to room temperature before serving.

makingcaramelallnestledin

Caramel making and nesting

thebatterready

Batter making

krakencloseup

Some rum for sprinkling on the final cake

readytoeat

Pretty as a picture

January 4, 2011

Angel Biscuits

Growing up I remember my grandmother making homemade biscuits as any fine grandmother does, more specifically my grandmother made Angel Biscuits. I'm not sure what exactly is angelic about them, I'm guessing it's a reference to being light as air, but what I do remember is helping her cut the biscuits and always hoping there would be raw dough scraps leftover. My grandmother would hand them to me and I would chomp on the yeasty sweet dough. It's one of my favorite childhood memories. When I was in my early 20s I began collecting all of these family recipes in a small notebook so I could use them for years to come. Somewhere along the way, between many moves, I lost the recipe book and hadn't seen it in years.

I'd pretty much written the book off until I was home for Christmas this year and my aunt walks up to me and asks, "Recognize this?" and holds up my long lost collection of recipes. I squealed with excitement and realized that they were actually using the book for a couple of recipes for Christmas dinner that evening. So after thinking it was long gone I had such a good time browsing through the book and got really excited for being able to recreate these recipes again. The first thing I made when I got home was Angel Biscuits. And fortunately for me, I was the only one around to eat all of the leftover dough scraps. These biscuits are slightly sweet and can be served with jam but they also work well as a dinner roll. I hope you enjoy them as much as I have (and will)!

Angel Biscuits
original source unknown

1 package active dry yeast
2 tablespoons warm water
5 cups self rising flour (or make your own by adding 1 tsp baking powder for every 1 cup of all purpose)
1/4 cup sugar
1/2 teaspoon baking soda
1 cup shortening
2 cups buttermilk
melted butter for pans and tops of biscuits

Preheat oven to 400 degrees. Grease two 13x9 inch pans with melted butter. Dissolve yeast in warm water and set aside to activate. Meanwhile, stir flour, sugar, and baking soda (and baking powder if using) together. Cut in shortening until mixture is pea sized consistency. Mix buttermilk with yeast and add to flour mixture. Stir until just combined. Roll the dough out onto well floured surface until 1/2 inch thick. Cut with 2 inch biscuit cutter or a pint glass works just as well. Place close together in buttered pans. Allow to rise one hour. Bake for 15-20 minutes until lightly brown. Brush tops with melted butter.

DSC01499DSC01509
Cutting the shapes and my dough scraps

DSC01512DSC01521
Rising and fully baked

DSC01527
with some apricot jam

November 9, 2010

Cranberry Apple Butter

I remember my grandmother making apple butter year after year when I was a kid, always thinking it tasted nothing like butter (and a tad disappointed with that fact). I'm not sure how she was making hers but I remember thinking how insanely talented my grandmother was. If only I knew how easy she was getting off. This is one of the easiest recipes you'll ever make. I guarantee it. That fact is largely due to using a crock pot and an immersion blender but you can still make this recipe even if you don't have those tools.

This recipe was very good. I would've preferred it a little bit thicker, however, I loved how the tartness of the cranberry played off the sweetness of the apple. This recipe made quite a bit of apple butter so this would be a perfect gift to jar up and hand out for the holidays. Impress your friends with your grandma-like skills. We ate this on pumpkin bread and regular toast for breakfast for weeks. Enjoy!

Slow Cooker Cran Apple Butter
source: Mommie Cooks

10-12 Apples, Chopped
3 Cups of Whole Cranberries
1/2 Cup of Brown Sugar
1/2 Cup of White Sugar
1 tsp of Cinnamon
1/2 tsp of Nutmeg
1/4 tsp Ginger
1/4 tsp Cloves
4 Shakes of Salt

Instructions

Throw it all in your slow cooker and cook it on low for 12 hours. You can also do this using a dutch oven in your regular oven at 400 degrees. Emulsify it smooth with an immersion blender or by batches in a regular blender.

DSC01131
All lined up ready to be chopped

DSC01137
The beginning

DSC01143
12 hours later

DSC01148
Pretty in jars

DSC01152
Even better on pumpkin bread

September 16, 2010

Chicken and Dumplings-Trial One

I recently met a friend at a bar here in St. Johns which is somewhat known for its chicken and dumplings. I'll admit, I've never had chicken and dumplings before and I didn't that night either. But my friend did and as I looked at the dish I thought, hm, just seems like thicker chicken pot pie without all the fuss, I could probably swing that. And it just so happens that DP loves chicken and dumplings. Probably because he likes to say dumplings but really, who doesn't? I went in search of a recipe and ended up with one from Real Simple that looked easy. I didn't change much about the recipe except for I poached some chicken breasts and shredded them instead of using a store bought rotisserie chicken. Oh yes and I added mushrooms. And peas.

I liked this recipe but it lacked the thickness that I wanted. Next time I'd probably try using a slurry or a beurre manie to thicken it up. I'll definitely give this another go during the approaching fall! I have posted the recipe as I made it.

Chicken and Dumplings
adapted from Real Simple

Ingredients
  • 3 tablespoons unsalted butter
  • 2 carrots, halved lengthwise and cut crosswise into 1-inch pieces
  • 1 stalk celery, cut into 1-inch pieces
  • 1 leek (white and light green parts), halved lengthwise and sliced crosswise
  • 1 1/2 cups of crimini mushrooms, sliced in half
  • 3/4 cup of frozen peas, or fresh if you have 'em
  • 1 1/2 cups all-purpose flour, spooned and leveled
  • 6 cups low-sodium chicken broth
  • 1/2 cup dry white wine
  • kosher salt and black pepper
  • 3 medium sized chicken breasts (2 1/2 to 3 lbs), poached and meat shredded
  • 1/4 teaspoon baking soda
  • 1/2 cup sour cream
  • 1 large egg, beaten
  • 2 tablespoons chopped fresh dill

Directions

  1. First poach the chicken. Cover chicken with water in a medium sauce pan. Add any spices you like, I usually go for ones that dissolve easily. After about 15 minutes of boiling, check the chicken. Be careful not to overcook it as it will cook a little bit more later in the recipe. Once it's done, put it on a plate and shred it using two forks.
  2. Melt the butter in a large pot over medium heat. Add the carrots, celery, leek, and mushrooms and cook, stirring occasionally, until tender, 6 to 8 minutes. Sprinkle with ½ cup of the flour and cook, stirring, for 1 minute (do not let it darken). Stir in the broth, wine, ½ teaspoon salt, and ¼ teaspoon pepper and bring to a boil. Add the chicken and reduce to a simmer.
  3. Meanwhile, in a medium bowl, whisk together the remaining 1 cup of flour with the baking soda and ¼ teaspoon salt. Stir in the sour cream and egg.
  4. If soup doesn't seem thick enough, this is where I might add in a slurry to thicken it up. Add the frozen peas. Drop tablespoonfuls of the dough into the stew and cook, covered, until the dumplings are plump and cooked through, 15 to 17 minutes. Sprinkle with the dill before serving.

DoubleMush
Siamese Mushroom!
Chopped
Chopped up
ShredChix
I really missed Mich for this one, she's a master shredder
Sautee
Sauteing
Dropped
This was the fun part
Fin
and done.

June 17, 2010

Spaghetti and Meatballs

Spaghetti and meatballs is a classic recipe but one I don't find myself craving very often. So when the time struck I went in search of a recipe that would satisfy. One of the first places I look for recipes is on the food blog Smitten Kitchen. If you haven't already please check out one of my favorite blogs. This woman manages to be funny and interesting while pulling off food that looks effortless and beautiful despite her small NY kitchen and having a newborn in tow. So when I came across a spaghetti and meatball recipe on her site that was an incarnation of a Barefoot Contessa (also one of my faves) recipe, I looked no further. And I'm glad I didn't because this recipe was flawless, which was to be expected. We stretched this dish for three meals and I dare say I won't be craving spaghetti and meatballs for quite a while.

I went ahead and used her suggestion on increasing the amount of sauce you make. I also didn't use any veal and just did a combination of pork and beef since my local grocer didn't have veal available. I re-wrote the recipe as I made it.

Spaghetti and Meatballs
Adapted from Smitten Kitchen

For the meatballs:
1 lb ground beef
1lb ground pork (I used the italian pork and I highly recommend this)
1 1/4 cups fresh white bread crumbs (about 5 slices, crusts removed)
2 tablespoons chopped fresh flat-leaf parsley
1/2 cup freshly grated Parmesan cheese
2 teaspoons kosher salt
1/2 teaspoon freshly ground black pepper, or more to taste
1 teaspoon onion powder
1 extra-large egg, beaten
Vegetable oil
Olive oil

For the sauce:
1 1/2 tablespoons good olive oil
1 large yellow onion or 2 small ones, diced
3 large cloves of garlic, minced
Pinch or so of red pepper flakes
3/4 cup good red wine
1 (28-ounce) can pureed tomatoes
1 (14-ounce) can chopped or diced tomatoes
2 tablespoons chopped fresh flat-leaf parsley
3 teaspoons kosher salt
1 teaspoon freshly ground black pepper

For serving:
1 1/2 pounds spaghetti, cooked according to package directions
Freshly grated Parmesan

Make the meatballs:
Place the ground meats, bread crumbs, parsley, Parmesan, salt, pepper, onion powder, egg, and 3/4 cup warm water in a bowl. Combine very lightly with a fork. Using your hands, lightly form the mixture into 2-inch meatballs.

Pour equal amounts of vegetable oil and olive oil into a large (12-inch) skillet to a depth of 1/4-inch. Heat the oil. Very carefully, in batches, place the meatballs in the oil and brown them well on all sides over medium-low heat, turning carefully with a spatula or a fork. This should take about 10 minutes for each batch. Don’t crowd the meatballs. Remove the meatballs to a plate covered with paper towels. Discard the oil but don’t clean the pan.

Make the sauce:
Heat the olive oil in the same pan. Add the onion and saute over medium heat until translucent, 5 to 10 minutes. Add the garlic and red pepper flakes, and cook for 1 more minute. Add the wine and cook on high heat, scraping up all the brown bits in the pan, until almost all the liquid evaporates, about 6 minutes. Stir in the tomatoes, parsley, salt, and pepper.

Return the meatballs to the sauce, cover, and simmer on the lowest heat for 25 to 30 minutes, until the meatballs are cooked through.

Serve hot on cooked spaghetti and pass the grated Parmesan.


DSC00706

DSC00713

DSC00719

June 14, 2010

Hot and Spicy Chocolate Chip Cookies

This is one that Michelle has been bugging me to post about for quite some time. These cookies were a bit out of the ordinary for a chocolate chip cookie, which can be hard to do. Who would've thought that adjusting the seasoning ever so slightly would create a whole different experience? I really liked these cookies and not only for their spiciness. The texture of them was fantastic as well. So if you're tired of the same old same old, add some heat to your cookies and make them hot and spicy.

Hot and Spicy Chocolate Chip Cookies
from No Recipes

1 1/2 sticks of butter at room temperature
3/4 C packed dark brown sugar
1/2 C granulated sugar
2 large eggs at room temperature
1 tsp vanilla
2 tsp cinnamon
1/4 tsp cayenne pepper
2 C + 2 Tbs all-purpose flour
3/4 tsp baking powder
1/4 tsp kosher salt
1 1/2 C bittersweet
chocolate chips or chunks

Move the oven rack to the middle position and preheat to 325 degrees.

Cream the butter and 2 kinds of sugar together until light and fluffy. Add the eggs one at a time and mix till combined after each addition. Add the vanilla, cinnamon and cayenne pepper, mixing until combined.

In a separate bowl, whisk the flour, baking powder and salt together. Add it to the butter mixture and mix until just combined. Add the chocolate chips and stir in by hand.

Scoop roughly 1/4 cup of batter for each cookie onto a baking sheet (it’s okay if the balls are jagged) leaving enough room for them to spread. Bake 1 sheet at a time for about 12-15 minutes each or until the edges are set, but the middle is still soft. You may need to experiment with your oven to figure out the perfect cooking time. As these cookies bake, they go from chewy to cakey to crisp, so you can change their characteristic by the amount of time you bake them for.

To get the chewy center, allow them to cool on the pan (not on a rack).

DSC00611

DSC00621

DSC00622