Showing posts with label gluten free. Show all posts

April 30, 2015

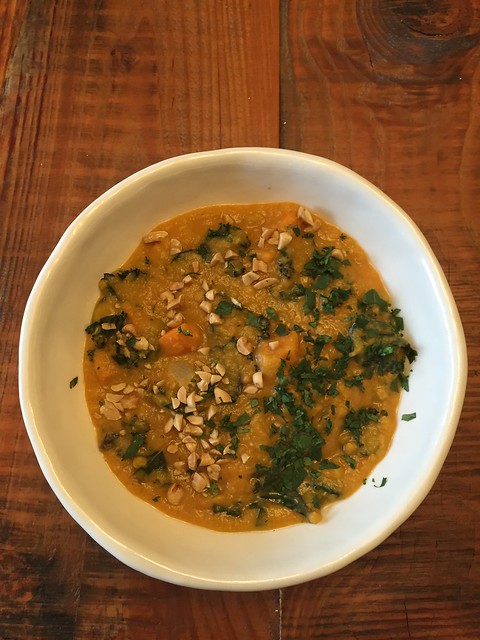
Yam and Peanut Stew with Kale

Around our house we've been feeling pretty uninspired to cook lately.  And there's one big culprit - we bought a house! So that means finding time or energy to think about or do anything has pretty much gone out the window.  Honestly even I get bored of how much we talk about house stuff but still we're super excited that we finally made this dream a reality.

When we have busted out with some cooking it's been for simple and healthy things to make up for all of the eating out we've been doing lately.  Up here in the PacNW we are also in between seasons weather wise so it can change daily what we're in the mood for.  We hit a cold and rainy spot earlier this week and that sent us hankering for some soup.  But healthy soup...and cheap soup...and quick soup.  So I found this recipe and it called my name immediately.

I really liked this soup but next time I'd pureed the whole thing and then add in the kale.  The texture was a little weird to have it a little of both.  Flavor wise this soup was top notch.  You may think, peanut butter in soup?  Are you sure?  And yes, I am sure - it's delicious!  Another thought is serving it with a nice lemon yogurt sauce on top to brighten it all.  Enjoy any which way you serve it.

Yam and Peanut Stew with Kale
found here

1 tablespoon Olive Oil
1 yellow onion, diced
2 cloves garlic, minced
1 1/2 tablespoons ginger, minced
1 cup dried red lentils
2 lbs of yams, peeled and cubed
3 ripe vine tomatoes, diced
1 teaspoon cinnamon
2 teaspoons cumin
1/2 teaspoon turmeric
dash of cayenne
5 cups vegetable stock
1/2 cup creamy peanut butter
1 head of curly kale
salt and pepper to taste
chopped green onions and peanuts for garnish, optional but highly recommended

1. Heat olive oil in large soup pot over medium heat.  Add onion and sautee until translucent, about 3 minutes.  Add garlic and ginger and sautee until fragrant.  Add the lentils, yams, tomatoes and spices and stir to combine.
2.  Add stock and bring to a boil.  Reduce soup to simmer and cook until yams are tender, about 35-40 minutes.
3.  Add peanut butter and stir well.  Puree soup with an immersion blender.  Add kale and cook until wilted.
4.  Check the seasoning and add salt and pepper.  Serve and garnish with peanuts and green onions, if using.

2015-04-28 19.29.42

March 3, 2015

Chicken Avocado Green Curry

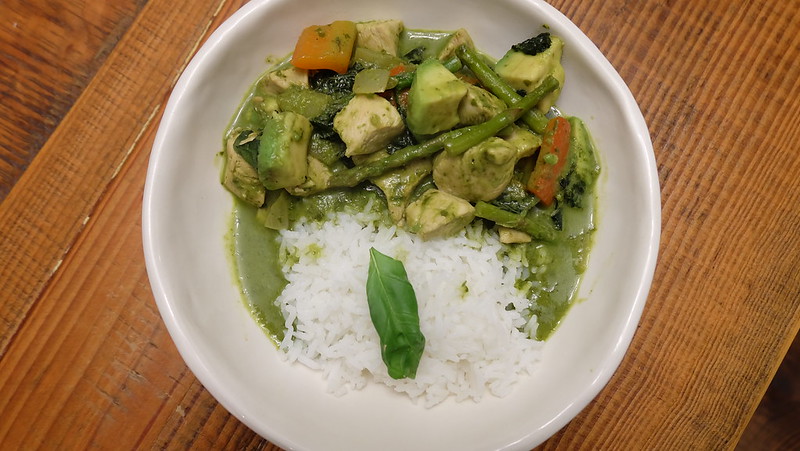
Whenever we order Thai food, which in Portland is one of the only abundant take out options, I often order this dish.  I love the warm but not mushy avocado and the spice level of the green curry is perfect for me.  And although it's not soup it sure is close enough and provides the same comforts.

I was brainstorming what to make for dinner a few nights ago and whenever I want tasty but healthy I usually veer towards a stir fry with lots of veggies and chicken or pork.   But then I saw that DP had stocked up on avocados over the weekend and those avocados were all perfectly ripe at the same time. So I immediately thought of one of my favorite Thai food take out dishes.  I went in search of a recipe and didn't come up with a whole lot for this dish.  So I found a green curry recipe and made up the rest on my own using my mad stir fry skills.  What I turned out was extremely good, and dare I say, better than the take out we usually get.  All the more reason to start making my own Thai food and probably spending a whole lot less.

I hope you enjoy this!  It would be a fun take on a St. Patrick's Day meal as it has loads and loads of green in it.

Chicken Avocado Green Curry
curry sauce adapted from here

  • 4 tablespoons green curry paste
  •  2 cans of coconut milk
  •  1 tablespoon soy sauce (or I use Bragg's liquid aminos)
  •  4 cloves of garlic, crushed
  •  1 tablespoon brown sugar
  • 4 oz of fresh basil
  • 2 tablespoons Sriracha, give or take depending on your desired spice level
  • 2 tablespoon canola or other light oil
  • 1.5 lbs of skinless boneless chicken breast, cut into 1" pieces
  • 1 yellow onion, medium dice
  • 2 medium carrots, cut into 1/2" coins
  • 1 bunch asparagus, fibrous ends discarded and cut into thirds
  • 1 large red bell pepper, cut into 1" pieces
  • 1 bunch of kale, stems discarded and chopped thin slices
  •  3 small avocados, cut into medium dice
  • cooked jasmine rice, for serving
First make the green curry sauce.  In a blender add green curry paste, coconut milk, soy sauce, crushed garlic, brown sugar, basil, and 1 tablespoon of Sriracha.  Blend until smooth and the basil is thoroughly blended.  Set aside. At this point you can start your rice, if using.

In a wok or large skillet, heat oil to almost smoking and add the chicken.  Cook until pieces are lightly browned, about 5 minutes.  Remove chicken from pan and set aside to add back in later.  Add some more oil to coat the bottom of the pan, turn down heat to medium high and add onion to pan.  Allow to caramelize and then add carrots.  Cook for 3 minutes.  Add in asparagus and bell pepper, cook for another 3-5 minutes until they start to soften.  Add kale and cook for 2 minutes until it starts to wilt.  Then add the cooked chicken and the green curry sauce.  Allow the sauce to come up to temperature.  Taste the curry sauce for desired spiciness and salt level.  Add more soy sauce or Sriracha if you'd like.  Last but not least, add in the diced avocado and allow to warm up, about 1-2 minutes.

Serve with jasmine rice if you'd like.

DSCF3953


January 18, 2015

Kimchi and Tofu Soup with Ground Pork

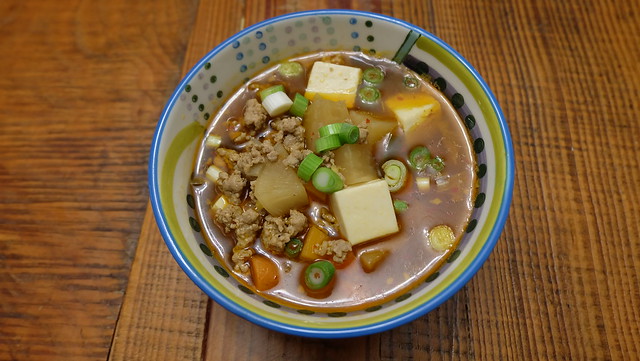
This soup is what I would call the equivalent of an Asian chicken noodle soup.  It seemed like something of a go to comfort soup and was really soothing and used a lot of basic Asian ingredients.  We happen to love kimchi in our household and try to have it on hand to throw on top of eggs, takeout, and whatever else we can think of.  I think kimchi in general is creating quite a following right now and seems to be prevalent on a lot of restaurant's menus, Asian or not.

Another thing about this soup is that it had a very harmonious texture profile.  The tofu was silky, the kimchi added crunch, and the ground pork added a chewy meaty consistency.  It had a little bit of spice from the kimchi and overall was really satisfying for a weeknight meal.  And, as always, I try to pick recipes that have minimal prep for anything I'm making on a weeknight.  This totally fit that order.  It also looked good in my new soup bowls my family gave me for Christmas - thanks family!

I hope you enjoy this; it was fun to make and eat!

Kimchi and Tofu Soup with Ground Pork
adapted from Food 52
  • 1 tablespoon toasted sesame oil
  • 1/2 pound ground pork
  • 4 cloves garlic, minced
  • 1 tablespoon ginger, minced
  • 2 cups kimchi
  • 6 cups chicken stock 
  • 3 medium carrots, cut into medium dice 
  • Bragg's liquid aminos, to taste
  • 7 ounces soft tofu, chopped into cubes
  • Green onion, to serve
  1. In a medium saucepan, heat oil on high until hot. Add ground pork and cook, breaking up clumps, until no longer pink. Add garlic and ginger and stir until fragrant. Add kimchi and cook for a few minutes until hot. Pour in stock and about a tablespooon of liquid aminos.
  2. Let soup come to a boil, then turn heat to a low simmer and gently add the tofu and carrots. Continue cooking for about 15 minutes. Add more liquid aminos to taste as you go.
  3. Distribute the soup evenly into bowls. Garnish each with a sprinkle of green onion right before serving.
DSCF3853

January 5, 2015

Harissa and Veggie Wild Rice Pilaf with Crispy Prosciutto

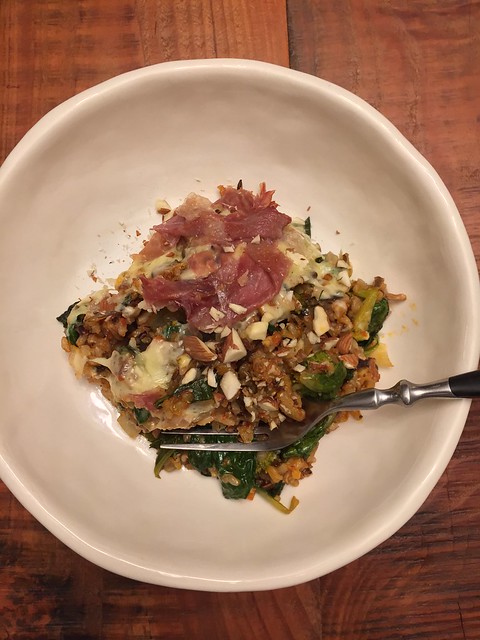
This recipe was very compelling to me even though it could come off as confusing to some.  I was in search of something indulgant, which for me means cheese, but still somewhat healthy and also weeknight friendly.  I recalled seeing this recipe and it checked all of those boxes for me. Also if you aren't already following the Half Baked Harvest blog then please do, I just love her stuff.

The result of this was very satisfying.  I was really in love with this dish.  The crispy prosciutto on top was so good and it would've never occurred to me to crisp it up like that but it added an extra treat to the dish.  If you are trying to go lighter with it you could always leave it off. I also loved the wild rice and it reminded me of a wild rice "stuffing" my mom always made at Thanksgiving time. Also this dish is very versatile in that you could use whatever veggies and cheese you wanted to the mix and still come up with something great.  This would also make a lovely side dish but I ate it as my main.  I went back for seconds of course because it was just that good.  I ate it all week for dinner and it stands up really well for leftovers.

A really great weeknight meal for the new year - enjoy!

Harissa and Veggie Wild Rice Pilaf with Crispy Prosciutto
slightly adapted from Half Baked Harvest

  • 1/4 cup olive oil
  • 1/2 medium yellow onion, chopped
  • 2 cloves garlic, minced
  • 4 cups cooked wild rice
  • 1/3 cup store bought (or try homemade) harissa
  • 1/2 cup fresh broccoli, cup into small pieces
  • 12 oz. fresh spinach
  • 1 tsp. dried dill
  • 1/4 cup fresh cilantro, chopped. plus more for garnish
  • 4 oz. dill cheddar cheese
  • 2 oz. gouda cheese
  • 5 oz thinly sliced prosciutto
  • 2 tblsp. toasted and chopped almonds
  • salt and pepper
Grease a 2-3 quart baking dish with butter or olive oil.  Preheat oven to 375 degrees.  Cook wild rice and set aside.  Heat a very large skillet or wok over medium-high heat.  Once hot add 2 tblsp. of olive oil, the chopped onions and minced garlic.   Cook 8-10 minutes or until onion is soft and lightly caramelized. Add the broccoli, spinach, cilantro and dill and cook about 3-5 minutes longer or until spinach is wilted and broccoli is slightly softened. Remove from heat and stir in the cooked wild rice, harissa and remaining 2 tblsp. of olive oil.  Pour mixture into prepared casserole dish and cover with grated cheeses.  Lay out prosciutto evenly over top of cheese.  Bake for about 20-30 minutes until prosciutto is crispy.  Remove and sprinkle with cilantro and almonds.  Serve immediately.

2014-11-21 19.37.14 HDR

December 30, 2014

Sweet and Sour Beef Brisket - 100th Post!

Happy 100th post to us!  We've been through our ups and downs with this blog over the years but Mostly Soup is still kicking.  Thanks to all those who read our stuff.  We like keeping this blog up for a reference journal of our own accord and those who follow along are icing on the cake.  So raise a glass to you - THANK YOU!

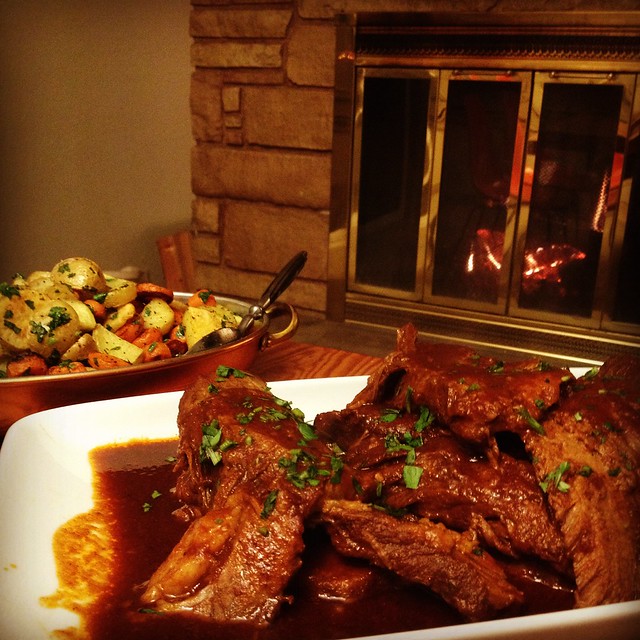
I made this classic beef brisket when the rain first started in and paired with some red wine and a warm fire it was just the trick for coziness.  It would be the perfect dish to make for a stay at home New Years Eve celebration.  It feels decadent and rich but is really hands off and easy.  I didn't feel the need to make any sort of adjustments to this recipe; it was great just the way it is.  Just a heads up that you do need to start this recipe the night before you plan to serve it, or in the morning time so you have the whole day to rest it.

I roasted up some carrot and potato "coins" to go along with it.  If you have the Smitten Kitchen cookbook this recipe is in there but it's as easy as cutting up the potatoes and carrots in coin shapes and roasting until done with your favorite seasonings.

In any case I hope you get to try this out before winter is over.  Have a very happy New Years (with or without this brisket)!!

Sweet and Sour Beef Brisket
not adapted at all from Smitten Kitchen cookbook

•  4-to-5-pound (1¾ to 2¼ kg) piece beef brisket
•  1½ teaspoons kosher salt, plus more for initial seasoning of meat
•  Freshly ground black pepper
•  1 cup (235ml) beef stock
•  3 tablespoons (50 grams) tomato paste
• 1/4 cup (50 grams) brown sugar, light or dark
•  4 teaspoons paprika
•  2 teaspoons Worcestershire sauce
•  1/8 teaspoon red chili flakes
•  1 teaspoon garlic powder
•  2 tablespoons (15 grams) onion powder

Season the meat generously on both sides with salt and pepper.  Whisk all of the remaining ingredients together in a bowl.  Preheat your oven to 350 degrees.  Place the meat in a dutch oven (or any other sturdy pot with a lid) and pour the sauce over it.  Put the lid on and roast for 3 hours, or tender enough to pull apart with a fork.

Chill the entire dish in the fridge for several hours or up to one day.  This resting time will enhance the flavor and texture of the meat.  An hour before you are ready to serve it heat the oven to 300 degrees and remove the dish from the fridge.  Skim off any fat that has congealed at the top of the meat.  You can leave some if you like but I skimmed it all for a less oily finish.  Remove the meat and slice into 1/4-1/2 inch slices and put back into the sauce in the pan.  Replace the lid and put into the pre-heated oven.  Reheat until the sauce is bubbly around the edges.  Serve immediately with sauce on the side to pour or spoon over meat.

2014-11-10 19.45.59-1

October 22, 2014

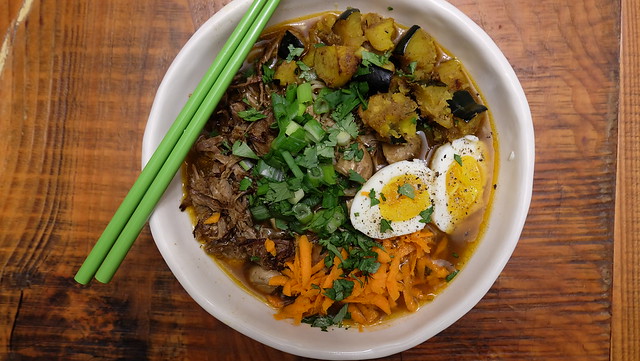
Crockpot Crispy Caramelized Pork Ramen with Roasted Acorn Squash

Yes the name is quite a mouthful.  However this recipe, oh this recipe.  It was definitely one of my favorite meals I've ever made.  To quote DP, my eyes while eating it looked like "Call of the Wild meets Top Chef".  It left me kind of speechless.  I think I was actually dancing with anticipation while caramelizing the pork, because I mean, is there anything better than pork that's been caramelized in sesame oil and a sprinkle of brown sugar after slow cooking it all day long?  I'm beginning to think not.  We made a couple of small edits to make the recipe gluten free but we mostly stuck to the script.  I found this to be just a tad salty for my palette so next time I might ease up on the soy sauce element but I'm very sensitive to salt.  DP thought it was perfectly salty.

The recipe itself is not hard at all but I would say it's a little involved.  For a leisurely Sunday though I didn't mind sporadically tending to it throughout the day, step by step.  Since most of the cooking time happens in the crock pot you could pull this off on a weeknight if you planned well.  Whatever the case may be I highly encourage you to make this ramen.  It is, by far, the tastiest version I've had outside of the real deal.  Enjoy! (and maybe invite me over when you make it)


Crockpot Crispy Caramelized Pork Ramen with Roasted Acorn Squash
modified ever so slightly from Half Baked Harvest

Soup
  • 3 lbs of pork butt (shoulder)
  • 4 cups low sodium chicken broth
  • 1/2 cup + 2 tblsp of low sodium soy sauce (Bragg's if you're gf)
  • 1/4 cup + 2 tblsp of rice vinegar
  • 1/4 cup fish sauce
  • 2 tblsp of red curry paste
  • 1 tblsp of fresh ginger, minced
  • 1 tblsp of sambal oelek (chili paste)
  • juice of 1 lime
  • 1 tblsp chinese five spice
  • 1 tsp black pepper
  • 2 tblsp sesame oil
  • 1/4 cup + 1 tblsp of brown sugar
  • 2 cups shiitake mushrooms, left whole
  • 4 packs ramen noodles (we used gf ones and they were great)
  • 4 soft boiled eggs for serving - I used this method
  • chopped carrots, cilantro, jalapeno + green onions for servings
Curry Roasted Acorn Squash
  • 1 medium acorn squash, seeded and diced
  • 2 tblsp coconut oil, melted
  • 1 tblsp curry powder (we used garam masala)
  • 1 tblsp white miso paste
  • 1 tblsp brown sugar
  • fresh ground pepper, to taste
  1. Add the pork to the bowl of the crockpot.  Pour the chicken broth, 1/2 cup of soy sauce, 1/4 cup of rice vinegar, fish sauce, red curry paste,  ginger, sambal oelek, lime juice, five spice, pepper, and 1 tblsp brown sugar into the pot.  Flip the pork around so it's all evenly coated and mixed together.  Cover and cook over low for 7 hours.
  2. About 40 minutes before the pork is set to be done preheat oven to 400 degrees.
  3. In a small bowl mix together the coconut oil, curry powder, miso, brown sugar, and pepper for the squash.  Add the diced squash and mix to evenly coat.  Bake for 30-40 minutes until soft, tossing a few times so the sides of the squash get a little crispy.
  4. Remove the pork from the crock pot once it's done and place in a bowl to shred with two forks or your hands.  Add mushrooms to broth in crock pot and cover again.
  5. Heat a large skillet or wok over medium high heat.  Add 1 tblsp sesame oil and once hot add about half of the pork.  While cooking sprinkle brown sugar over pork and 1 tblsp of soy sauce and rice vinegar.  Let the pork caramelize for 3-5 minutes stirring only once or twice.  Repeat process with remaining half of pork.  Keep the pork warm - I used the residual heat from roasting the squash to keep mine in the oven.
  6. Add the ramen noodles to the crock pot, cover and cook until soft.  At this point start your soft boiled eggs.  After noodles are soft, add half the pork to the crock pot.  Ladle soup into bowls and garnish with extra pork, carrots, green onions, cilantro, jalapeno, and boiled eggs.  Try not to let your jaw drop with amazement!
 DSCF3731