Showing posts with label not soup. Show all posts

June 15, 2015

Chicken Lettuce Wraps

Okay, okay, this is definitely not soup. But it is easy, fast, delicious, healthy, and perfectly comforting on a warm day. A crisp bite of lettuce and a warm savory filling! There is not much better. I don't typically make a lot of Asiany food, I am always afraid it won't taste as good as it should. But this was pretty darn perfect. Topped with whatever you like or have on hand, this is definitely customizable. I want to eat everything inside a lettuce leaf now! Look out tacos, you have a fierce competitor! Ground turkey or pork would also work well here!

Chicken Lettuce Wraps
Recipe from The Kitchn </u>
Serves 4 as a main course, or 2 people for two meals!

3 tablespoons hoisin sauce (gluten-free, if needed)
2 tablespoons soy sauce (or 1 tablespoon tamari, if gluten-free)
2 tablespoons rice wine vinegar
1 teaspoon sesame oil
1 pound ground chicken, white meat or dark meat (or ground turkey)
2 teaspoons vegetable oil, divided
8 ounces mushrooms, chopped small
1 8-ounce can water chestnuts, rinsed, drained and chopped small
4 cloves garlic, minced
1-inch piece ginger, minced (about 1 tablespoon)
1/2 cup sliced green onions (from about 6 green onions), divided
2 small heads Bibb or butter lettuce (we ate one whole head of Boston lettuce for one 2-person meal, and will eat the other head with leftovers!)

Optional extras: chopped red onions, chopped bell peppers,  grated carrots, extra green onions, red pepper flakes, hot sauce 


Mix together the sauce: Combine 3 tablespoons of the hoisin sauce, soy sauce, rice wine vinegar, and sesame oil in a small bowl. Whisk to combine and keep near the stove. (If you'd like a thicker sauce, whisk in 1 teaspoon of cornstarch.)

Heat a teaspoon of oil in a skillet over medium heat. Add the ground chicken and cook until cooked through and no longer pink, 7 to 8 minutes. Break up the chicken into small crumbles as you cook. Transfer the cooked chicken to a clean bowl.

Warm the other teaspoon of oil in the skillet. Add the chopped mushrooms and cook until tender, about 5 minutes. Stir in the chopped water chestnuts, garlic, and ginger, and cook until aromatic, about 30 seconds.

Transfer the cooked chicken back to the pan with the vegetables, along with half of the green onions.

Pour the sauce over the top of the chicken mixture and stir to coat. Cook just until you hear bubbling and the sauce is warmed through, 30 to 60 seconds. Taste a spoonful of the mixture and add more hoisin sauce if you'd like a stronger flavor. (I found it to be perfect as is!)

Break off all the lettuce leaves and pile them on a plate in the center of the table, along with small dishes with hot sauce, red pepper flakes, and the remaining sliced green onions. Transfer the hot chicken mixture to a serving dish, or serve straight from the skillet. Give everyone a spoon and let them dig in — place a generous spoonful of chicken mixture in the middle of a lettuce leaf, top with whatever looks delicious, and dig in! 

Yum!

January 5, 2015

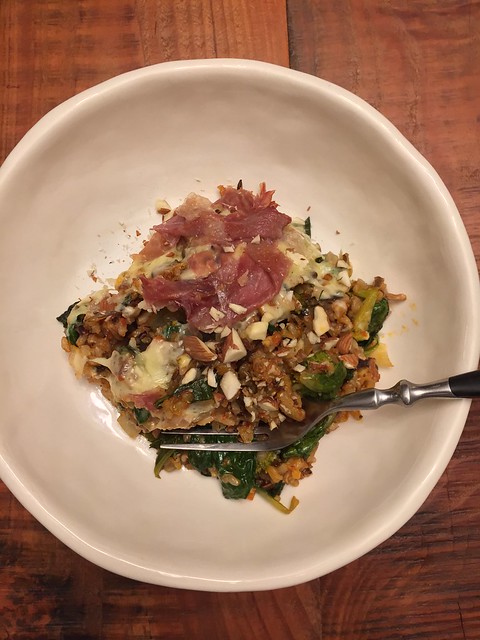
Harissa and Veggie Wild Rice Pilaf with Crispy Prosciutto

This recipe was very compelling to me even though it could come off as confusing to some.  I was in search of something indulgant, which for me means cheese, but still somewhat healthy and also weeknight friendly.  I recalled seeing this recipe and it checked all of those boxes for me. Also if you aren't already following the Half Baked Harvest blog then please do, I just love her stuff.

The result of this was very satisfying.  I was really in love with this dish.  The crispy prosciutto on top was so good and it would've never occurred to me to crisp it up like that but it added an extra treat to the dish.  If you are trying to go lighter with it you could always leave it off. I also loved the wild rice and it reminded me of a wild rice "stuffing" my mom always made at Thanksgiving time. Also this dish is very versatile in that you could use whatever veggies and cheese you wanted to the mix and still come up with something great.  This would also make a lovely side dish but I ate it as my main.  I went back for seconds of course because it was just that good.  I ate it all week for dinner and it stands up really well for leftovers.

A really great weeknight meal for the new year - enjoy!

Harissa and Veggie Wild Rice Pilaf with Crispy Prosciutto
slightly adapted from Half Baked Harvest

  • 1/4 cup olive oil
  • 1/2 medium yellow onion, chopped
  • 2 cloves garlic, minced
  • 4 cups cooked wild rice
  • 1/3 cup store bought (or try homemade) harissa
  • 1/2 cup fresh broccoli, cup into small pieces
  • 12 oz. fresh spinach
  • 1 tsp. dried dill
  • 1/4 cup fresh cilantro, chopped. plus more for garnish
  • 4 oz. dill cheddar cheese
  • 2 oz. gouda cheese
  • 5 oz thinly sliced prosciutto
  • 2 tblsp. toasted and chopped almonds
  • salt and pepper
Grease a 2-3 quart baking dish with butter or olive oil.  Preheat oven to 375 degrees.  Cook wild rice and set aside.  Heat a very large skillet or wok over medium-high heat.  Once hot add 2 tblsp. of olive oil, the chopped onions and minced garlic.   Cook 8-10 minutes or until onion is soft and lightly caramelized. Add the broccoli, spinach, cilantro and dill and cook about 3-5 minutes longer or until spinach is wilted and broccoli is slightly softened. Remove from heat and stir in the cooked wild rice, harissa and remaining 2 tblsp. of olive oil.  Pour mixture into prepared casserole dish and cover with grated cheeses.  Lay out prosciutto evenly over top of cheese.  Bake for about 20-30 minutes until prosciutto is crispy.  Remove and sprinkle with cilantro and almonds.  Serve immediately.

2014-11-21 19.37.14 HDR

December 30, 2014

Sweet and Sour Beef Brisket - 100th Post!

Happy 100th post to us!  We've been through our ups and downs with this blog over the years but Mostly Soup is still kicking.  Thanks to all those who read our stuff.  We like keeping this blog up for a reference journal of our own accord and those who follow along are icing on the cake.  So raise a glass to you - THANK YOU!

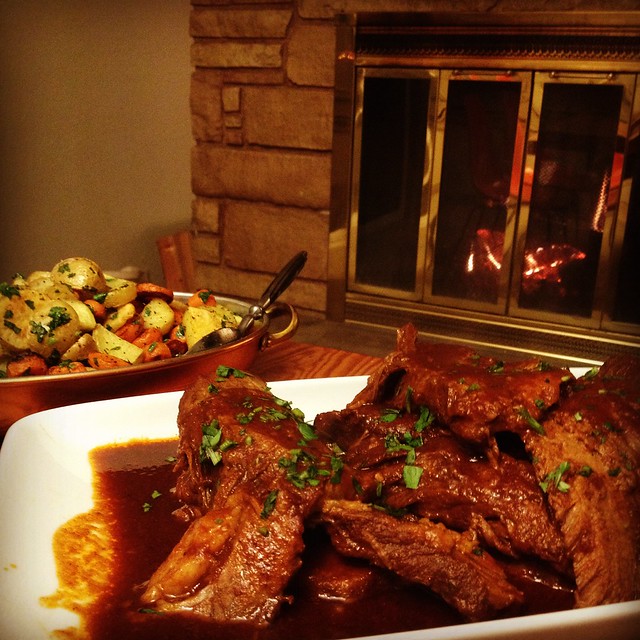
I made this classic beef brisket when the rain first started in and paired with some red wine and a warm fire it was just the trick for coziness.  It would be the perfect dish to make for a stay at home New Years Eve celebration.  It feels decadent and rich but is really hands off and easy.  I didn't feel the need to make any sort of adjustments to this recipe; it was great just the way it is.  Just a heads up that you do need to start this recipe the night before you plan to serve it, or in the morning time so you have the whole day to rest it.

I roasted up some carrot and potato "coins" to go along with it.  If you have the Smitten Kitchen cookbook this recipe is in there but it's as easy as cutting up the potatoes and carrots in coin shapes and roasting until done with your favorite seasonings.

In any case I hope you get to try this out before winter is over.  Have a very happy New Years (with or without this brisket)!!

Sweet and Sour Beef Brisket
not adapted at all from Smitten Kitchen cookbook

•  4-to-5-pound (1¾ to 2¼ kg) piece beef brisket
•  1½ teaspoons kosher salt, plus more for initial seasoning of meat
•  Freshly ground black pepper
•  1 cup (235ml) beef stock
•  3 tablespoons (50 grams) tomato paste
• 1/4 cup (50 grams) brown sugar, light or dark
•  4 teaspoons paprika
•  2 teaspoons Worcestershire sauce
•  1/8 teaspoon red chili flakes
•  1 teaspoon garlic powder
•  2 tablespoons (15 grams) onion powder

Season the meat generously on both sides with salt and pepper.  Whisk all of the remaining ingredients together in a bowl.  Preheat your oven to 350 degrees.  Place the meat in a dutch oven (or any other sturdy pot with a lid) and pour the sauce over it.  Put the lid on and roast for 3 hours, or tender enough to pull apart with a fork.

Chill the entire dish in the fridge for several hours or up to one day.  This resting time will enhance the flavor and texture of the meat.  An hour before you are ready to serve it heat the oven to 300 degrees and remove the dish from the fridge.  Skim off any fat that has congealed at the top of the meat.  You can leave some if you like but I skimmed it all for a less oily finish.  Remove the meat and slice into 1/4-1/2 inch slices and put back into the sauce in the pan.  Replace the lid and put into the pre-heated oven.  Reheat until the sauce is bubbly around the edges.  Serve immediately with sauce on the side to pour or spoon over meat.

2014-11-10 19.45.59-1

December 29, 2014

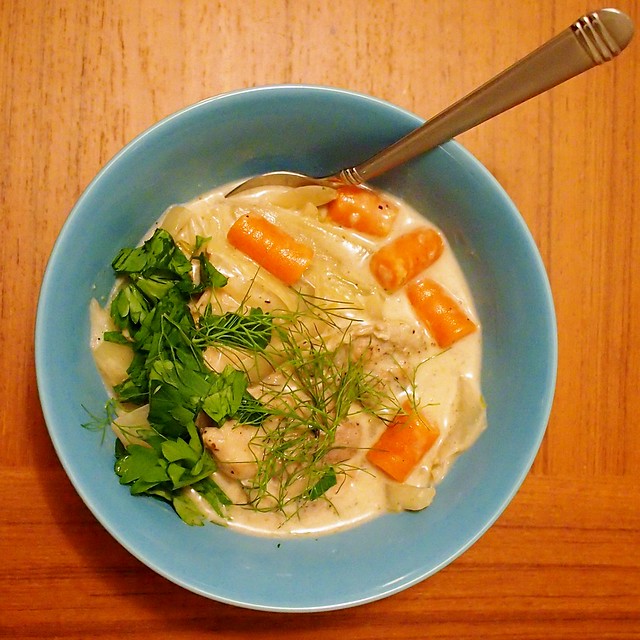
Quick-Braised Chicken with Fennel and Endive

It is officially winter, and I have comfort food on the brain.  I cannot for the life of me figure out how I found this recipe, but it was probably from some one-pot meal round-up which I always love because who wants to clean more than one pot?  

Other things that I liked about this: I had never used endive in a soup before, I am slightly obsessed with fennel, and I love anything with white wine and cream, so this was a no brainer.  

This actually isn't a soup, but because I used boneless/skinless chicken thighs, I probably should have used more or reduced the liquid a bit more.  We ate it just as is with some bread, but it would be great over mashed potatoes, pasta, or rice to soak up the yummy juices.  If I make this again, I would add some mushrooms and saute some of the veggies a bit, maybe caramelize the fennel.  The endive was great, it held a bit of crunch and surprised me!

In any case, this was super tasty and really hit the spot, as far as winter comfort goes.  Here is the recipe as I made it.

Quick-Braised Chicken with Fennel and Endive
Serves 4

2 pounds skinless/boneless chicken thighs
2 Tbls butter 
1 Tbls canola oil
2 medium fennel bulbs
4 heads belgian endive
1 large shallot
4 small carrots (optional)
1/2 cup white wine
1/2 cup chicken broth
1/2 cup heavy cream
1/4 cup Italian parsley
salt & pepper to taste


Sprinkle chicken with 1 tsp. each salt and pepper. In a dutch oven over medium-high heat, melt 1 Tbsp butter with the oil. Add chicken in a single layer and cook, without moving, until browned underneath, about 5 minutes. Turn over and cook until second side is lightly browned, about 2 minutes. Transfer chicken to a plate, drain fat from pan. (This is where I wish I would have browned the veggies up a bit but it did not even occur to me.)

While the chicken is browning, trim fennel bulbs (reserve 1/4 cup fronds) and cut bulbs into quarters, core and thinly slice. Trim ends of endive and quarter heads length­wise. Chop shallot. chop carrots into bite sized chunks.

Return pan to medium-high heat. Add wine and broth and stir, scraping bottom, to release browned bits from pan. 

Reduce heat to a simmer.  Add chicken, fennel, endive, shallot, carrots and re­­maining butter. Cover and let simmer, stirring occasionally, until chicken is cooked through, about 10-15 minutes.

Add cream to pan, increase heat to high, and cook uncovered, stirring, until slightly thickened, about 5 minutes. Season with salt and pepper. Spoon into a shallow bowl and sprinkle with parsley and reserved fennel fronds.

2014-12-09 Quick Braised Chicken 008

October 31, 2014

Burmese Noodles

When I saw this recipe I am pretty sure I squealed with joy.  There used to be this fantastic Burmese restaurant in The Castro District of San Francisco where I ate noodles on a magical jungle patio as often as possible, and I was dying to try this recipe immediately and slurp delicious noodles in a nostalgia haze.

The recipe was easier than I expected it to be, with the payoff of a very flavorful sauce at the end.  The hardest part was probably finding shrimp paste (belachan), which I admittedly did not try too hard to track down, assuming it would be anywhere.  I was wrong, and so instead of trekking to an Asian market, I googled to find a substitute and it worked out fine. Blending up the spice mixture as the base of the soup is different, but it was a lot faster than dicing and sauteing everything separately.

These noodles are hearty and delicious, not quite a soup, but still a bit saucy, with sort of a mild curry flavor (though it did not have the exact right flavor that I was dreaming of).  I will probably make this again but I will try to track down the shrimp paste and see if it hits closer to home.  I loved the chicken in this dish, it was super tender and delicious from cooking in the coconut broth, and next time I may add some mushrooms and spinach, which probably wouldn't be considered Burmese at all anymore, but I just think they would taste good with this delicious sauce!

Burmese Noodles
Slightly adapted from Food52
Serves 4 - 6 hungry people

2 medium yellow onions, chopped roughly
4 garlic cloves, chopped
1 tsp fresh ginger, grated
1 tsp shrimp paste (belachan) or 2 Tbls fish sauce or 2 Tbls anchovy paste
1 Tbsp water (if using fish sauce, omit this ingredient)
2 Tbsp canola oil
1 tsp sesame oil
1/4 tsp turmeric powder
2 Tbsp chili powder (plus a little extra to serve)
1 1/2 pounds boneless, skinless chicken thighs, chopped into bite-sized pieces.
1 can coconut milk (14 oz)
2 tsp salt
12 oz packet of rice noodles
1 shallot, thinly sliced and fried to a crisp
3 eggs, boiled and chopped
2 Tbsp cilantro, chopped fine
2 limes, quartered
sambal olek chili sauce (optional)

Place the chopped onions, garlic, ginger, shrimp paste, and water (or fish sauce)  in a blender or food processor. Pulse well until you have a smooth paste.

Heat canola and sesame oils in a Dutch oven over medium heat.  Add the onion/garlic/ginger blended mixture and saute for about 5 minutes to get the rawness out of the onions.

Add 1/4 tsp turmeric and 2 Tbsp chili powder, stirring to distribute throughout the onion mixture.

Add the chopped up chicken to the pot along with the salt.  Cook the chicken for 2 to 3 minutes, stirring well to coat with spice mixture.

Add coconut milk and 1 cup of water. Stir well and bring the soup to a boil. Lower the heat and reduce soup to a simmer.  Cover and let the soup simmer for 20 - 30 minutes, stirring occasionally, until the other components are ready.

While the soup is simmering, juggle these other tasks:

Cook the rice noodles to the package directions.  Drain well and set aside.

Fry up some crispy shallots by heating enough canola oil over medium heat to cover your sliced shallots. Toss the shallots in and stir them around until they are golden brown and crispy.  This took about 15 minutes or so. Remove from the oil with a slotted spoon to drain on a paper towel.

Boil a few eggs, peel them, and chop them up.

If the chicken is cooked through by now, taste your broth. Adjust salt if needed.

Assemble by scooping a large helping of rice noodles into a soup bowl. Top with ladlefuls of soup. The noodles should swim in coconut broth. Add pieces of chicken. Top with crispy shallots, chopped egg, a sprinkling of chili powder, some cilantro, and a large squirt of lime juice.  I also added some sambal olek which was really good with this dish if you like a bit more spice!

2014-10-25 Burmese Noodles 011

October 13, 2014

Applesauce Cake with Caramel Glaze

I'm going to go ahead and say that this is the best dessert I've eaten in a long time, let alone made.  It was seriously good.  This might have something to do with my palate craving fall flavors and this being one of the first fall items I've made this year.  But I also have some serious back up in thinking this cake is the jam.

It also was insanely easy to make.  I made it a little harder by making my own applesauce from scratch, which is not a requirement, but probably made this cake that much better.  Plus making your own applesauce may seem like it's a crazy thing to do when store bought is pretty legit but honestly it's so easy and the fall bounty of apples is upon us.  I got mine at $1/lb at my local farm stand and I've seen grocery store prices hover not too much higher than that.

I have to say that for such an easy cake to make, it's pretty impressive looking and tasting.  So if you have some folks you'd like to impress or a loved one then whip this up and let them think you slaved away.  Happy fall everyone!

Applesauce Cake with Caramel Glaze
made from Food52; applesauce recipe was made up on the fly

Cake:

  •     2 cups all-purpose flour
  •     1 1/2 teaspoons baking soda
  •     1 teaspoon kosher salt
  •     1/4 teaspoon finely ground black pepper
  •     2 teaspoons cinnamon
  •     1 teaspoon ground ginger
  •     1/4 teaspoon ground allspice
  •     2 large eggs
  •     1 cup sugar
  •     1/2 cup light brown sugar
  •     1 1/2 cups unsweetened (preferably homemade) applesauce
  •     2/3 cup vegetable oil
  •     1 teaspoon vanilla

Caramel Glaze:
  •  4 tablespoons butter, cut into chunks
  • 1/2 cup packed light brown sugar    
  • 1/3 cup heavy cream
  • 1/4 teaspoon kosher salt
  • 3/4 to 1 cup sifted confectioners’ sugar
Applesauce:
  • 6 lbs of apples.  I used gala but feel free to use a mix of sweet/tart apples
  • juice of one lemon
  • 1 cup apple juice or cider
  1. If making the homemade applesauce, start with that recipe.  Core apples and cut into medium size chunks.  Add to a large dutch oven or stock pot.  Add lemon juice and apple juice.  Bring to a boil and then let simmer until apples are broken down and soft, about 25 minutes.  Using a hand blender or regular blender, blend the mixture until smooth.  Jar up anything you don't use in the cake recipe.  Feel free to add spices or sugar at this point but you don't need that for the sauce you use in the cake.
  2. Heat oven to 350 degrees and butter/flour a bundt pan.  Sift together flour, baking soda, salt, pepper and spices and set aside.  In large mixing bowl of a stand mixer beat the eggs with both sugars until a light color. Mix in the applesauce, oil and vanilla until smooth.
  3. Using a spatula fold in the dry ingredients - don't over mix.  Pour the batter into the prepared bundt pan and bake for about 45 minutes or until cake tester comes out clean.  Cool the cake in the pan for about 10 minutes before turning it out on a rack to cool completely.  Make sure the cake is cold before glazing.  
  4. Put the butter in a medium saucepan with brown sugar, cream and salt and set over medium heat. Bring to a full rolling boil while stirring constantly.  Boil for one minute exactly then pull off the heat.  Leave the pan to cool for a few minutes.  Then gradually whisk in powdered sugar until you have a thick but pourable consistency.  You might not use all the sugar.  If it becomes too thick then add a splash of cream to thin it out again.  Immediately pour over the cooled cake.  Let the glaze set for a few minutes, or longer, before serving the cake.
IMG_2325[1]


October 1, 2014

Beginning of Fall Bounty Salad

This was a huge surprise and revelation to me, though it may seem an obvious sort of dinner to throw together. I am not usually very successful in my thrown together ideas, at least in my mind (my mister always thinks I am nuts).  But this one, cobbled from a recipe I had in the back of my brain and using up things in the fridge turned out great and I can't wait to make it again.

The abundance of ingredients beginning with B was absolutely not planned and I did not even realize it until I was trying to think of what to call this feast while devouring it.  Bacon, Brussels, Butternut, Broccoli, Balsamic... believe me, this is a combination from the heavens, and was a great way to welcome Fall!

Beginning of Fall Bounty Salad
Adapted from here
Serves 4
  • 1 shallot, sliced
  • 1 lb brussels sprouts, washed and sliced in half (or quartered if they are big ones)
  • 1/2 of a medium butternut squash, peeled and cubed into bite-sized cubes
  • 1 small head of broccoli, cut into small florets 
  • baby spinach
  • 4 slices of thick-cut bacon, sliced into ½ inch pieces
  • 1 tablespoon olive oil
  • salt and pepper
  • balsamic vinegar
  • lemon (optional)

Preheat oven to 400 degrees.  Toss butternut squash with olive oil, salt and pepper. Roast in preheated oven for 15-20 minutes, until the squash is tender but not too mushy.

While the squash is roasting, heat a Dutch oven over medium heat and cook the chopped up bacon until about halfway cooked.

Add the sliced shallot and let it get a little bit soft.  Add the brussels sprouts, broccoli florets, a bit of salt and pepper, and cook over medium heat for about 15 minutes stirring occasionally until the brussels and broccoli are just tender and the bacon is fully cooked.

When your brussels and broccoli are cooked to perfection, add the roasted squash and toss it all together.  Taste and adjust salt and pepper to taste.

Put a handful of baby spinach into each bowl. Add a scoop of the bacon, brussels, broccoli, butternut, shallot mixture.

Drizzle balsamic over each bowl, and squeeze a bit of lemon on also if you wish.
Serve immediately!

not the most photogenic thing, but so tasty!

August 12, 2014

Garlicky Kale Pasta Salad

This is really the most delicious pasta salad I have ever had.  We ate it all week and I didn't even complain.  

The magic of this simple sounding recipe is in the garlic-infused olive oil.  It just flavors everything so perfectly.  The little creases in the bowtie pasta catch all the little bits of garlic/pepper/pine nuts/cheese and it is so so good. We ate this all week with various things on the side (salmon being a standout) but even just tossing in some tuna, smoked salmon, shredded chicken, or even garbanzo beans would be a great way to fill out this dish.  One night I added in some chopped fresh basil and it was a nice way to add some freshness. 

This is a great, fulfilling pasta dish full of greens and super comforting, perfect for a summer night and so easily adaptable, mostly made from pantry items! You could really use any other greens you have on hand instead of kale--spinach, Swiss Chard, or arugula would go great.  When I tasted the pasta after tossing it with the garlic/oil/salt/pepper mix before adding any of the other stuff it was pretty dang good just like that. So use your imagination!

Garlicky Kale Pasta Salad
Adapted from The Pioneer Woman


  • 1 pound Bowtie Pasta (Farfalle)
  • 3 Tablespoons Pine Nuts (chopped if you want)
  • 1/4 cup Olive Oil
  • 6 cloves Garlic, minced
  • 2 teaspoons Salt, more to taste
  • 1 teaspoon Black Pepper, more to taste
  • 2 smallish bunches Kale, finely sliced (I had about 6 cups once it was sliced up)
  • 6.5 oz can of sliced Black Olives, or fancier olives if you prefer
  • 4 ounces weight Parmesan Cheese, shaved
  • 2 Tablespoons fresh lemon juice

    Cook pasta according to package directions including a healthy dose of salt. Drain, rinse with cold water, and add to a large bowl. Set aside. 

    While the pasta cooks, add pine nuts to a small skillet over low heat. Toast slowly over the course of 8-10 minutes, tossing regularly. Remove from the skillet and set aside.

    In a large skillet, heat olive oil and garlic over low heat so that the garlic slowly infuses the oil. When the oil starts to cause the garlic to sizzle, stir around so the garlic doesn't get too brown. When garlic starts to turn golden, add salt and pepper, stir, and set aside for 5 minutes. 

    After 5 minutes, pour the oil mixture (scraping the salt, pepper, and garlic) all over the bowtie pasta. Toss to combine and set aside.

    Set the same skillet (without cleaning it) over medium-high heat. Add the kale and cook for 5 minutes, or until partly wilted. 

    Add kale, olives, pine nuts, and lemon juice to the pasta and toss it all together. Check to make sure it's no longer warm, then add Parmesan shavings and toss. Taste for seasonings and add more salt, pepper, and lemon if needed. 

    Chill for at least 1 hours before serving. 

August 6, 2014

Stuffed Eggplant with Pork

This is not exactly a summer meal but it turned out so good I decided to post it anyhow.  My mom and I have a standing Saturday date at the farmer's market and this time of year in the PacNW it's a bounty that is all for the taking.  Every single stand looks like a picture out of a cookbook.  I had a hard time restraining myself.  One of the things I did end up with in my basket was some beautiful small eggplants. I always feel good buying these because they are DP's favorite vegetable.  To which I had two people exclaim to me on that same day, "Who's favorite vegetable is eggplant?!?"  He's an odd bird that one.  Fortunately, I like eggplant too so I was on my way to something good for dinner.

In the summertime I feel you can't go wrong with veggies and protein so I thought a meat stuffed eggplant sounded great.  I ended up finding a recipe out of the beautiful cookbook Jerusalem.  This one was for lamb stuffed eggplant and I'm not such a huge lamb fan, unlike Michelle.  So I substituted ground pork in its place.  I made a few other small adjustments.  Next time I think this would be even lovelier with a nice yogurt sauce spooned on top.  Come fall I'll be giving it another go around. Here is the recipe as I made it.

Stuffed Eggplant with Pork
adapted from Jerusalem cookbook
  • 3 small eggplants, halved lengthwise
  • 3 tablespoons olive oil
  • 1 teaspoon ground cumin
  • 1 tablespoon hungarian paprika
  • 1/2 tablespoon cinnamon
  • 1 medium onion, finely chopped
  •  1/2 ground pork or any other ground meat you prefer
  • 3 tablespoons pine nuts
  • 3/4 cup fresh parsley, minced
  • 2 teaspoons tomato paste
  • 1 1/2 teaspoons sugar
  • 1/2 cup water
  • 1/2 tablespoon tamarind paste
  • 1/2 tablespoon lemon juice
  • 2 cinnamon sticks
  • Salt and freshly ground pepper
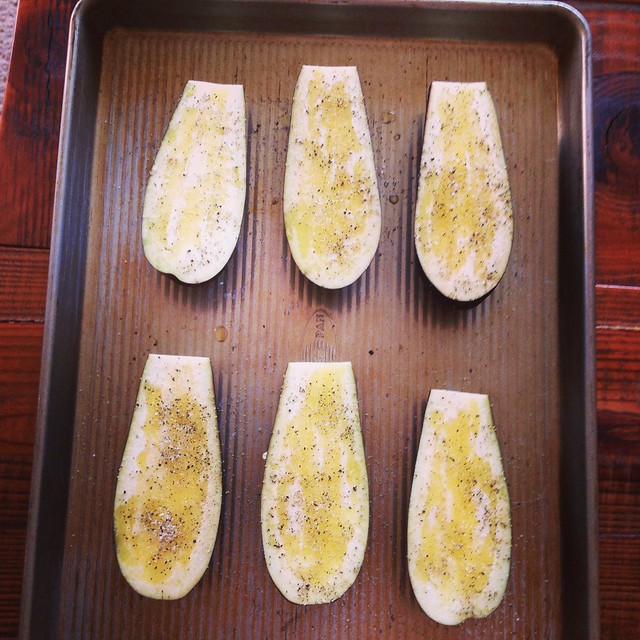
Preheat the oven to 425.  Place the halved eggplants in a roasting pan with sides and brush with 2 tablespoon of the olive oil.  Sprinkle with salt and pepper and let roast for 20 minutes, until golden brown and then allow to cool slightly.

While the eggplants roast start making the filling.  Heat the remaining 1 tablespoon olive oil in a medium frying pan over medium heat. Mix together the cumin, paprika and cinnamon and add half of this mixture to the pan, along with the onions.  Cover over medium-high heat for about 8 minutes. stirring often.  Add the ground meat, pine nuts, parsley, tomato paste, 1 teaspoon of the sugar and salt and pepper.  Continue to cook and stir for another 8 minutes or until meat is cooked through.

Place the remaining spice mix in a bowl and add the water, lemon juice, tamarind paste, cinnamon sticks, a sprinkle of salt and the remaining sugar.  Stir well.

Reduce the oven temperature to 375.  Pour the spice mixture into the bottom of the pan.  Spoon the meat mixture into each eggplant, heaping.  Cover tightly with foil and return to the oven for 1 1/2 hours.  Twice during cooking baste the eggplants with the sauce and add more water if it starts to dry out.  The eggplants should be completely soft at the end.  Serve warm or even at room temperature.

2014-07-28 18.33.26-1

I totally failed at taking a final picture - whoops.


July 22, 2014

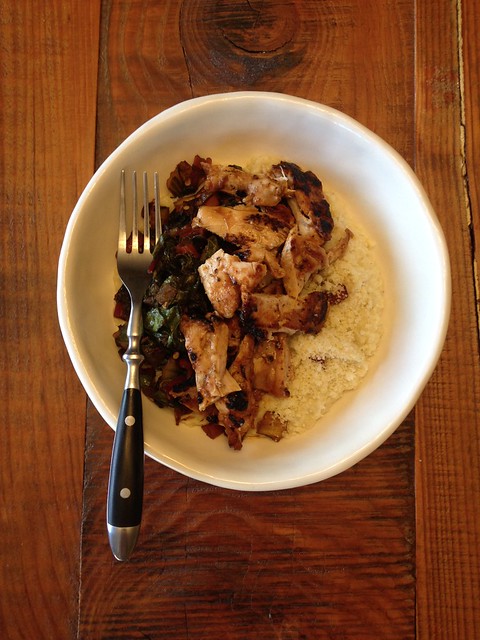
Fresh Corn Polenta - with a side of BBQ Chicken and Balsamic Pepper Flake Chard

Let's just get one thing straight right off the bat.  This post is all about the Fresh Corn Polenta.  When I stumbled across this recipe I thought - must try, immediately.  This recipe is the epitome of summer.  I'd say if it didn't require turning on the stove (for like 10 minutes, tops) it might be the king of the summer recipes.  But we can't all be perfect, can we?  Anyhow, please do give this recipe a go.  It requires little work, few ingredients, and a huge pay off.  Summer corn is one of life's simple pleasures and this, this my friends, is the way to highlight it.

As I grated the corn for the polenta I had one of those "no duh" moments with the realization that the starch that's hiding in the cob of the corn pockets is what naturally thickens this polenta right up.  I mean, where the heck did I think corn starch comes from? Tomatoes? Don't answer that.

I decided to top my polenta off with some super simple chicken marinated in BBQ sauce and a sautee of rainbow chard.  I dressed the chard with red pepper flakes and balsamic to give it some heat and acid to bounce off the super sweet corn polenta.  This meal was so good.  I give it two very enthusiastic thumbs up.

Fresh Corn Polenta
from here
Serves 3

  • 5 ears of corn - I used sweet white but feel free to use the less sweet yellow
  • 1 tablespoon of butter + 1 tablespoon olive oil
  • Salt and Pepper
  • Parmesan, grated (optional)

Clean the corn, removing all husks and silk threads. Working over a bowl, grate the corn using the large grate side of a box grater.  You will end up with a pulpy wet mixture.  Melt the butter and olive oil in a saucepan over medium heat.  Add the grated corn, stir in some salt and pepper. Allow mixture to cook over medium low heat, stirring it often so it doesn't burn, until it becomes thick.  Serve immediately with some grated parmesan, if using.

To make a full meal of this, add whatever sauteed green suits your fancy and some protein.  Really you can't go wrong with whatever you decide to whip up and add on top.  Happy Summer!

2014-07-21 19.33.43

June 1, 2014

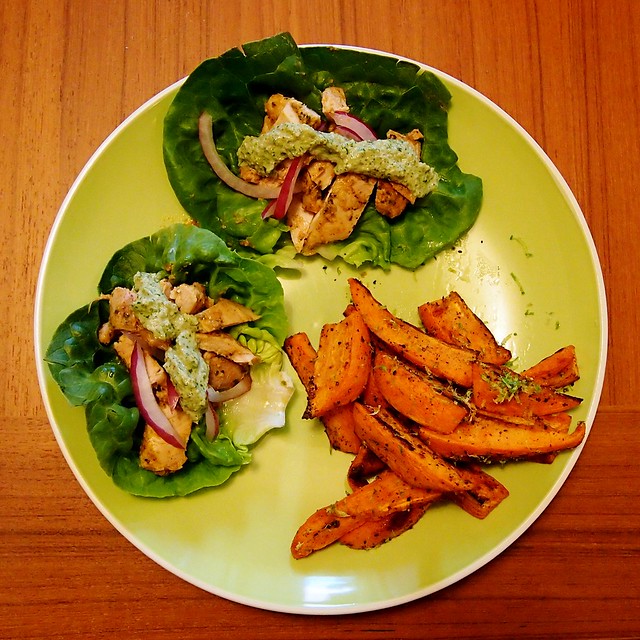
Coriander Chicken Lettuce Wraps

When the weather is nice for three days and then turns rainy suddenly, as May in Portland is wont to do, your grilling plans can be shattered.  Luckily this delicious marinade turned out beautifully in the oven and aside from the chicken and fresh ginger, I already had all of the ingredients on hand.  

This chicken is super flavorful and just spicy enough, and turned out extremely tender chicken.  It satisfied a craving for Indian food without a super long marinating time or slow cooking or anything like that.  It came together quickly, cooked easily, and was so extremely satisfying.  I will likely grill the chicken next time and I am positive it will be even more delicious that way, and I may not make any other type of chicken for quite some time. 

We ate this tasty treat wrapped in Boston lettuce leaves, topped with a few chopped red onions and a spicy cilantro walnut sauce.  On the side we had roasted sweet potatoes tossed with fresh lime zest which worked perfectly to balance the spiciness.

2014-05-27 Coriander Chicken 002

The chicken recipe is modified from The Barbecue Bible by Steven Raichlen and here is the recipe as I made it:

Coriander Chicken Lettuce Wraps with Sweet Potatoes

For the chicken:
(serves 6-8)
3 lbs boneless chicken thighs 
1 heaping tsp Cumin
2 heaping tsp ground Coriander
2 tsp freshly ground pepper
8 cloves garlic, peeled and roughly chopped
fresh ginger, a 2 inch piece, peeled and sliced
3 Tbsp olive oil or vegetable oil
2 Tbsp lemon juice (about 1 large lemon)
1 heaping tsp Cayenne pepper (use more if you love spice, less if you don't)
1 1/2 tsp salt
1/2 cup fresh cilantro chopped
1/4 cup water (if needed)

For the sweet potatoes:
(serves 2)
2 smallish sweet potatoes
olive oil
salt & pepper
zest of 1 lime 

For the Cilantro Walnut sauce:
(makes about 1 cup)
1 cup loosely packed cilantro (cut off most of the stems)
3 cloves garlic, roughly chopped
1 jalapeno pepper (seeded if you want a less spicy sauce)
1/2 cup unsalted walnut pieces
1/3 cup fresh lemon juice
1 tsp salt
1/2 tsp freshly ground pepper

First, get your chicken marinating.   Rinse the chicken, blot dry, and place in a baking dish or tupperware that allows the chicken to be in a single layer.  

Using a blender or hand mixer, blend all of the other ingredients for the chicken (minus the water) to a smooth paste.  Add water if needed to obtain a pourable consistency. Spread the paste over the chicken, tossing to coat all over.  Place in refrigerator and let marinate for at least 2 hours, up to 6 hours.

When you are almost ready to cook the chicken, preheat the oven to 425 degrees and cut the sweet potatoes lengthwise into 8 wedges, and then cut those wedges in half. Toss on a parchment-lined cookie sheet lined with olive oil, salt, and pepper.

When the oven is hot and you are getting hungry, take the chicken out of the fridge, and put it onto a foil lined rimmed cookie sheet in a single layer.  Place the sheet of chicken and the sheet of sweet potatoes into the oven.

After 10 minutes, toss the sweet potatoes and flip the chicken.  Check the chicken and potatoes again after another 8 minutes or so.  

While the chicken and potatoes are in the oven, blend up the Cilantro Walnut sauce with that handy hand blender (or regular blender) and taste for seasoning, adding more salt, pepper, or lemon juice as needed.

The chicken should be cooked to 165 degrees internally and the sweet potatoes should be fork tender but slightly crispy on the outside.  When the potatoes come out of the oven, toss them with the zest of one lime.

Chop up some chicken, place it into a fresh crunchy Boston lettuce leaf with a few slices of red onion and a scoop of cilantro-walnut sauce, and eat it like a taco! The sweet potatoes were so so good on the side, and crunchy enough to eat with your fingers like french fries. We ate the leftover chicken in a salad over the next couple of days and it was also so so good.  

Enjoy!


March 27, 2014

Thai Curry Vegetable Pot Pie

I struggled with whether or not to make this recipe.  It sounded so good but the recipe was written a tad poorly and I wondered if it would end up soupy.  In the end I decided that it's the thought that counts and I made quite a few adjustments to make it my own masterpiece.  Not to mention that I'll take just about any chance to roll out a piece of pie dough.  It's so therapeutic and rewarding when it comes together and I always get a thrill when I get it right.  It's easy for this one to get her kicks these days, mmkay?

Also this is a great recipe to make in this weird in between spring time because it's lighter than your traditional pot pie but still is hearty enough to chase away the rainy blues.  I made some changes not only to the vegetables I put in to the mix but also I always opt to make my own crust even though I know it's so much easier to use store bought.  But if you're not feeling it and don't get your kicks the same way I get mine then use that pre-made pie dough! If you do, this recipe is easy as pie.....pot pie.

Also if you aren't into the tofu thing, which I know lots who aren't, chicken would be a perfect meat to substitute in place of that.  After all chicken and pot pie go together like birds of a feather.  Below is the recipe as I made it. 

Thai Curry Vegetable Pot Pie
adapted from here

2 sheets of pre-made whole wheat pie crust (or here is the homemade recipe I use)
12 oz. drained extra firm tofu
2 tbl olive oil
1 yellow onion, diced
2 celery stalks, diced
2 carrots, diced
1 bunch kale, center stems removed and chopped thin
1 small head broccoli, stem removed and chopped into small pieces
3 cloves garlic, minced
1 sweet potato, diced
1 cup fresh or frozen peas
2 tbl soy sauce 
1/2 cup broth of your choice
1/2 can lite coconut milk
2 tsp green curry paste
1 tsp flour
2 tsp fresh herbs of your choice (I used thyme and parsley)
salt and pepper to taste

  1. First prepare your pie dough.  If you're making homemade get that prepared and chilling in the fridge.  If using premade there's usually a thaw period to abide by.
  2. Drain tofu by sandwiching between two plates and put a weight on top for about 10-15 minutes or until most of the liquid has drained out.  Then cut into 1 inch pieces.
  3. Preheat oven to 400 degrees
  4. Heat 1 tablespoon of olive oil in a large wok or skillet. Throw in tofu and cook until golden brown on all sides.  Remove from pan into a large mixing bowl and set aside.
  5. Heat 1 tablespoon of olive oil in same skillet or wok.  Add onion and garlic and saute until translucent.  Add celery, broccoli, carrots and sweet potatoes.  Saute until potatoes are tender.
  6. Add soy sauce and mix with veggies.  Remove veggies and put into the same mixing bowl with tofu.
  7. In the same wok or skillet add green curry paste and allow to heat until aromatic.  Add coconut milk and broth.  Then add the flour and allow to thicken on low heat for about 5 minutes.  Turn off heat.
  8. Prepare your baking pan with the pie dough.  If using pre-made use a 9" pie plate.  I used a larger casserole dish for mine as my homemade recipe made enough dough.
  9. Line the bottom of the pie dough with chopped kale.  Pour the tofu and veggies on top of the kale.  Then add the curry sauce from the pan on top of the veggies.
  10. Place the second pie dough over the top and seal the sides up as decoratively as you please.  Put a few vents by poking fork holes or something decorative as well.
  11. Bake in the oven for 25-30 minutes.  Let sit 5 minutes before serving.  Goes great with a green salad!


March 18, 2014

Rigatoni with Vegetable Bolognese

I should have posted this last week before I went on vacation, but I was so excited and trying to get as much done at work as possible before I left that it sort of slipped my mind. Likewise, I forgot to take an actual photo of anything, because I was too anxious to eat, and all I have to show for this feast is a Vine video and the oohs and aahs of the friends who ate it.

This is one of my favorite pasta dishes to make because it is hearty and rich and feels like a special treat, but it has no meat and makes me feel a little better about myself when I eat seconds.  Next time I am going to toss in some kale or chard at the end to really amp up the veg factor. 

This recipe comes from Giada De Laurentiis, who I love, and her cookbook was the first I bought, a very long time ago when I barely had any interest in cooking. She makes things look so simple and delicious, she convinced me that I could do it!  This is definitely not the first recipe I have made from Giada, and it won't be the last, but so far, it is my favorite and the one I have made the most frequently.  You could just as easily have this sauce with polenta or some other type of noodle, or use it in a lasagna or any way you would use a regular meat bolognese! 

One note:  definitely do not skip the dried mushrooms, and get the best ones you can find. These mushrooms really amp up the flavor and add a richness to the sauce that is missing if you don't use the dried mushrooms plus their liquid.

Vegetable Bolognese
Slightly adapted from Giada De Laurentiis

1-ounce dried porcini mushrooms
1 1/2 cups hot water
3 carrots, peeled and diced 
1 onion, peeled and diced 
1 red bell pepper, seeded and diced
4 garlic cloves
1/4 cup olive oil
2 teaspoons chopped fresh thyme leaves
1 teaspoon chopped fresh oregano leaves 

1 teaspoon red pepper flakes (optional)
2 teaspoons salt
1 teaspoon freshly ground black pepper
8 ounces assorted mushrooms (like shiitake, cremini, and brown), stemmed and chopped
2 tablespoons tomato paste
1/2 cup red wine
1/2 cup mascarpone cheese
1 pound rigatoni pasta
1/4 cup Parmesan


Place the dried mushrooms in a small bowl and cover with 1 1/2 cups very hot water. Set aside and let the mushrooms soften.
Remove the thyme and oregano from their stems, chop them up a bit, and set them aside.

Dice the carrots, onion, bell pepper, and garlic to a fairly small consistency. You want them to be a little chunky but not a regular dice. I think of it as small dice.  Alternately, you can chop them up with a food processor. Pulse the vegetables until finely chopped but still chunky.

Place the olive oil in a large, heavy skillet over medium-high heat. Add the chopped vegetables, thyme, oregano, red pepper flakes (if using), salt, and pepper and cook until tender, about 6 - 10 minutes.

While the vegetables are cooking, destem and chop your mushrooms into small chunks. 

Strain the porcini mushrooms, reserving the porcini mushroom liquid. Chop the now softened porcini mushrooms to small chunks.

Add the porcini mushrooms, fresh diced mushrooms, and tomato paste to the pot and continue cooking, stirring to dissolve the tomato paste, until the mushrooms are softened, about 8 minutes.

Add the porcini mushroom liquid and red wine. Bring the liquid to a boil, reduce the heat to low, and let the mixture simmer until the liquid is reduced by half, about 15 minutes.

While the mushrooms are cooking away, boil a pot of water for the pasta.  Cook the pasta until tender but still firm to the bite, stirring occasionally, about 8 to 10 minutes. Drain pasta, reserving 1/2 cup of the cooking liquid.

Once the liquid in the vegetable mixture has reduced by half and is looking and s melling extra delicious, add the mascarpone cheese and stir until the cheese is incorporated.  This adds a really amazing creaminess that makes this sauce feel so decadent!

If the sauce seems to thick, add a bit of the pasta liquid to thin it out a bit. I did not do this, as I like a thicker sauce.

Toss the pasta with the sauce, top with parmesan and serve!


Watch:

February 25, 2014

Carnitas Taco Salad

Another pork recipe, I know, I know. But I can't help it!  Pork is delicious all the time!  Carnitas is one of those things that I always ordered when I went out to eat for a burrito or tacos but I never considered making it myself.  Once I tried it once I wondered why I had never done it before. It is so easy, super satisfying, and is a little bit magical in the way that it transforms right in front of your eyes from a bubbling cauldron of meat to perfect little tender bites that are crispy on the edges!

I have made carnitas from this recipe many times and tweaked it here and there each time and it is pretty near fool proof. I have always gotten compliments on it and I doubt I will ever use another recipe! Normally I just have this tasty treat on tortillas with some onions, cilantro, and salsa but this time we decided to make a taco salad.  I tossed a mixture of romaine and baby salad mix with a cilantro sour cream lime dressing, and topped this with some warmed black beans, sliced red onions, diced avocado, a little big of roasted tomato salsa, a little big of salsa verde, crumbled queso fresco, and some crispy corn tortilla strips.

It all worked perfectly together and though it took a little more effort, it was worth it to feel slightly less gluttonous.

 Carnitas Taco Salad

Here are the recipes for the carnitas and for the salad dressing! Toss some greens with the dressing, scoop some meat on top and add whatever other toppings sound delicious!

Carnitas
Slightly adapted from Smitten Kitchen

3 pounds boneless pork shoulder or pork butt, cut into 2-inch cubes
1/2 cup orange juice
1/4 cup lime juice (from about 2 to 3 limes) **note: you can also just forgo the lime and use more OJ
4 cloves garlic, peeled and just smashed with the side of your knife
1 Tablespoon ground cumin
1 teaspoon salt, plus more to taste
Water (I find 4 cups is the perfect amount for a 3 lb roast)

1. Place the cut up pork into a large Dutch oven. Add the orange juice, lime juice, garlic, cumin, salt and enough water to just barely cover the meat.
2. Bring the pot to a boil and then reduce the heat to a simmer. Simmer uncovered for two hours. Don’t touch the meat!
3. After two hours, increase the heat to medium-high and while occasionally stirring and turning the pieces, continue to cook for about 45 minutes to an hour, until all of the liquid has evaporated, leaving only the rendered pork fat. Let it sizzle in this fat long enough to brown at the edges, turning pieces gently (they’ll be eager to fall apart), only as needed.
4. When pork is browned and crispy on all sides, it’s ready.
5. Taste and adjust seasonings.  Try not to eat it all straight out of the pot!  Put this into a tortilla or make taco salad!

Cilantro Lime Sour Cream Dressing
Slightly adapted from The Kitchn
Makes about 3/4 cup

1 bunch of loosely packed cilantro, rinsed, stems removed, and roughly chopped (about 1 cup)
1/2 cup sour cream
juice from one lime
2 cloves garlic, roughly chopped
1/2 cup olive oil
2 teaspoons sherry vinegar
1/2 teaspoon kosher salt
A few grinds of freshly-ground black pepper
Water, to thin (a couple tablespoons)

Combine all the ingredients except the water in a blender or use a stick blender until well combined and smooth.  If it seems too thick, drizzle in water a little at a time until it is a consistency you prefer. Taste and add more salt, pepper, or lime juice if necessary.

Watch:


January 24, 2014

Cheesemaking 101 - Mozzerella

Here's a post off the beaten path as this most definitely is not soup.  However it is fairly easy yet something that will make you feel accomplished in the end - much like soup.  DP and I hosted a classical music listening night at our house and picked Mozart for our first gathering.  When deciding upon snacks there were many puns including Mozart-ella sticks, Wolfgang Puck Amadeus pizza, Don Juan almonds and the like.  I saw the shining star as clearly being Mozart-ella so I took the opportunity to teach myself how to make this easy cheese.  It turned out really good despite my worry throughout the process that it wouldn't come together.  But come together it did and served with fresh basil and garlic, our best olive oil (from here), balsamic, and a sprinkle of red pepper flakes and it was a party hit.  It turns out that the adage used when making beer applies to making cheese as well - don't worry, have a homebrew cheeseball.

Even though this recipe might require a stop at a home brewing store the two off the wall supplies needed, rennet and citric acid, are cheap and easy to find.  Also you use so little of each ingredient in each batch that I'll be able to stretch the amounts I purchased for many more cheese making adventures.  Up next, goat cheese...or maybe feta!  A little aside about the whey too; I read from the recipe that the leftover whey can be used in place of water in any bread recipe for an enhanced flavor so I saved mine and will be whipping up a fresh batch of bread this weekend.  Cheese making yields many treats my friends.

Homemade Mozzerella
recipe from The Pioneer Woman

1 gallon of whole milk - preferably raw and unpasteurized if you can find it (I couldn't)
1 1/2 teaspoons of citric acid powder
1/4 teaspoon vegetable rennet
kosher salt to taste

Sprinkle the citric acid powder into a large non-reactive stockpot then add 1/4 cup of water and swirl to dissolve.  Pour the gallon of milk into the pot and stir to combine.  Put the pot over medium-low heat and attach a thermometer to the side of the pot and allow to heat to 90 degrees F.  You may notice a little curdling but this is a good thing.  While that heats up combine the vegetable rennet with 1 cup of water.

When the milk comes to temp remove from the burner and add the rennet/water mixture.  Very gently stir together for about 30 seconds.  Place a lid on the pot and walk leave it alone for exactly 5 minutes - don't touch it in the meantime! After 5 minutes the mixture should resemble a very soft custard.  A note on this - mine looked more like large curds and didn't congeal as much as the recipe pictures looked.  I think this is because I didn't use raw milk so if you don't either and it just looks like a bunch of large curds, don't worry it will still come together.  Return to the burner over medium heat and place the thermometer on once again and bring up to 105 degrees F.

Remove from heat and with a slotted spoon remove all of the curds from the whey (the watery looking part) and place in a colander.  Press down with a spoon or your clean hands to remove as much of the whey from the curds as possible. Place in a microwaveable bowl and microwave on high for 1 minute.  Without burning your hand press on the cheese to drain all of the whey off.  Microwave for 30 seconds a few more times to keep removing as much of the watery whey as possible.  I only did this two times total.  Then knead in salt to taste.  Stretch out the cheese curd to get any more whey that you can out of it.  Shape into a ball and place in a bowl of ice water until completely cool.  Afterwards eat as is or add herbs, seasonings and serve with a crusty baguette as we did.

The final product before it was devoured:
IMG_1909[1]

Video of the making:

January 21, 2012

Sausage and White Bean Cassoulet

This is one of those recipes that you would be proud to serve to company yet it's ridiculously simple. My favorite recipe type by far. While it could definitely be gussied up by adding some confit, some homemade bread crumbs, or maybe serving it over some sort of puree, I liked it just the way it was. Served with some french bread torn right off the loaf, a glass of wine and a simple salad with nothing more than red leaf lettuce and some homemade vinaigrette. Yup, this was winter Friday night staycation worthy alright. Follow it up with a documentary and some downloading of Nico records and I'm in heaven.

I modified the recipe a little and added some spices to the tomatoes before they went into the oven. I also added much more than a "glug" of wine...I like to drink my wine in as many ways as possible. Enjoy!

Sausage and White Bean Cassoulet
recipe from Sweet Sugar Bean

2 pints of cherry tomatoes
4-6 hot Italian sausages OR Chorizo sausages
4 large garlic cloves, smashed
1 onion, cut into wedges
extra virgin olive oil
balsamic vinegar
coarse salt and pepper
few sprigs fresh thyme OR rosemary
3 cups cooked white navy beans or white kidney beans OR 1 19 oz can (540ml) of white beans, rinsed and drained well
chicken broth or white wine(optional)

Adjust oven rack to lowest position and heat oven to 425 *F.
Scatter tomatoes over bottom of dish (reserve about 1/2 cup to add later). Add garlic, onion and sausages over top. Drizzle with balsamic and olive oil. Toss on rosemary and sprinkle with S & P and other spices if using. Bake about 25-30 minutes, for sausages to be golden and tomatoes start to burst. Remove from oven and stir in beans and reserved 1/2 cup of cherry tomatoes. If you'd like a bit more sauce with your beans, add a glug or white wine or chicken stock. Return to oven and bake 20 minutes longer or until beans are cooked through. Serve with bread and butter for dunking; green salad on the side. Makes enough for 4.

DSC02968
Snug as a bug

DSC02974
In go the beans

DSC02981
C'est fini


October 6, 2011

Chicken Pot Pie

We arrived home from a two week trip to Spain to find that fall has hit in Portland! Which is just dandy by me, I sure do love this season. All the traveling and hotel hopping left me yearning to spend the day in my kitchen so I decided to spend my Sunday making this very involved, from scratch, chicken pot pie that I got from the new Bon Appetit magazine. It was the perfect cure for fall weather and the need to cook. I went above and beyond on this one and even pulled the meat from the chicken carcass with my bare hands, a first and most likely a last for me. I'm not as carnivorous as I may have thought after shirking my vegetarian upbringing some 12 years ago. Overall, this recipe turned out really well but I think I prefer Ina Garten's Chicken Stew with Biscuits more. It's an all time favorite. This recipe can be a close second though and one to keep around should I ever need to impress anyone with my chicken ripping skills.


Chicken Pot Pie

slightly altered from Bon Appetit

Crust
2 cups all purpose flour
1 cup whole wheat flour
1 teaspoon baking powder
1 cup (2 sticks) chilled unsalted butter, cut into 1/2" cubes
1/4 cup vegetable shortening

Chicken
2 cups peeled, coarsely chopped carrots
1 large onion, coarsely chopped
1 leek, coarsely chopped
1 3-pound whole chicken
4 celery stalks, coarsely chopped
6 sprigs thyme
1 cup dry white wine
1 tablespoon salt
1 teaspoon whole black peppercorns
1 tablespoon tomato paste

Filling
2 tablespoons dried chanterelle or shittake mushrooms
1 cupo 1/2" slices of carrots
1 cup fresh (or frozen, thawed) peas
1 cup fresh (or I used frozen already peeled) pearl onions
1/2 cup (1 stick) unsalted butter
3/4 cup all purpose flour
6 fresh sage leaves
4 thyme sprigs
2 sprigs rosemary
1 cup button mushrooms
1 cup 1/4" rounds sliced fingerling potatoes
1 egg, beaten to blend
coarse sea salt and ground pepper

PREPERATION:

Crust

Mix flour, salt, and baking powder in a food processor. Add cubed butter and shortening and process until mixture resembles coarse meal with some pea-size lumps. With machine running, add 1/2 cup ice water and process, adding more water by teaspoonfuls if dry, until dough forms. Form dough into a ball; flatten into a disk. Wrap in plastic and refrigerate for 30 minutes. Line a baking sheet with parchment paper. Place chilled dough on a lightly floured surface and roll out to a 12x9 1/2" rectangle, about 1/4" thick. Place on prepared sheet and cover tightly with plastic wrap. Chill. DO AHEAD: Can be made 6 hours ahead. Keep chilled.

Chicken

Preheat oven to 400°. Place carrots, onion, and leek on a rimmed baking sheet and roast until golden brown, about 30 minutes. Transfer to a large pot fitted with a lid. Add chicken, breast side down, celery, thyme sprigs, wine, salt, and peppercorns to pot. Add 8 cups water to cover and bring to a boil. Reduce heat to low and simmer gently for 10 minutes. Remove pot from heat, cover, and poach chicken until cooked through, about 35 minutes.
Remove chicken from pot and set aside until cool. Reserve broth. Shred meat; discard skin and bones. Set a large strainer over another pot. Strain broth into clean pot. Stir in tomato paste. Return to medium heat and simmer, uncovered, until reduced to 5 cups, about 40 minutes. DO AHEAD: Can be made 1 day ahead. Chill uncovered until cool. Cover chicken and broth separately; keep chilled. Rewarm broth before continuing.

Filling

Place dried chanterelles in a small bowl and cover with 1 cup hot water. Let steep for 10 minutes; set aside. Reserve soaking liquid. Cook carrots in a large saucepan of boiling salted water until crisp-tender, about 2 minutes. Using a slotted spoon, transfer to a medium bowl. Add peas to saucepan; cook for 1 minute; transfer to bowl with carrots. Add onions to saucepan and cook until crisp-tender, about 2 minutes. Remove from pot and set aside; let cool. Peel onions. In a large heavy saucepan, melt butter over medium heat. Whisk in flour. Cook over medium-low heat, whisking constantly, until golden brown, about 10 minutes. Whisk in herbs and warm broth from chicken. Using a slotted spoon, transfer chanterelles to saucepan. Pour in soaking liquid, leaving sediment behind. Simmer for 20 minutes. Set a strainer over another large pot. Strain broth into pot; discard solids. Add chicken, carrots, peas, onions, mushrooms, and potatoes. Bring to a simmer. DO AHEAD: Can be made 1 day ahead. Chill uncovered until cool; cover and keep chilled. Rewarm before continuing. Preheat oven to 400°. Spoon filling into an 11x8x2" or 2 1/2-qt. round baking dish. (Add pie bird, if using.) Top with pastry, pinching edges to seal. If not using pie bird, cut a 1" slit in center of crust for steam to vent. Brush pastry with beaten egg, and sprinkle with sea salt and pepper, if desired. Place pot pie on a rimmed baking sheet. Bake until crust is golden brown and filling is bubbly, about 45 minutes.

DSC02923
Poaching the chicken and making the stock base

DSC02928
Stirring the roux

DSC02933
The filling. so good

DSC02943
et voila


April 5, 2011

Lemon Rolls with Cream Cheese Lemon Thyme Glaze

There were a million things pointing me towards making these sweet wonderful rolls. First off, I planted my first herb garden this last weekend! I'm pretty excited about it and I keep smiling every time I walk into my kitchen and see a window sill of fresh herbs smiling back at me. I've managed to use them in just about everything I've made since then but the one that has by far stolen me away is the lemon thyme. Just rubbing your fingers on it leaves the beautiful refreshing smell of lemon on them. It doesn't get much better than that. Secondly, I ran across a recipe for these lemon rolls on The Kitchn that I remembered I had bookmarked some time ago so I stocked up on lemons at the grocery store the very same day.

Those lemons came in handy later that day when I started feeling sick. I must've had about 15 lemon, hot water and honey drinks over the next 24 hours trying to chase the bug away. But alas, I'm home sick today with nothing to do but bake to make me feel better. I realized while making these that yellow is one of my favorite colors and I sure do have a lot of it in my kitchen decor. It's a brighten your day kind of color. The next thing you know I'm stumbling across this post on Poppytalk alerting me that today was in fact declared a day of yellow for Spring Colors Week. Sometimes when you get a good idea it doesn't take a lot of convincing to carry it through but it sure does help when the universe is there to back you up. So, here's my own little tribute to yellow.

I made the recipe as it was posted but I added some fresh lemon thyme to the cream cheese glaze. I also modified the lemon amounts a bit as I think my glaze and filling were a bit too wet and it needed to be adjusted into measurements instead of just whole lemons.

Sticky Lemon Rolls with Lemon Cream Cheese Glaze
Makes 12 large breakfast rolls

Lemon Roll Dough
1 envelope (0.25 ounces, or 2 1/2 teaspoons) active yeast

3/4 cup milk, warmed to about 100°F (warm but not hot on your wrist)
1/2 cup (1 stick) unsalted butter, very soft
1/4 cup white sugar
2 teaspoons vanilla extract
4 1/2 cups flour
1/2 teaspoon salt
1/2 teaspoon nutmeg
2 eggs
2 tablespoons of grated lemon zest
(about 1 lemon)

Sticky Lemon Filling
1 cup sugar
1/4 teaspoon freshly-ground nutmeg
1/2 teaspoon powdered ginger
3 tablespoons unsalted butter, very soft
1/4 cup fresh lemon juice
2 tablespoons grated lemon zest (about 1 lemon)

Lemon Cream Cheese Glaze
4 ounces cream cheese, softened
1 cup powdered sugar
1/2 cup fresh lemon juice
2 tablespoons fresh lemon thyme
2 tablespoons grated lemon zest for garnish
(about 1 lemon)

Make the dough:
Zest and juice the lemons. Divide the zest into three parts. Divide the juice into two parts, and set aside.

In the bowl of a stand mixer sprinkle the yeast over the warmed milk and let it sit for a few minutes. With the mixer paddle, stir in the softened butter, sugar, vanilla, and one cup of the flour. Stir in the salt, nutmeg, and one part (1/3) of the lemon zest. Stir in the eggs and enough of the remaining flour to make a soft yet sticky dough.

Switch to the dough hook and knead for about 5 minutes, or until the dough is elastic and pliable. (If you do not have a stand mixer, stir together the ingredients by hand, then turn the soft dough out onto a lightly floured countertop. Knead the dough by hand for 5 to 7 minutes, or until the dough is smooth, pliable, and stretchy.)

Spray the top of the dough with vegetable oil, and turn the dough over so it is coated in oil. Cover the bowl with plastic wrap and a towel and let the dough rise until nearly doubled — about an hour.

Make the filling:
In a small bowl, mix the sugar with the nutmeg and ginger, then work in the second part of the lemon zest (1/3) with the tips of your fingers until the sugar resembles soft sand. Slowly pour in one part of the lemon juice, stirring. Stop when the sugar and lemon juice form a wet, clumpy mixture. (You may use all of the reserved half of the lemon juice; you may stop before completely adding that half of the lemon juice.)

Assemble the rolls:
Lightly grease a 13x9 inch baking dish with baking spray or butter. On a floured surface pat the dough out into a large yet still thick rectangle — about 10x15 inches.

Spread the dough evenly with the 3 tablespoons of softened butter, then pour and spread the lemon-sugar mixture over top. Roll the dough up tightly, starting from the top long end. Stretch and pull the dough taut as you roll, to keep the lemon sugar firm inside. Cut the long dough roll into 12 even rolls. Pinch the bottom of each roll closed and place each one, open and cut side up, in the prepared baking dish.

Cover the rolls with a towel and let them rise for an hour or until puffy and nearly doubled. (You can also refrigerate the rolls at this point. Cover the pan tightly with plastic wrap, and place it in the refrigerator for up to 24 hours. When you are ready to bake the rolls, remove the pan from the fridge, and let them rise for an hour.)

Heat the oven to 350°F. Place the risen rolls in the oven and bake for 35 minutes or until a thermometer inserted into a center roll reads 190°F.

Make the glaze:
While the rolls are baking, prepare the glaze. In a small food processor (or with a mixer, or a sturdy whisk), whip the cream cheese and the lemon thyme until light and fluffy. Add the remaining lemon juice and blend until well combined. Add the powdered sugar and blend until smooth and creamy.

Finish the rolls:
When the rolls are done, smear them with the cream cheese glaze, and sprinkle the final remaining lemon zest over top to garnish. Let cool for at least 10 minutes before serving, but do serve while still warm.

lemonthymeplant
My Inspiration


lemons!gratedlemon
A little before and after

teatowel
My pretty tea towel with the dough rising

buns
Makes my mouth water just looking at 'em

onebundone
Another before and after