Showing posts with label creamy. Show all posts

April 30, 2015

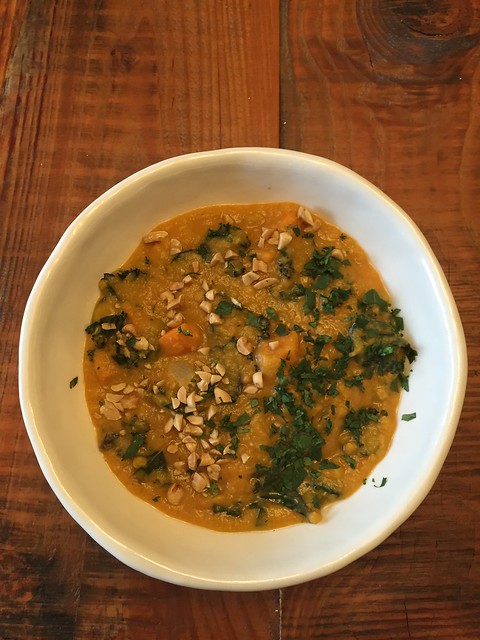
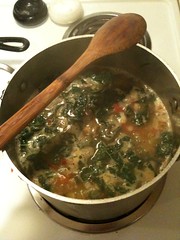
Yam and Peanut Stew with Kale

Around our house we've been feeling pretty uninspired to cook lately.  And there's one big culprit - we bought a house! So that means finding time or energy to think about or do anything has pretty much gone out the window.  Honestly even I get bored of how much we talk about house stuff but still we're super excited that we finally made this dream a reality.

When we have busted out with some cooking it's been for simple and healthy things to make up for all of the eating out we've been doing lately.  Up here in the PacNW we are also in between seasons weather wise so it can change daily what we're in the mood for.  We hit a cold and rainy spot earlier this week and that sent us hankering for some soup.  But healthy soup...and cheap soup...and quick soup.  So I found this recipe and it called my name immediately.

I really liked this soup but next time I'd pureed the whole thing and then add in the kale.  The texture was a little weird to have it a little of both.  Flavor wise this soup was top notch.  You may think, peanut butter in soup?  Are you sure?  And yes, I am sure - it's delicious!  Another thought is serving it with a nice lemon yogurt sauce on top to brighten it all.  Enjoy any which way you serve it.

Yam and Peanut Stew with Kale
found here

1 tablespoon Olive Oil
1 yellow onion, diced
2 cloves garlic, minced
1 1/2 tablespoons ginger, minced
1 cup dried red lentils
2 lbs of yams, peeled and cubed
3 ripe vine tomatoes, diced
1 teaspoon cinnamon
2 teaspoons cumin
1/2 teaspoon turmeric
dash of cayenne
5 cups vegetable stock
1/2 cup creamy peanut butter
1 head of curly kale
salt and pepper to taste
chopped green onions and peanuts for garnish, optional but highly recommended

1. Heat olive oil in large soup pot over medium heat.  Add onion and sautee until translucent, about 3 minutes.  Add garlic and ginger and sautee until fragrant.  Add the lentils, yams, tomatoes and spices and stir to combine.
2.  Add stock and bring to a boil.  Reduce soup to simmer and cook until yams are tender, about 35-40 minutes.
3.  Add peanut butter and stir well.  Puree soup with an immersion blender.  Add kale and cook until wilted.
4.  Check the seasoning and add salt and pepper.  Serve and garnish with peanuts and green onions, if using.


2015-04-28 19.29.42

December 29, 2014

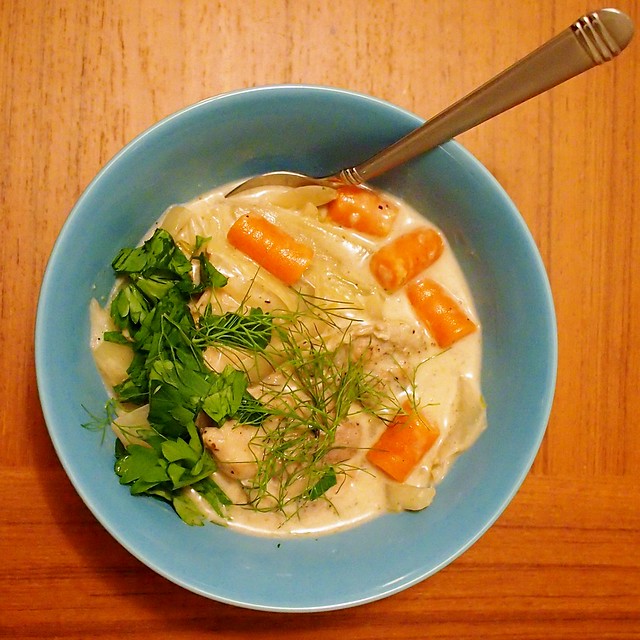
Quick-Braised Chicken with Fennel and Endive

It is officially winter, and I have comfort food on the brain.  I cannot for the life of me figure out how I found this recipe, but it was probably from some one-pot meal round-up which I always love because who wants to clean more than one pot?  

Other things that I liked about this: I had never used endive in a soup before, I am slightly obsessed with fennel, and I love anything with white wine and cream, so this was a no brainer.  

This actually isn't a soup, but because I used boneless/skinless chicken thighs, I probably should have used more or reduced the liquid a bit more.  We ate it just as is with some bread, but it would be great over mashed potatoes, pasta, or rice to soak up the yummy juices.  If I make this again, I would add some mushrooms and saute some of the veggies a bit, maybe caramelize the fennel.  The endive was great, it held a bit of crunch and surprised me!

In any case, this was super tasty and really hit the spot, as far as winter comfort goes.  Here is the recipe as I made it.

Quick-Braised Chicken with Fennel and Endive
Serves 4

2 pounds skinless/boneless chicken thighs
2 Tbls butter 
1 Tbls canola oil
2 medium fennel bulbs
4 heads belgian endive
1 large shallot
4 small carrots (optional)
1/2 cup white wine
1/2 cup chicken broth
1/2 cup heavy cream
1/4 cup Italian parsley
salt & pepper to taste


Sprinkle chicken with 1 tsp. each salt and pepper. In a dutch oven over medium-high heat, melt 1 Tbsp butter with the oil. Add chicken in a single layer and cook, without moving, until browned underneath, about 5 minutes. Turn over and cook until second side is lightly browned, about 2 minutes. Transfer chicken to a plate, drain fat from pan. (This is where I wish I would have browned the veggies up a bit but it did not even occur to me.)

While the chicken is browning, trim fennel bulbs (reserve 1/4 cup fronds) and cut bulbs into quarters, core and thinly slice. Trim ends of endive and quarter heads length­wise. Chop shallot. chop carrots into bite sized chunks.

Return pan to medium-high heat. Add wine and broth and stir, scraping bottom, to release browned bits from pan. 

Reduce heat to a simmer.  Add chicken, fennel, endive, shallot, carrots and re­­maining butter. Cover and let simmer, stirring occasionally, until chicken is cooked through, about 10-15 minutes.

Add cream to pan, increase heat to high, and cook uncovered, stirring, until slightly thickened, about 5 minutes. Season with salt and pepper. Spoon into a shallow bowl and sprinkle with parsley and reserved fennel fronds.

2014-12-09 Quick Braised Chicken 008

October 6, 2014

Jalapeno Corn Soup with Seared Scallops

After getting back home from a two week long trip overseas I was dying to cook, bake, clean.  Basically all things domestic were calling my name.  I was also expecting to get home to some chilly fall weather here in Portland.  But as it turned out it's still fairly sunny and hot here so I decided to milk a little bit more summer fare out of the dwindling days.

As you can see here; I'm pretty into corn.  Especially summer corn.  So I saw this recipe and decided to go for it.  I also am such a novice when it comes to scallops.  I'd never even eaten a scallop until probably 3 years ago and I've never cooked them - until now.  Turns out they are super simple and the satisfaction you get from searing one off and seeing the caramelization is deeply gratifying.

I changed a couple of things on this recipe.  Mainly I used coconut milk instead of cream and subbed olive oil for the butter to make it dairy free.  I also cut down on one of the jalapeno peppers thinking it'd be too spicy but in retrospect that was a mistake so I've listed it back to the original two.  I hope you enjoy this, be it these last weeks of summer, or maybe save it for next year!

Jalapeno Corn Soup
adapted from Food 52

  • 9 ears of corn, kernels removed and 4 cobs reserved
  • 1 onion, diced
  • 2 jalapeños, seeded and diced
  • 3 cloves of garlic, peeled and minced
  • 4 cups low-sodium chicken stock
  • 1/2 cup unsweetened coconut milk
  • 3 tablespoons oil
  •  Salt and pepper
Melt the oil over medium heat in a large heavy pot or dutch oven. Add in the onion and jalapeño and cook for 5 to 7 minutes, or until soft but not brown. Add in the garlic and the corn kernels and cook for another minute or until fragrant, making sure that the garlic doesn't burn.  Pour in the chicken stock and coconut milk and add the corn cobs. Season with a few large pinches of salt and pepper. Bring soup to a boil, lower to a simmer, and cook for about 45 minutes.  Discard the cobs and blend the soup until smooth. Check for seasoning and add more salt and pepper if needed.  Ladle the soup into a shallow bowl and top with seared scallops. Soup can also be cooled and refrigerated for a few days or frozen for a couple months.

Seared Scallops
  •     12 large sea scallops, preferably fresh and/or dry-packed
  •     1 tablespoon olive oil
  •     1 tablespoon neutral oil, like canola or grapeseed
  •     Salt and pepper
Melt the butter and oil together in a large heavy skillet until very hot, but not smoking.  Rinse the scallops, pat very dry, and season generously with salt and pepper.  Add the scallops to the pan and cook for 2 to 3 minutes per side, or until caramelized on the outside and just slightly translucent in the center.

DSCF3519

July 22, 2014

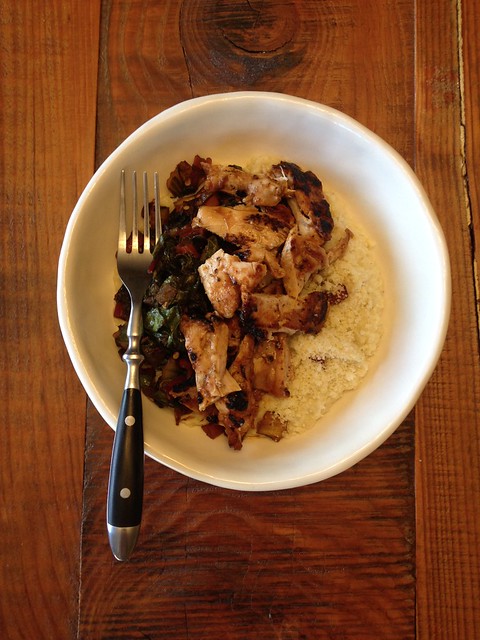
Fresh Corn Polenta - with a side of BBQ Chicken and Balsamic Pepper Flake Chard

Let's just get one thing straight right off the bat.  This post is all about the Fresh Corn Polenta.  When I stumbled across this recipe I thought - must try, immediately.  This recipe is the epitome of summer.  I'd say if it didn't require turning on the stove (for like 10 minutes, tops) it might be the king of the summer recipes.  But we can't all be perfect, can we?  Anyhow, please do give this recipe a go.  It requires little work, few ingredients, and a huge pay off.  Summer corn is one of life's simple pleasures and this, this my friends, is the way to highlight it.

As I grated the corn for the polenta I had one of those "no duh" moments with the realization that the starch that's hiding in the cob of the corn pockets is what naturally thickens this polenta right up.  I mean, where the heck did I think corn starch comes from? Tomatoes? Don't answer that.

I decided to top my polenta off with some super simple chicken marinated in BBQ sauce and a sautee of rainbow chard.  I dressed the chard with red pepper flakes and balsamic to give it some heat and acid to bounce off the super sweet corn polenta.  This meal was so good.  I give it two very enthusiastic thumbs up.

Fresh Corn Polenta
from here
Serves 3

  • 5 ears of corn - I used sweet white but feel free to use the less sweet yellow
  • 1 tablespoon of butter + 1 tablespoon olive oil
  • Salt and Pepper
  • Parmesan, grated (optional)

Clean the corn, removing all husks and silk threads. Working over a bowl, grate the corn using the large grate side of a box grater.  You will end up with a pulpy wet mixture.  Melt the butter and olive oil in a saucepan over medium heat.  Add the grated corn, stir in some salt and pepper. Allow mixture to cook over medium low heat, stirring it often so it doesn't burn, until it becomes thick.  Serve immediately with some grated parmesan, if using.

To make a full meal of this, add whatever sauteed green suits your fancy and some protein.  Really you can't go wrong with whatever you decide to whip up and add on top.  Happy Summer!

2014-07-21 19.33.43

May 14, 2014

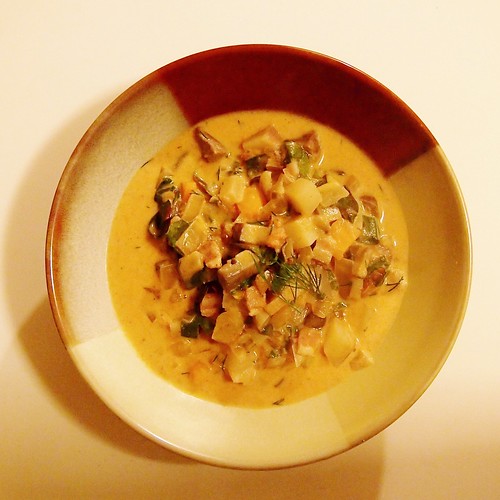
Soup of the Bakony Outlaws

First things first, this soup has an outstanding name that comes not from the bacon in it, but from a region of Hungary called Bakony.  I picture a bunch of rough looking dudes eating this feast around a campfire in the mountains after just having stolen the bacon that's used in it. Besides that, the ingredient list is a lot of my favorite things all piled into one very rich, hearty, comforting soup. Not the most "springy" soup, but it sure did hit the spot on a cozy Friday night spent at home.  If you like Hungarian Mushroom soup and if you like bacon, you will most definitely enjoy this soup. 

One important aspect of making this soup (and most soups) is that the vegetables are cooked perfectly. Not too mushy, not too hard, but just perfect. Chopping them up small and consistent in size (before you begin making the soup), as the recipe indicates, helps with this and also keep an eye on your pot to make sure it doesn't boil too heavily but stays at a low simmer.  I felt a little guilty chopping up the gorgeous beef tenderloin to put in this soup forgot all about it once I tasted those tender little chunks in the finished soup.  This soup takes a lot of chopping but believe me, it is worth the effort.  I will definitely be making this again on a cold winter's night in the future.

Soup of the Bakony Outlaws 
Adapted from Fine Cooking and I made very few changes. 

Serves 6 +
  • 3 Tbs. oil
  • 2 medium yellow onions, cut in 1/4-inch dice
  • 3 slices thick cut bacon, about 1/4 lb or slightly les, cut in 1/4-inch dice
  • 2 Tbs. sweet paprika
  • 8 oz. beef tenderloin, cut in 1/4-inch dice (the original recipe calls for veal) 
  • 3 cups chicken stock
  • 3 skinny carrots, peeled and cut in 1/4-inch dice 
  • 2 medium turnips, cut in 1/4-inch dice
  • 8 oz. mushrooms, cut in 1/4-inch dice (I used cremini but a fancier variety would be swell)
  • 2 medium red potatoes, cut in 1/4-inch dice (medium=about three inch diameter)
  • 2 medium tomatoes, seeded, and cut in 1/4-inch dice  (a can of diced would also work well)
  • Salt and freshly ground black pepper
  • 1 cup sour cream
  • 1 cup heavy cream or crème fraîche
  • 2 Tbs. all-purpose flour
  • 1 bunch of swiss chard, ribs removed, sliced into ribbons (optional)
  • 3 Tbs. chopped fresh dill
Heat the oil in a large Dutch oven and cook the onions and bacon over medium heat until the onions start to color, 10 to 15 minutes. Stir in the paprika and cook, stirring, another 2 minutes to release and develop its flavor. Add the beef and just enough stock to cover it. Cover the pan and simmer for 20 minutes.

Add the chopped carrots, turnips, mushrooms, potatoes, tomatoes, and enough stock to cover the vegetables. Season with salt and pepper. Bring to a boil, reduce the heat, and simmer until the vegetables are tender, another 20 minutes. Add a little more stock if the soup looks too dry during cooking, bearing in mind that more liquid will be added later. (I did not need to add more stick, used 3 cups total.)

Put the sour cream and cream in a small bowl and stir in the flour with a fork or whisk.  Pour this into the pot and bring it to a boil, stirring constantly. Simmer for 2 minutes. Taste and adjust the salt and pepper. Just before serving, stir in the chopped chard and fresh dill and dish it up!

We ate this with a seedy baguette and could not stop oohing and aahing! It is extremely rich and I think the amount of cream/sour cream could be reduced in half and still be just as inspiring. 

Soup of the Bakony Outlaws

P.S. This soup tastes about a zillion times better than it photographs!

January 24, 2014

Cheesemaking 101 - Mozzerella

Here's a post off the beaten path as this most definitely is not soup.  However it is fairly easy yet something that will make you feel accomplished in the end - much like soup.  DP and I hosted a classical music listening night at our house and picked Mozart for our first gathering.  When deciding upon snacks there were many puns including Mozart-ella sticks, Wolfgang Puck Amadeus pizza, Don Juan almonds and the like.  I saw the shining star as clearly being Mozart-ella so I took the opportunity to teach myself how to make this easy cheese.  It turned out really good despite my worry throughout the process that it wouldn't come together.  But come together it did and served with fresh basil and garlic, our best olive oil (from here), balsamic, and a sprinkle of red pepper flakes and it was a party hit.  It turns out that the adage used when making beer applies to making cheese as well - don't worry, have a homebrew cheeseball.

Even though this recipe might require a stop at a home brewing store the two off the wall supplies needed, rennet and citric acid, are cheap and easy to find.  Also you use so little of each ingredient in each batch that I'll be able to stretch the amounts I purchased for many more cheese making adventures.  Up next, goat cheese...or maybe feta!  A little aside about the whey too; I read from the recipe that the leftover whey can be used in place of water in any bread recipe for an enhanced flavor so I saved mine and will be whipping up a fresh batch of bread this weekend.  Cheese making yields many treats my friends.

Homemade Mozzerella
recipe from The Pioneer Woman

1 gallon of whole milk - preferably raw and unpasteurized if you can find it (I couldn't)
1 1/2 teaspoons of citric acid powder
1/4 teaspoon vegetable rennet
kosher salt to taste

Sprinkle the citric acid powder into a large non-reactive stockpot then add 1/4 cup of water and swirl to dissolve.  Pour the gallon of milk into the pot and stir to combine.  Put the pot over medium-low heat and attach a thermometer to the side of the pot and allow to heat to 90 degrees F.  You may notice a little curdling but this is a good thing.  While that heats up combine the vegetable rennet with 1 cup of water.

When the milk comes to temp remove from the burner and add the rennet/water mixture.  Very gently stir together for about 30 seconds.  Place a lid on the pot and walk leave it alone for exactly 5 minutes - don't touch it in the meantime! After 5 minutes the mixture should resemble a very soft custard.  A note on this - mine looked more like large curds and didn't congeal as much as the recipe pictures looked.  I think this is because I didn't use raw milk so if you don't either and it just looks like a bunch of large curds, don't worry it will still come together.  Return to the burner over medium heat and place the thermometer on once again and bring up to 105 degrees F.

Remove from heat and with a slotted spoon remove all of the curds from the whey (the watery looking part) and place in a colander.  Press down with a spoon or your clean hands to remove as much of the whey from the curds as possible. Place in a microwaveable bowl and microwave on high for 1 minute.  Without burning your hand press on the cheese to drain all of the whey off.  Microwave for 30 seconds a few more times to keep removing as much of the watery whey as possible.  I only did this two times total.  Then knead in salt to taste.  Stretch out the cheese curd to get any more whey that you can out of it.  Shape into a ball and place in a bowl of ice water until completely cool.  Afterwards eat as is or add herbs, seasonings and serve with a crusty baguette as we did.

The final product before it was devoured:
IMG_1909[1]

Video of the making:

October 6, 2011

Chicken Pot Pie

We arrived home from a two week trip to Spain to find that fall has hit in Portland! Which is just dandy by me, I sure do love this season. All the traveling and hotel hopping left me yearning to spend the day in my kitchen so I decided to spend my Sunday making this very involved, from scratch, chicken pot pie that I got from the new Bon Appetit magazine. It was the perfect cure for fall weather and the need to cook. I went above and beyond on this one and even pulled the meat from the chicken carcass with my bare hands, a first and most likely a last for me. I'm not as carnivorous as I may have thought after shirking my vegetarian upbringing some 12 years ago. Overall, this recipe turned out really well but I think I prefer Ina Garten's Chicken Stew with Biscuits more. It's an all time favorite. This recipe can be a close second though and one to keep around should I ever need to impress anyone with my chicken ripping skills.


Chicken Pot Pie

slightly altered from Bon Appetit

Crust
2 cups all purpose flour
1 cup whole wheat flour
1 teaspoon baking powder
1 cup (2 sticks) chilled unsalted butter, cut into 1/2" cubes
1/4 cup vegetable shortening

Chicken
2 cups peeled, coarsely chopped carrots
1 large onion, coarsely chopped
1 leek, coarsely chopped
1 3-pound whole chicken
4 celery stalks, coarsely chopped
6 sprigs thyme
1 cup dry white wine
1 tablespoon salt
1 teaspoon whole black peppercorns
1 tablespoon tomato paste

Filling
2 tablespoons dried chanterelle or shittake mushrooms
1 cupo 1/2" slices of carrots
1 cup fresh (or frozen, thawed) peas
1 cup fresh (or I used frozen already peeled) pearl onions
1/2 cup (1 stick) unsalted butter
3/4 cup all purpose flour
6 fresh sage leaves
4 thyme sprigs
2 sprigs rosemary
1 cup button mushrooms
1 cup 1/4" rounds sliced fingerling potatoes
1 egg, beaten to blend
coarse sea salt and ground pepper

PREPERATION:

Crust

Mix flour, salt, and baking powder in a food processor. Add cubed butter and shortening and process until mixture resembles coarse meal with some pea-size lumps. With machine running, add 1/2 cup ice water and process, adding more water by teaspoonfuls if dry, until dough forms. Form dough into a ball; flatten into a disk. Wrap in plastic and refrigerate for 30 minutes. Line a baking sheet with parchment paper. Place chilled dough on a lightly floured surface and roll out to a 12x9 1/2" rectangle, about 1/4" thick. Place on prepared sheet and cover tightly with plastic wrap. Chill. DO AHEAD: Can be made 6 hours ahead. Keep chilled.

Chicken

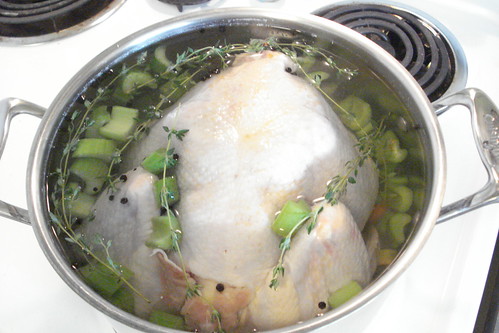
Preheat oven to 400°. Place carrots, onion, and leek on a rimmed baking sheet and roast until golden brown, about 30 minutes. Transfer to a large pot fitted with a lid. Add chicken, breast side down, celery, thyme sprigs, wine, salt, and peppercorns to pot. Add 8 cups water to cover and bring to a boil. Reduce heat to low and simmer gently for 10 minutes. Remove pot from heat, cover, and poach chicken until cooked through, about 35 minutes.
Remove chicken from pot and set aside until cool. Reserve broth. Shred meat; discard skin and bones. Set a large strainer over another pot. Strain broth into clean pot. Stir in tomato paste. Return to medium heat and simmer, uncovered, until reduced to 5 cups, about 40 minutes. DO AHEAD: Can be made 1 day ahead. Chill uncovered until cool. Cover chicken and broth separately; keep chilled. Rewarm broth before continuing.

Filling

Place dried chanterelles in a small bowl and cover with 1 cup hot water. Let steep for 10 minutes; set aside. Reserve soaking liquid. Cook carrots in a large saucepan of boiling salted water until crisp-tender, about 2 minutes. Using a slotted spoon, transfer to a medium bowl. Add peas to saucepan; cook for 1 minute; transfer to bowl with carrots. Add onions to saucepan and cook until crisp-tender, about 2 minutes. Remove from pot and set aside; let cool. Peel onions. In a large heavy saucepan, melt butter over medium heat. Whisk in flour. Cook over medium-low heat, whisking constantly, until golden brown, about 10 minutes. Whisk in herbs and warm broth from chicken. Using a slotted spoon, transfer chanterelles to saucepan. Pour in soaking liquid, leaving sediment behind. Simmer for 20 minutes. Set a strainer over another large pot. Strain broth into pot; discard solids. Add chicken, carrots, peas, onions, mushrooms, and potatoes. Bring to a simmer. DO AHEAD: Can be made 1 day ahead. Chill uncovered until cool; cover and keep chilled. Rewarm before continuing. Preheat oven to 400°. Spoon filling into an 11x8x2" or 2 1/2-qt. round baking dish. (Add pie bird, if using.) Top with pastry, pinching edges to seal. If not using pie bird, cut a 1" slit in center of crust for steam to vent. Brush pastry with beaten egg, and sprinkle with sea salt and pepper, if desired. Place pot pie on a rimmed baking sheet. Bake until crust is golden brown and filling is bubbly, about 45 minutes.

DSC02923
Poaching the chicken and making the stock base

DSC02928
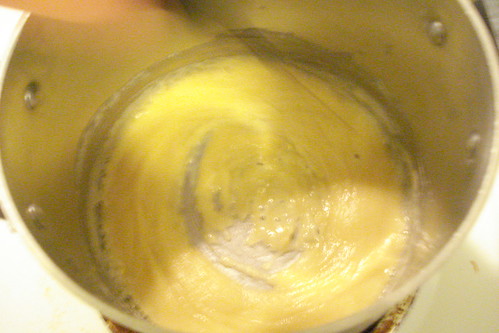
Stirring the roux

DSC02933
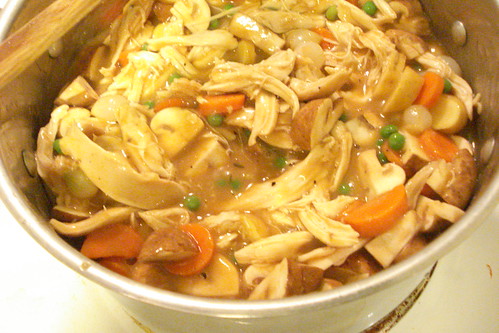
The filling. so good

DSC02943
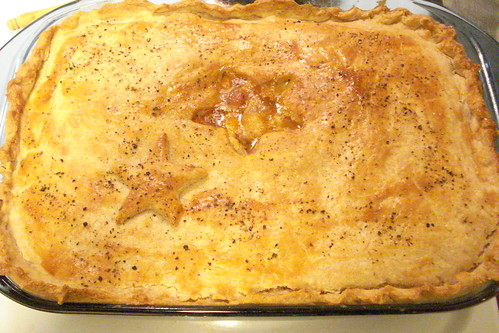
et voila


April 5, 2011

Lemon Rolls with Cream Cheese Lemon Thyme Glaze

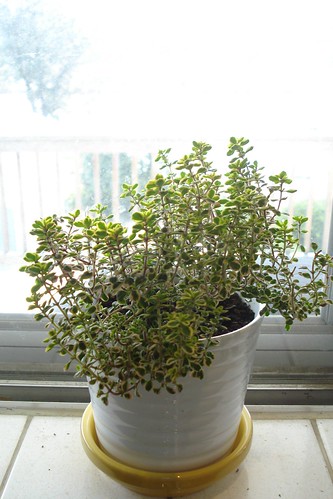
There were a million things pointing me towards making these sweet wonderful rolls. First off, I planted my first herb garden this last weekend! I'm pretty excited about it and I keep smiling every time I walk into my kitchen and see a window sill of fresh herbs smiling back at me. I've managed to use them in just about everything I've made since then but the one that has by far stolen me away is the lemon thyme. Just rubbing your fingers on it leaves the beautiful refreshing smell of lemon on them. It doesn't get much better than that. Secondly, I ran across a recipe for these lemon rolls on The Kitchn that I remembered I had bookmarked some time ago so I stocked up on lemons at the grocery store the very same day.

Those lemons came in handy later that day when I started feeling sick. I must've had about 15 lemon, hot water and honey drinks over the next 24 hours trying to chase the bug away. But alas, I'm home sick today with nothing to do but bake to make me feel better. I realized while making these that yellow is one of my favorite colors and I sure do have a lot of it in my kitchen decor. It's a brighten your day kind of color. The next thing you know I'm stumbling across this post on Poppytalk alerting me that today was in fact declared a day of yellow for Spring Colors Week. Sometimes when you get a good idea it doesn't take a lot of convincing to carry it through but it sure does help when the universe is there to back you up. So, here's my own little tribute to yellow.

I made the recipe as it was posted but I added some fresh lemon thyme to the cream cheese glaze. I also modified the lemon amounts a bit as I think my glaze and filling were a bit too wet and it needed to be adjusted into measurements instead of just whole lemons.

Sticky Lemon Rolls with Lemon Cream Cheese Glaze
Makes 12 large breakfast rolls

Lemon Roll Dough
1 envelope (0.25 ounces, or 2 1/2 teaspoons) active yeast

3/4 cup milk, warmed to about 100°F (warm but not hot on your wrist)
1/2 cup (1 stick) unsalted butter, very soft
1/4 cup white sugar
2 teaspoons vanilla extract
4 1/2 cups flour
1/2 teaspoon salt
1/2 teaspoon nutmeg
2 eggs
2 tablespoons of grated lemon zest
(about 1 lemon)

Sticky Lemon Filling
1 cup sugar
1/4 teaspoon freshly-ground nutmeg
1/2 teaspoon powdered ginger
3 tablespoons unsalted butter, very soft
1/4 cup fresh lemon juice
2 tablespoons grated lemon zest (about 1 lemon)

Lemon Cream Cheese Glaze
4 ounces cream cheese, softened
1 cup powdered sugar
1/2 cup fresh lemon juice
2 tablespoons fresh lemon thyme
2 tablespoons grated lemon zest for garnish
(about 1 lemon)

Make the dough:
Zest and juice the lemons. Divide the zest into three parts. Divide the juice into two parts, and set aside.

In the bowl of a stand mixer sprinkle the yeast over the warmed milk and let it sit for a few minutes. With the mixer paddle, stir in the softened butter, sugar, vanilla, and one cup of the flour. Stir in the salt, nutmeg, and one part (1/3) of the lemon zest. Stir in the eggs and enough of the remaining flour to make a soft yet sticky dough.

Switch to the dough hook and knead for about 5 minutes, or until the dough is elastic and pliable. (If you do not have a stand mixer, stir together the ingredients by hand, then turn the soft dough out onto a lightly floured countertop. Knead the dough by hand for 5 to 7 minutes, or until the dough is smooth, pliable, and stretchy.)

Spray the top of the dough with vegetable oil, and turn the dough over so it is coated in oil. Cover the bowl with plastic wrap and a towel and let the dough rise until nearly doubled — about an hour.

Make the filling:
In a small bowl, mix the sugar with the nutmeg and ginger, then work in the second part of the lemon zest (1/3) with the tips of your fingers until the sugar resembles soft sand. Slowly pour in one part of the lemon juice, stirring. Stop when the sugar and lemon juice form a wet, clumpy mixture. (You may use all of the reserved half of the lemon juice; you may stop before completely adding that half of the lemon juice.)

Assemble the rolls:
Lightly grease a 13x9 inch baking dish with baking spray or butter. On a floured surface pat the dough out into a large yet still thick rectangle — about 10x15 inches.

Spread the dough evenly with the 3 tablespoons of softened butter, then pour and spread the lemon-sugar mixture over top. Roll the dough up tightly, starting from the top long end. Stretch and pull the dough taut as you roll, to keep the lemon sugar firm inside. Cut the long dough roll into 12 even rolls. Pinch the bottom of each roll closed and place each one, open and cut side up, in the prepared baking dish.

Cover the rolls with a towel and let them rise for an hour or until puffy and nearly doubled. (You can also refrigerate the rolls at this point. Cover the pan tightly with plastic wrap, and place it in the refrigerator for up to 24 hours. When you are ready to bake the rolls, remove the pan from the fridge, and let them rise for an hour.)

Heat the oven to 350°F. Place the risen rolls in the oven and bake for 35 minutes or until a thermometer inserted into a center roll reads 190°F.

Make the glaze:
While the rolls are baking, prepare the glaze. In a small food processor (or with a mixer, or a sturdy whisk), whip the cream cheese and the lemon thyme until light and fluffy. Add the remaining lemon juice and blend until well combined. Add the powdered sugar and blend until smooth and creamy.

Finish the rolls:
When the rolls are done, smear them with the cream cheese glaze, and sprinkle the final remaining lemon zest over top to garnish. Let cool for at least 10 minutes before serving, but do serve while still warm.

lemonthymeplant
My Inspiration


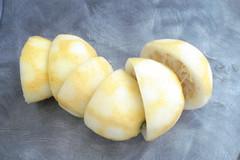
lemons!gratedlemon
A little before and after

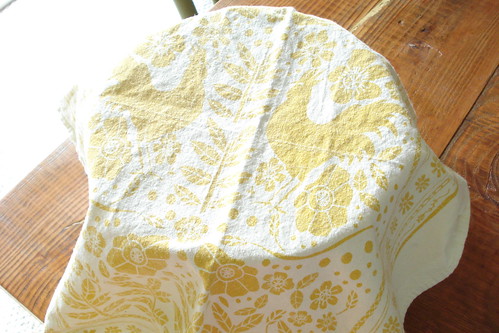
teatowel
My pretty tea towel with the dough rising

buns
Makes my mouth water just looking at 'em

onebundone
Another before and after

March 9, 2011

Labor of Love-Macaron Making

This past Valentine's day I took as an excuse to tackle a long time goal of mine-french macaron making. Michelle got me a detailed book on the subject for my birthday last year that I've been studying intently for the last 6 months. I invested in all the necessary equipment and we also got to use my new Kitchenaid mixer for the first time. A day of firsts indeed. Michelle came over to lend a hand in the kitchen and also for all the adorable crafting we did for our Valentine's gifts that we passed out to our loved ones. This was an all day project, with a couple of fails and do-overs, luckily we were smart enough to fit in pedicures and champagne drinking.

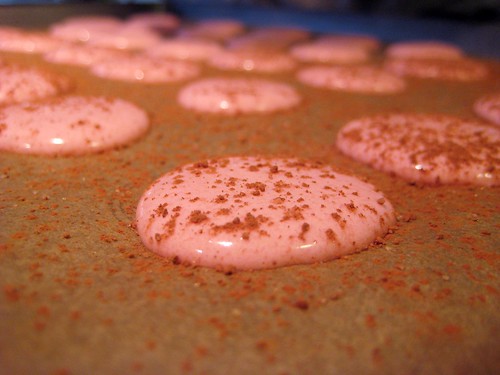
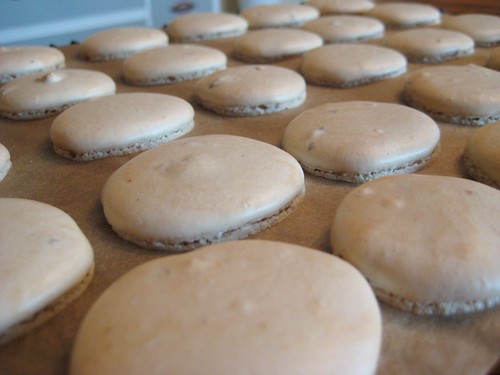
These little cookie monsters are hard to make but I think we had success in the end. They turned out really well, as did the darling packaging we made. We ended up making two different kinds of macarons. The first was a fig cookie with orange liqueur buttercream filling. The second was a pink colored cookie with fresh strawberry buttercream and a sprinkle of Dagoba's spicy chocolate powder on top. We did half of the strawberry batch with coconut on top but unfortunately those didn't turn out because we didn't cook them long enough. In the end we impressed ourselves with pulling off this baking feat. It left me wanting to experiment even more with the french macaron! Here is the detailed process of this labor of love.

Fig Macarons with Orange Liqueur Buttercream or
Pink Macarons with Fresh Strawberry Buttercream and Spicy Cocoa Topping

Macaron batter:
2/3 cup (3 ounces/85 grams) ground almonds
1 1/2 cups (5.25 ounces/150 grams) powdered sugar
3 large egg whites, at room temperature
5 tablespoons/65 grams granulated sugar
1 teaspoon vanilla extract, or seeds from 1/2 vanilla bean
Additions:
2 tablespoons ground dried figs or
red food coloring

Orange Liqueur Buttercream or Fresh Strawberry Buttercream:
7 tablespoons (3.5 ounces/100 grams) unsalted butter, softened
3 tablespoons (1.4 ounces/40 milliliters) water
3 tablespoons (1.4 ounces/40 grams) granulated sugar
1 egg
vanilla extract
Additions:
2 tablespoons orange liqueur, such as Cointreau or
4 tablespoons fresh strawberry puree

Toppings:
shredded unsweetened coconut or
Dagoba's spicy cocoa powder

To make macaron batter:
Cut a sheet of parchment paper (or silpat) to fit your baking sheet. Draw 1 inch circles on paper, spacing them at least 1/2 inch apart. This patter will be your guide for squeezing out the macaron batter. In a food processor, grind almonds and powdered sugar together to a fine powder. Sift the mixture through a medium-mesh sieve twice. Set aside.

In a stainless steel mixing bowl, beat egg whites (in a stand mixer or with a hand mixer) on high speed until they are foamy. Gradually add the granulated sugar to the egg whites. Add vanilla and continue to beat the meringue until it is stiff, firm, and has a glossy texture. Make sure this is VERY stiff. Just when you think it's stiff enough, beat a little more. This part is crucial to not ending up with runny macaron circles (we found out later).

Add half of the sifted flour mixture and stir with a spatula while scooping it up from the bottom of the bowl. Add the rest of the flour and mix it lightly in a circular motion. At this point add any flavors, such as the fig bits, or coloring you desire. Feel free to experiment with a variety of dried fruits or coloring, we did! After you run out of flour or have added your flavoring, press and spread out the batter against the bowl's sides. Scoop the batter from the bottom and turn it upside down. This is called making the macaronnage. Repeat this process about 15 times but not more than 20. When the batter becomes nicely firm and drips slowly as you scoop it with a spatula, the mixture is done. This is called the macaronner.. Attach a 0.4 inch tip to a pastry bag. Twist the bag to hold the tip tightly. This prevents the batter from leaking out. Place the pastry bag, tip down, inside a deep measuring cup and pour the macaronner batter into it. After pouring the batter into the bag. clip the bag top to prevent the batter from coming out. You can also use a rubber band. Using the parchment outlined in circles, squeeze small circles of batter onto a cookie sheet, making sure that the batter is firm and does not run. At this point sprinkle any coconut or cocoa or other powdered toppings you may want onto the circles.

Rap the baking sheet firmly against the counter or other flat surface. This helps the macarons hold their rounded shape and helps the pied, or "little foot", to form. Dry the batter at room temperature, uncovered, for 15 minutes. A slight crust should form on top of the macarons. On rainy days, it helps to dehumidify the room. If the batter circles do not stick to your finger when you touch them, the drying process is complete. On a dry and sunny day, the drying process takes approximately 30 minutes.

After the macarons have sufficiently dried you are ready to bake them. Place the oven racks in the center of the oven. Preheat to 375 degrees. Stack the baking sheet with the batter circles into an empty baking sheet and slide both into the oven. Bake for 15 to 18 minutes until slightly crisp and crackled on top. If the insides of the macarons are still soft after 15 minutes lower the oven temperature to 300 degrees, cover the tray with foil, and bake for another 2 to 3 minutes. Remove the baking sheet from the oven and cool on a wire rack. When the macarons are completely cooled, remove them from the baking sheet.

To make buttercream:
Cut butter into small pieces and put in a medium bowl. Stir the butter with a spatula until it becomes smooth and creamy like mayonnaise, set aside. Put water and granulated sugar in a small saucepan and stir well. Heat the mixture over medium low heat until the sugar is completely dissolved and the mixture begins to become syrupy. Scoop some syrup with a spoon and drop it into a small amount of water. Then try to scoop the syrup out of the water and make a ball with it using your fingers. If you can do this, the syrup is the right density. While heating the syrup, break an egg into a bowl and beat it lightly with a hand mixer. Pour the syrup like a thread into the bowl and beat it at high speed. Reduce the speed to medium and then to slow, and continue beating until the bottom of the bowl is no longer hot and the mixture becomes white and heavy.

Add the creamed butter in 3 batches into the syrup beating with the hand mixture each time you add it. When the mixture is well mixed the process is done. Stir a drop or two of vanilla extract and whatever flavoring you are adding. When the mixture is well stirred it is done. Spread the cream between the macaron puffs and sandwich together. Now they are ready to eat!

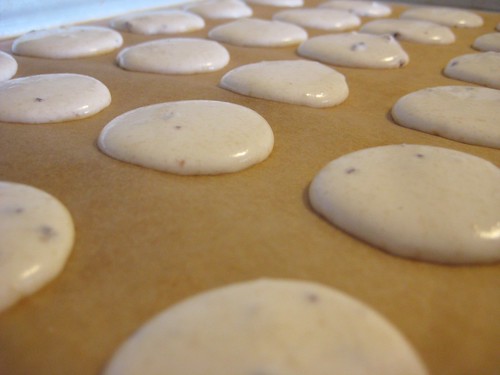
2011-02-13 cookies 003
Not runny, very important
2011-02-13 cookies 022
A sprinkle of cocoa
2011-02-13 cookies 025
Little feet
2011-02-13 cookies 039
Getting creamed
2011-02-13 cookies 0352011-02-13 cookies 045
Stuffed!
2011-02-13 cookies 053
Valentines presents ready to go
2011-02-13 cookies 060
Just a peek at the goods


November 9, 2010

Cranberry Apple Butter

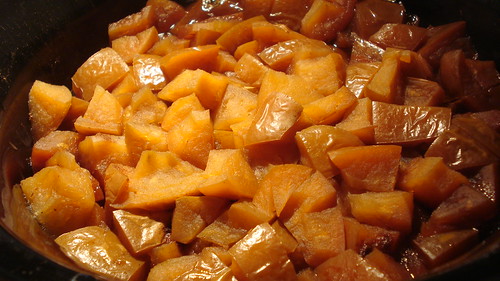
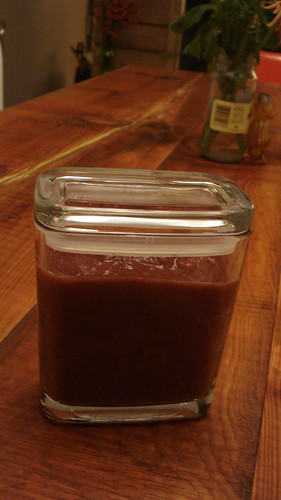
I remember my grandmother making apple butter year after year when I was a kid, always thinking it tasted nothing like butter (and a tad disappointed with that fact). I'm not sure how she was making hers but I remember thinking how insanely talented my grandmother was. If only I knew how easy she was getting off. This is one of the easiest recipes you'll ever make. I guarantee it. That fact is largely due to using a crock pot and an immersion blender but you can still make this recipe even if you don't have those tools.

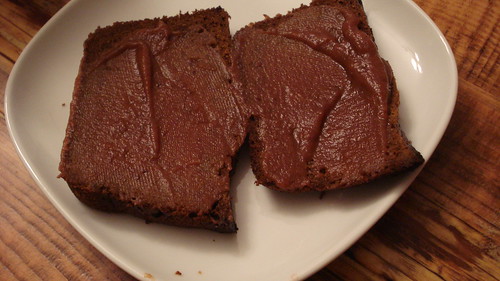
This recipe was very good. I would've preferred it a little bit thicker, however, I loved how the tartness of the cranberry played off the sweetness of the apple. This recipe made quite a bit of apple butter so this would be a perfect gift to jar up and hand out for the holidays. Impress your friends with your grandma-like skills. We ate this on pumpkin bread and regular toast for breakfast for weeks. Enjoy!

Slow Cooker Cran Apple Butter
source: Mommie Cooks

10-12 Apples, Chopped
3 Cups of Whole Cranberries
1/2 Cup of Brown Sugar
1/2 Cup of White Sugar
1 tsp of Cinnamon
1/2 tsp of Nutmeg
1/4 tsp Ginger
1/4 tsp Cloves
4 Shakes of Salt

Instructions

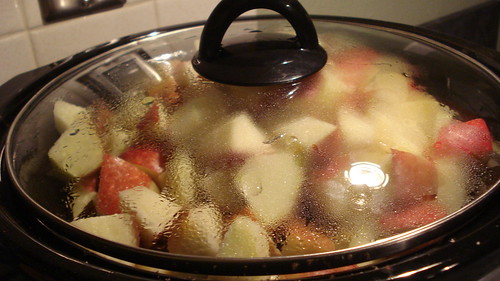
Throw it all in your slow cooker and cook it on low for 12 hours. You can also do this using a dutch oven in your regular oven at 400 degrees. Emulsify it smooth with an immersion blender or by batches in a regular blender.

DSC01131
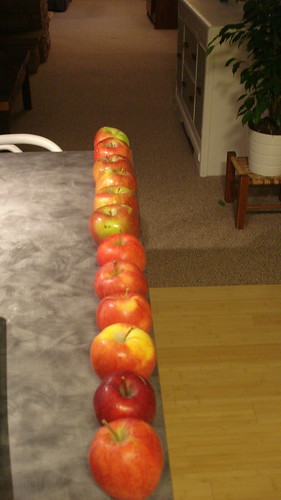
All lined up ready to be chopped

DSC01137
The beginning

DSC01143
12 hours later

DSC01148
Pretty in jars

DSC01152
Even better on pumpkin bread

January 13, 2010

Classic Minestrone, sorta.

As part of the new year I'm trying to get back at this blogging thing. I have a million recipes to try, more time to spend cooking and baking, and tons of motivation to boot. Yet one missing piece still remains and that is a functional camera. So for the last time I ask you to please excuse my horrible iPhone pictures because I'm setting forth on a camera buying mission this weekend.

As an homage to my last poorly pixelated pictures we have minestrone soup. I came across this recipe on Food & Wine's website and since I had a bunch of kale to use up (isn't that always the case?) and we haven't done one of the most classic soups of all time I decided it was meant to be. I modified the recipe quite a bit and used cannellini beans in place of potatoes, added a can of fire roasted tomatoes and substituted the kale for the chard/spinach but I guess I'll still give credit where credit is due. I also added more spices than just the s&p that the original recipe called for, I can't help myself when it comes to throwing those around.

The final result was really good. One trick that you can use for any soup, but works perfectly in this Italian soup, is saving parmesan rinds to throw in while the soup is simmering. I keep them in a plastic bag in the freezer. It adds a rich creaminess that isn't too salty and can't be replicated with just stock alone. Plus it falls under my neurotic need to not waste food!

Minestrone Soup
adapted from Food & Wine

3 tblsp. olive oil
1 onion, chopped
1 fennel bulb, chopped
3 ribs celery, chopped
1 1/2 tsp. salt
1 tsp oregano
1 tsp parsley
1 tsp garlic powder
1 quart low-sodium chicken broth or homemade stock
2 cups water
1 can cannellini beans
1 can diced tomatoes (I used fire roasted)
1/4 tsp. black pepper
1/2 cup orecchiette pasta
1 bunch of kale, tough stems removed, roughly chopped
1/3 grated parmesan or parmesan rind (optional)

In a large saucepan, heat the oil over moderately low heat. Add the onion, fennel, celery, 1/4 teaspoon of the salt, and other spices. Cook, stirring occasionally, until the vegetables start to soften, about 10 minutes.

Add the beans, tomatoes, broth, water, the remaining 1 1/4 teaspoons salt, and the pepper. Bring to a boil. Reduce the heat and simmer for 5 minutes (this is where I throw in the parmesan rinds). Stir in the pasta and simmer for 5 minutes longer.

Add the kale and bring the soup back to a simmer. Cook, stirring occasionally, until the greens are wilted and the pasta is tender, about 5 minutes longer. Stir in the Parmesan, if using.

photo(4)photo(3)
Prepped

photo(2)photo(6)
Almost ready

photo(5)photo
Set up and my shriveled parm rinds

October 21, 2009

Too much cheese. Yes, it can happen.

Now that it is officially fall, I decided to venture back into my good friend, "The Big Book of Soups & Stews."

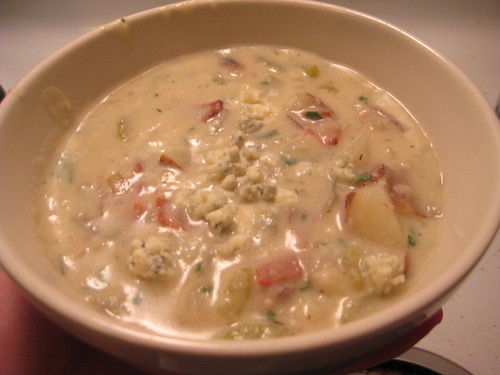
I asked my boyfriend for a particular ingredient that I should feature in this soup, and he said cheese. I looked in the index of the Big Book and decided on Potato Soup With Bacon and Gorgonzola Cheese. I thought about this soup all day at work and knew it was going to be amazing. I went a little overboard though. Let me elaborate after I tell you the recipe.

Ingredients:
4 slices bacon, diced.
1 cup chopped yellow onion. (I used a whole onion, I dont bother measuring veggies.)
2 stalks celery, sliced.
2 large russet potatoes (about 1 1/2 pounds), peeled and cubed.
1 cup chicken or veggie broth or stock.
2 cups milk.
1/4 cup chopped parsley.
3/4 teaspoon salt.
freshly ground pepper to taste.
4 ounces crumbled gorgonzola cheese or blue cheese for topping (optional).

Process:
In a large soup pot over medium heat, cook bacon until crisp. Remove with a slotted spoon to a plate, leaving 2 tablespoons bacon drippings in pan. Add onion and celery to pan and saute until vegetables are slightly tender, about 6 minutes. Add potatoes and stock and bring to a boil. Reduce temperature to medium-low and simmer, covered, until vegetables are tender, about 20 minutes. Transfer 1 cup of the vegetables to a food processor or blender and process until smooth. (Note: My bf does not have these items so i just scooped some out and mashed them up with a potatoo masher, and it worked fine. Not quite as creamy but enough for me.) Return to pan and add milk and parsley. Season with salt and pepper and rehehat over medium hehat for about 5 minutes. Ladel into bowls and sprinkle with bacon and chese, if desired.


My changes/additions/mistakes:
-I added about 8 mushroms, quartered. (good decision)
-I added a little more broth than it called for as it didn't seem like enough liquid to me at first. After adding the milk, it turned out I hadn't needed that extra broth. (bad decision)
-I added the bacon back into the soup rather than just using it as a garnish. In fact I got so carried away and excited that I forgot to save a little to garnish for the picture! (good decision)
-I added the full 4 ounces, maybe even 5 ounces, of gorgonzola cheese into the soup and let it melt a bit, rather than using it as a topping. (bad decision)

I thought, "I love gorgonzola! This is going to be amazing! Why would you just put a few crumbles on top of this normal old potato soup when you can mix in a ton of yummy cheese!?" Well, dear readers, because there is such a thing as too much blue cheese. The deliciousness I had envisioned quickly turned into I can't eat any more of this, what a disappointment.

I would still recommend making this soup, but be sparing with the cheese. As with salt you can add, but you cannot subtract once you add it in, and too much is just too much. Also this soup is pretty rich, I would recommend making it as an appetizer rather than a full meal, which is typically how I prefer my soup. I am just not patient enough to make soup for a first course and then follow it with a full meal. But if you are into that sort of thing, or want to make a hearty soup to bring to a potluck this holiday season, this is a great option. But seriously, even if you love blue cheese, don't mix it all in. You will regret it, I promise.

20091013_bacongorgsoup_001

June 11, 2009

So Sagey

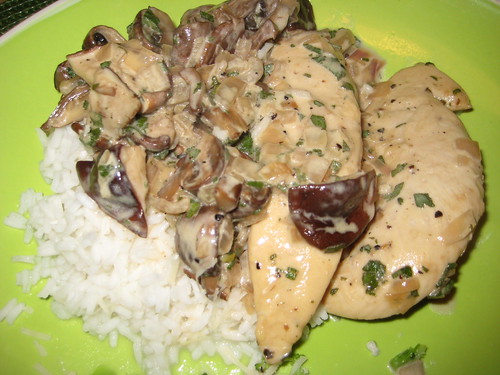
When my Boyfriends fridge was suddenly filled with mushrooms, I went searching for a good tasty recipe to use them in. I came across a few things that sounded great, and finally narrowed it down to either a Chicken Marsala or a Creamy Sage sauce, both from Barn Appetit. I went with option B!


20090605_sage_011


Chicken with Mushroom Sage Sauce

Ingredients:
3 Tbsp butter
1/2 cup chopped shallots (I used 2 whole shallots)
2 garlic cloves (I added this part)
8-10 ounces mushrooms, any sort (I used Crimini sliced and Shiitakes quartered, probably a bit more than 10 oz as I really love mushrooms)
1 teaspoon chopped fresh parsley (Optional, I didn't use any and didn't miss it)
1 cup dry vermouth or dry white wine (I used Chardonnay)
2/3 cup heavy whipping cream
3 Tbsp chopped fresh sage (Fresh from the yard!)
1 Tbsp olive oil
1 1/4 to 1 1/2 pounds chicken breasts (I used 6 little fillets)

Salt and freshly ground black pepper

Process:
The recipe I used listed a roasted chicken method, but I just cooked my little fillets in a pan with salt and pepper, then set them aside while I made the sauce.

To make the sauce, start by melting the butter in a large sauté pan on medium high heat. Add shallots and garlic and sauté for one minute. Add mushrooms (and parsley, if using) and sauté for
5-10 more minutes, until the mushrooms have browned. If you are using unsalted butter, sprinkle with a pinch of salt. Add vermouth or white wine and deglaze the pan, scraping up any bits that may be sticking to the bottom of the pan. Stir in the cream. Bring to a simmer and cook the sauce down until it is thick enough to coat the back of a wooden spoon (about 10 minutes).
While the sauce is reducing, add the chicken breasts/fillets back in to the sauce early enough to just warm them. The last step is to stir the fresh sage into sauce, adjust seasoning to taste with salt and pepper. Plate and spoon sauce over chicken to serve.
Garnish with chopped fresh parsley if desired.

I served this with minute rice, as that is what I had available, and a side of broccoli. I would have preferred mashed potatoes or a better rice, but I was being lazy and did not realize there were potatoes at my fingertips that I ended up making mashed potatoes with later in the week! Anyway, this sauce was so so so good and so simple, I intend to make it again and again and again. And even though it has the heavy cream, it didn't taste too heavy. I had a hard time putting my fork down and from what I heard from my favorite guy, the leftovers were just as amazing.

May 12, 2009

Cheese and bacon are always good

A few months ago, V made the most delicious corn chowder ever, and we kept saying "next time we will do this and this and this and it will be even more amazing!" I had a hankering for something rich and creamy and cheesy and delicious on a cold day last week, but we could not quite nail down the recipe that had been used before. I took a look through The Big Book of Soups & Stews, and decided to make this:

Cheddar Chicken Corn Chowder

3 slices bacon, diced
1 cup chopped yellow onion
1/2 green bell pepper, chopped (We used the whole pepper)
2 cloves garlic, minced (We used 3)
3 cups chicken stock or broth
1 1/2 cups unpeeled cubed red potatoes (We used 3 small-medium ones)
1 1/2 cups corn kernels, fresh or frozen (We used frozen, and a little more than 1 1/2 cups)
3 tablespoons all-purpose flour
3 cups milk
2 cups cubed cooked chicken breast (We used 2 small breast fillets, poached them in the broth and shredded them instead of cubing them)
1 cup seeded, peeled, chopped tomato (I bought a jar of diced tomatoes instead of whole, oops)
1/2 cup grated cheddar cheese (We used white cheddar, closer to a cup)
3/4 teaspoon salt
freshly ground pepper to taste

In a large Dutch oven, over medium heat, cook bacon until crisp. Transfer bacon to a plate, leaving 1 tablespoon drippings in Dutch oven. Make sure you don't eat all the bacon while you cook the rest of the soup. Add onion, bell pepper, and garlic and saute until tender, about 5 minutes. Add Stock and potatoes and bring to a boil. If you choose to poach the chicken like we did, add the chicken in at this point as well, so it will cook in the broth. Reduce heat to medium-low and simmer, covered, until potatoes are tender, about 20 minutes. Stir in Corn.

In a bowl, blend flour and milk. Stir into soup. Increase heat to medium-high and stir until thickened, about 5 minutes. Reduce heat to medium-low and add bacon, tomato, cheese, salt and pepper (and chicken, if you choose to cook it beforehand and add it in, as the recipe calls for originally).) Simmer, uncovered, until flavors are blended and cheese is melted, about 15 minutes longer. If it doesn't seem thick enough, you can add a dash more flour, which we did.


We ate this soup with a big loaf of rosemary bread that I found at Whole Foods which was super tasty. The soup turned out really delicious. Perfectly creamy, the bell pepper added a nice bit of crunchiness, and the tomato, though it was a little saucier than the recipe called for, was delicious. If I make this again, I will make sure and use tomato chunks instead of diced saucy tomatoes from a can. Sometimes I am just lazy and did not feel like trying to peel and de-seed a fresh tomato. I think I would like the fresh tomato addition with the cheesiness. The soup was so pretty and colorful too!

20090504_chowder_006

Yummmmmm.

May 4, 2009

Stir, Stir, Stir-Shiitake and Asparagus Risotto

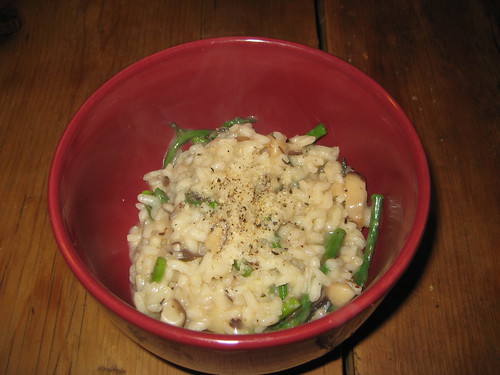
Well, it's true what they say about risotto, it requires a whole lotta stirring. Mich and I are not very patient cooks but I'd say we pulled this one off without a hitch. It helps to have a glass of wine in hand. I picked up some shiitake mushrooms at the Farmer's Market last week intending to try out a sublime sounding slow-cooked pork recipe that my dear friend Jenn sent to me. But between work and packing to take off for a 3 day weekend in rainy CA, I didn't have time to pull that off. So using the rest of the bunch of asparagus we ate with the chicken parm and the shiitakes, I thought, hey, ho - risotto. And what a lovely idea it was.

Shiitake Mushroom and Asparagus Risotto
Adapted from May 2003 Gourmet via epicurious.com

5 cup chicken broth
1 cup water
1 lb asparagus, trimmed and cut into pieces (I used a tad less than this)
1 tablespoon olive oil
1/2 stick unsalted butter
3/4 lb shiitake mushrooms, wiped clean and sliced
1 small onion, finely chopped (I used 4 large shallots instead)
1 1/2 cups arborio rice
1/2 cup dry white wine (I used pinot grigio as that's the stuff I like to drink)
2 oz Parmesan cheese

Bring broth and water to a boil in a large soup pot. Prepare a bowl with ice water. Throw in chopped asparagus and cooked until slightly tender, about 4 minutes. Remove from pot with a slotted spoon and put in the ice water bowl to stop the cooking process. Keep the broth simmering over low heat, covered.

Heat oil and 1 tbsp of butter in a large soup pot over moderately high heat. Saute mushrooms until browned and soft, about 4 minutes, season with salt and pepper (I threw in some thyme too) and remove from pot to a small bowl.

Put 2 tbsp of butter in the same pot and saute the shallots until soft. Add rice to the pan and coat with butter, stirring, about 1 minute. Add wine and cook, stirring until absorbed, about 1 minute.

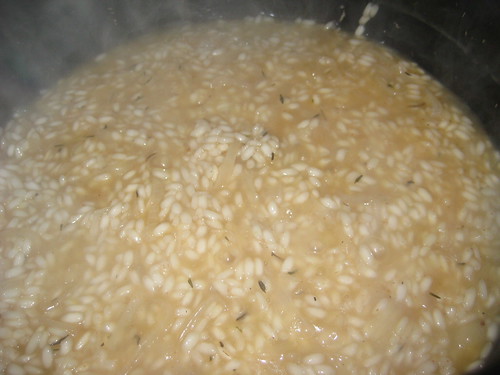
Ladle in 1 cup of the simmering broth, stirring, until all is absorbed. Continue this process until most all of the broth is absorbed and your rice is soft and creamy, about 18 to 20 minutes. Remove from heat and stir in 1/2 cup of cheese, remaining butter (I skipped this part), and salt and pepper. Add asparagus and mushrooms back in and let stand, covered, for about a minute. Serve with remaining cheese on the side.

20090429_risotto_002
Stir stir-drink drink

20090429_risotto_003
Eat eat-drink drink

I have to say this turned out pretty outstanding and was still delicious the next day for lunch. Some of the asparagus had too much of a crunchy texture but I think that's due to my dumbass not trimming them down far enough. Well worth all the stirring!

April 29, 2009

You can never have too much cheese!

Since Vanessa keeps posting every day, making me look bad, I thought I would take it back to the old school with a nice warm tasty soup on a cold rainy day.

Coburg Inn Beer Cheese Soup from The Big Book of Soups and Stews

1/2 cup butter or margarine
1/2 cup diced celery (I used 2 smallish stalks)
1/2 cup diced carrot (I used 1 large carrot)
1 cup diced yellow onion
1/2 cup all purpose flour
1/2 teaspoon dry mustard
5 cups chicken stock or broth
3 tablespoons freshly grated parmesan cheese (I used more like 5)
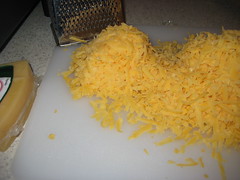
2 cups firmly packed grated cheddar (I used smoked medium cheddar)
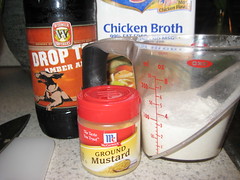
1 12 oz bottle of beer, allowed to go flat (I used Drop Top Amber, not flat)
1/2 teaspoon salt, or to taste
freshly ground pepper to taste

In a large saucepan over medium heat, melt butter. Add celery, carrot, and onion and saute until soft, about 10 minutes. Add flour and mustard and cook, stirring constantly, 1 minute. Slowly stir in stock. Bring to a boil and cook over medium-high heat, stirring constantly, until thickened, about 5 minutes. Reduce heat to medium-low and add cheeses, stirring until melted. Add beer, salt, and pepper and simmer, uncovered, over low heat to blend flavors, about 15 minutes, stirring occasionally.

Note: The soup thickens and the texture improves the second day. Warm carefully over medium-low heat, as it scorches easily. Add more liquid if the soup is too thick.


As you can see, I noted what I changed above in parentheses. This recipe was super easy, and turned out amazing. The only thing I would do differently is to saute the veggies a tad longer. They were a tiny bit crunchier than I would have liked. I was just so impatient to eat! I served this with fresh sliced french baguette.

20090428_beercheese_00120090428_beercheese_002
Veggies and Cheese!

20090428_beercheese_00320090428_beercheese_006
More ingredients and simmering!

20090428_beercheese_007
Voila! Yummmm!

The perfect end for a rainy spring day, paired with watching Battlestar Galactica with my favorite guy.