Showing posts with label fruit. Show all posts

October 13, 2014

Applesauce Cake with Caramel Glaze

I'm going to go ahead and say that this is the best dessert I've eaten in a long time, let alone made.  It was seriously good.  This might have something to do with my palate craving fall flavors and this being one of the first fall items I've made this year.  But I also have some serious back up in thinking this cake is the jam.

It also was insanely easy to make.  I made it a little harder by making my own applesauce from scratch, which is not a requirement, but probably made this cake that much better.  Plus making your own applesauce may seem like it's a crazy thing to do when store bought is pretty legit but honestly it's so easy and the fall bounty of apples is upon us.  I got mine at $1/lb at my local farm stand and I've seen grocery store prices hover not too much higher than that.

I have to say that for such an easy cake to make, it's pretty impressive looking and tasting.  So if you have some folks you'd like to impress or a loved one then whip this up and let them think you slaved away.  Happy fall everyone!

Applesauce Cake with Caramel Glaze
made from Food52; applesauce recipe was made up on the fly

Cake:

  •     2 cups all-purpose flour
  •     1 1/2 teaspoons baking soda
  •     1 teaspoon kosher salt
  •     1/4 teaspoon finely ground black pepper
  •     2 teaspoons cinnamon
  •     1 teaspoon ground ginger
  •     1/4 teaspoon ground allspice
  •     2 large eggs
  •     1 cup sugar
  •     1/2 cup light brown sugar
  •     1 1/2 cups unsweetened (preferably homemade) applesauce
  •     2/3 cup vegetable oil
  •     1 teaspoon vanilla

Caramel Glaze:
  •  4 tablespoons butter, cut into chunks
  • 1/2 cup packed light brown sugar    
  • 1/3 cup heavy cream
  • 1/4 teaspoon kosher salt
  • 3/4 to 1 cup sifted confectioners’ sugar
Applesauce:
  • 6 lbs of apples.  I used gala but feel free to use a mix of sweet/tart apples
  • juice of one lemon
  • 1 cup apple juice or cider
  1. If making the homemade applesauce, start with that recipe.  Core apples and cut into medium size chunks.  Add to a large dutch oven or stock pot.  Add lemon juice and apple juice.  Bring to a boil and then let simmer until apples are broken down and soft, about 25 minutes.  Using a hand blender or regular blender, blend the mixture until smooth.  Jar up anything you don't use in the cake recipe.  Feel free to add spices or sugar at this point but you don't need that for the sauce you use in the cake.
  2. Heat oven to 350 degrees and butter/flour a bundt pan.  Sift together flour, baking soda, salt, pepper and spices and set aside.  In large mixing bowl of a stand mixer beat the eggs with both sugars until a light color. Mix in the applesauce, oil and vanilla until smooth.
  3. Using a spatula fold in the dry ingredients - don't over mix.  Pour the batter into the prepared bundt pan and bake for about 45 minutes or until cake tester comes out clean.  Cool the cake in the pan for about 10 minutes before turning it out on a rack to cool completely.  Make sure the cake is cold before glazing.  
  4. Put the butter in a medium saucepan with brown sugar, cream and salt and set over medium heat. Bring to a full rolling boil while stirring constantly.  Boil for one minute exactly then pull off the heat.  Leave the pan to cool for a few minutes.  Then gradually whisk in powdered sugar until you have a thick but pourable consistency.  You might not use all the sugar.  If it becomes too thick then add a splash of cream to thin it out again.  Immediately pour over the cooled cake.  Let the glaze set for a few minutes, or longer, before serving the cake.
IMG_2325[1]


April 5, 2011

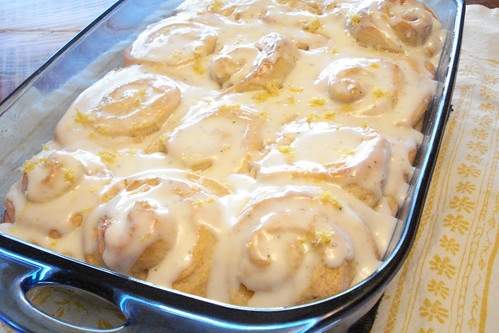
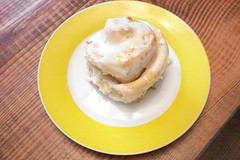
Lemon Rolls with Cream Cheese Lemon Thyme Glaze

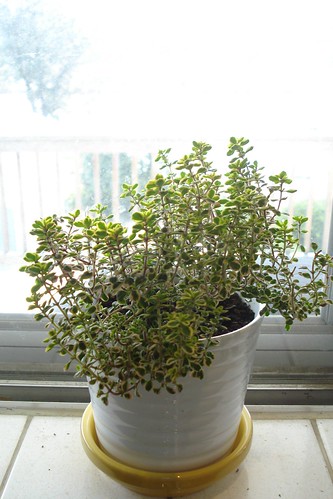
There were a million things pointing me towards making these sweet wonderful rolls. First off, I planted my first herb garden this last weekend! I'm pretty excited about it and I keep smiling every time I walk into my kitchen and see a window sill of fresh herbs smiling back at me. I've managed to use them in just about everything I've made since then but the one that has by far stolen me away is the lemon thyme. Just rubbing your fingers on it leaves the beautiful refreshing smell of lemon on them. It doesn't get much better than that. Secondly, I ran across a recipe for these lemon rolls on The Kitchn that I remembered I had bookmarked some time ago so I stocked up on lemons at the grocery store the very same day.

Those lemons came in handy later that day when I started feeling sick. I must've had about 15 lemon, hot water and honey drinks over the next 24 hours trying to chase the bug away. But alas, I'm home sick today with nothing to do but bake to make me feel better. I realized while making these that yellow is one of my favorite colors and I sure do have a lot of it in my kitchen decor. It's a brighten your day kind of color. The next thing you know I'm stumbling across this post on Poppytalk alerting me that today was in fact declared a day of yellow for Spring Colors Week. Sometimes when you get a good idea it doesn't take a lot of convincing to carry it through but it sure does help when the universe is there to back you up. So, here's my own little tribute to yellow.

I made the recipe as it was posted but I added some fresh lemon thyme to the cream cheese glaze. I also modified the lemon amounts a bit as I think my glaze and filling were a bit too wet and it needed to be adjusted into measurements instead of just whole lemons.

Sticky Lemon Rolls with Lemon Cream Cheese Glaze
Makes 12 large breakfast rolls

Lemon Roll Dough
1 envelope (0.25 ounces, or 2 1/2 teaspoons) active yeast

3/4 cup milk, warmed to about 100°F (warm but not hot on your wrist)
1/2 cup (1 stick) unsalted butter, very soft
1/4 cup white sugar
2 teaspoons vanilla extract
4 1/2 cups flour
1/2 teaspoon salt
1/2 teaspoon nutmeg
2 eggs
2 tablespoons of grated lemon zest
(about 1 lemon)

Sticky Lemon Filling
1 cup sugar
1/4 teaspoon freshly-ground nutmeg
1/2 teaspoon powdered ginger
3 tablespoons unsalted butter, very soft
1/4 cup fresh lemon juice
2 tablespoons grated lemon zest (about 1 lemon)

Lemon Cream Cheese Glaze
4 ounces cream cheese, softened
1 cup powdered sugar
1/2 cup fresh lemon juice
2 tablespoons fresh lemon thyme
2 tablespoons grated lemon zest for garnish
(about 1 lemon)

Make the dough:
Zest and juice the lemons. Divide the zest into three parts. Divide the juice into two parts, and set aside.

In the bowl of a stand mixer sprinkle the yeast over the warmed milk and let it sit for a few minutes. With the mixer paddle, stir in the softened butter, sugar, vanilla, and one cup of the flour. Stir in the salt, nutmeg, and one part (1/3) of the lemon zest. Stir in the eggs and enough of the remaining flour to make a soft yet sticky dough.

Switch to the dough hook and knead for about 5 minutes, or until the dough is elastic and pliable. (If you do not have a stand mixer, stir together the ingredients by hand, then turn the soft dough out onto a lightly floured countertop. Knead the dough by hand for 5 to 7 minutes, or until the dough is smooth, pliable, and stretchy.)

Spray the top of the dough with vegetable oil, and turn the dough over so it is coated in oil. Cover the bowl with plastic wrap and a towel and let the dough rise until nearly doubled — about an hour.

Make the filling:
In a small bowl, mix the sugar with the nutmeg and ginger, then work in the second part of the lemon zest (1/3) with the tips of your fingers until the sugar resembles soft sand. Slowly pour in one part of the lemon juice, stirring. Stop when the sugar and lemon juice form a wet, clumpy mixture. (You may use all of the reserved half of the lemon juice; you may stop before completely adding that half of the lemon juice.)

Assemble the rolls:
Lightly grease a 13x9 inch baking dish with baking spray or butter. On a floured surface pat the dough out into a large yet still thick rectangle — about 10x15 inches.

Spread the dough evenly with the 3 tablespoons of softened butter, then pour and spread the lemon-sugar mixture over top. Roll the dough up tightly, starting from the top long end. Stretch and pull the dough taut as you roll, to keep the lemon sugar firm inside. Cut the long dough roll into 12 even rolls. Pinch the bottom of each roll closed and place each one, open and cut side up, in the prepared baking dish.

Cover the rolls with a towel and let them rise for an hour or until puffy and nearly doubled. (You can also refrigerate the rolls at this point. Cover the pan tightly with plastic wrap, and place it in the refrigerator for up to 24 hours. When you are ready to bake the rolls, remove the pan from the fridge, and let them rise for an hour.)

Heat the oven to 350°F. Place the risen rolls in the oven and bake for 35 minutes or until a thermometer inserted into a center roll reads 190°F.

Make the glaze:
While the rolls are baking, prepare the glaze. In a small food processor (or with a mixer, or a sturdy whisk), whip the cream cheese and the lemon thyme until light and fluffy. Add the remaining lemon juice and blend until well combined. Add the powdered sugar and blend until smooth and creamy.

Finish the rolls:
When the rolls are done, smear them with the cream cheese glaze, and sprinkle the final remaining lemon zest over top to garnish. Let cool for at least 10 minutes before serving, but do serve while still warm.

lemonthymeplant
My Inspiration


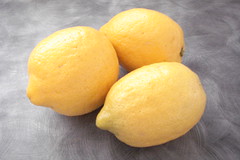
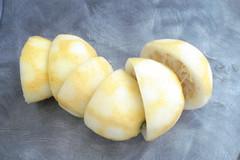
lemons!gratedlemon
A little before and after

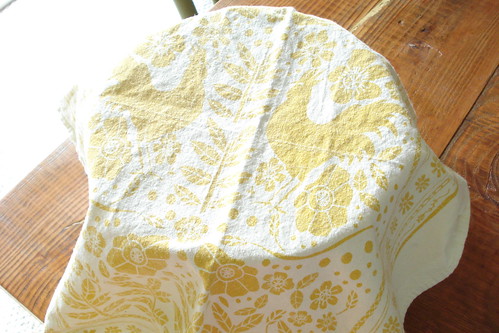
teatowel
My pretty tea towel with the dough rising

buns
Makes my mouth water just looking at 'em

onebundone
Another before and after

March 9, 2011

Labor of Love-Macaron Making

This past Valentine's day I took as an excuse to tackle a long time goal of mine-french macaron making. Michelle got me a detailed book on the subject for my birthday last year that I've been studying intently for the last 6 months. I invested in all the necessary equipment and we also got to use my new Kitchenaid mixer for the first time. A day of firsts indeed. Michelle came over to lend a hand in the kitchen and also for all the adorable crafting we did for our Valentine's gifts that we passed out to our loved ones. This was an all day project, with a couple of fails and do-overs, luckily we were smart enough to fit in pedicures and champagne drinking.

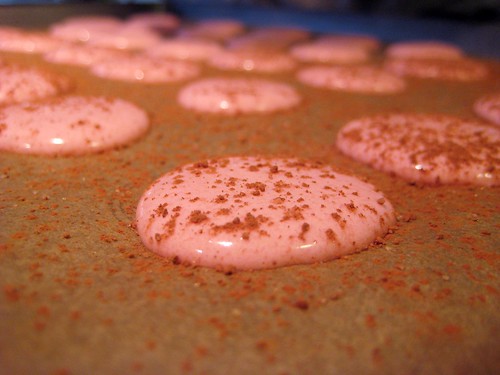
These little cookie monsters are hard to make but I think we had success in the end. They turned out really well, as did the darling packaging we made. We ended up making two different kinds of macarons. The first was a fig cookie with orange liqueur buttercream filling. The second was a pink colored cookie with fresh strawberry buttercream and a sprinkle of Dagoba's spicy chocolate powder on top. We did half of the strawberry batch with coconut on top but unfortunately those didn't turn out because we didn't cook them long enough. In the end we impressed ourselves with pulling off this baking feat. It left me wanting to experiment even more with the french macaron! Here is the detailed process of this labor of love.

Fig Macarons with Orange Liqueur Buttercream or
Pink Macarons with Fresh Strawberry Buttercream and Spicy Cocoa Topping

Macaron batter:
2/3 cup (3 ounces/85 grams) ground almonds
1 1/2 cups (5.25 ounces/150 grams) powdered sugar
3 large egg whites, at room temperature
5 tablespoons/65 grams granulated sugar
1 teaspoon vanilla extract, or seeds from 1/2 vanilla bean
Additions:
2 tablespoons ground dried figs or
red food coloring

Orange Liqueur Buttercream or Fresh Strawberry Buttercream:
7 tablespoons (3.5 ounces/100 grams) unsalted butter, softened
3 tablespoons (1.4 ounces/40 milliliters) water
3 tablespoons (1.4 ounces/40 grams) granulated sugar
1 egg
vanilla extract
Additions:
2 tablespoons orange liqueur, such as Cointreau or
4 tablespoons fresh strawberry puree

Toppings:
shredded unsweetened coconut or
Dagoba's spicy cocoa powder

To make macaron batter:
Cut a sheet of parchment paper (or silpat) to fit your baking sheet. Draw 1 inch circles on paper, spacing them at least 1/2 inch apart. This patter will be your guide for squeezing out the macaron batter. In a food processor, grind almonds and powdered sugar together to a fine powder. Sift the mixture through a medium-mesh sieve twice. Set aside.

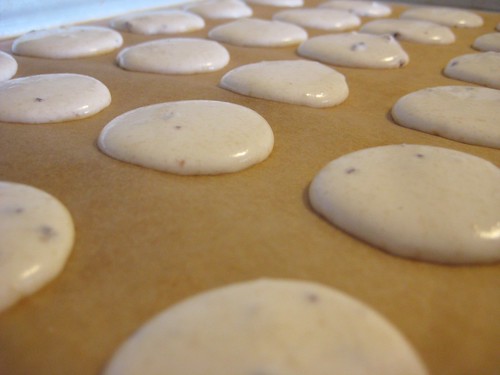
In a stainless steel mixing bowl, beat egg whites (in a stand mixer or with a hand mixer) on high speed until they are foamy. Gradually add the granulated sugar to the egg whites. Add vanilla and continue to beat the meringue until it is stiff, firm, and has a glossy texture. Make sure this is VERY stiff. Just when you think it's stiff enough, beat a little more. This part is crucial to not ending up with runny macaron circles (we found out later).

Add half of the sifted flour mixture and stir with a spatula while scooping it up from the bottom of the bowl. Add the rest of the flour and mix it lightly in a circular motion. At this point add any flavors, such as the fig bits, or coloring you desire. Feel free to experiment with a variety of dried fruits or coloring, we did! After you run out of flour or have added your flavoring, press and spread out the batter against the bowl's sides. Scoop the batter from the bottom and turn it upside down. This is called making the macaronnage. Repeat this process about 15 times but not more than 20. When the batter becomes nicely firm and drips slowly as you scoop it with a spatula, the mixture is done. This is called the macaronner.. Attach a 0.4 inch tip to a pastry bag. Twist the bag to hold the tip tightly. This prevents the batter from leaking out. Place the pastry bag, tip down, inside a deep measuring cup and pour the macaronner batter into it. After pouring the batter into the bag. clip the bag top to prevent the batter from coming out. You can also use a rubber band. Using the parchment outlined in circles, squeeze small circles of batter onto a cookie sheet, making sure that the batter is firm and does not run. At this point sprinkle any coconut or cocoa or other powdered toppings you may want onto the circles.

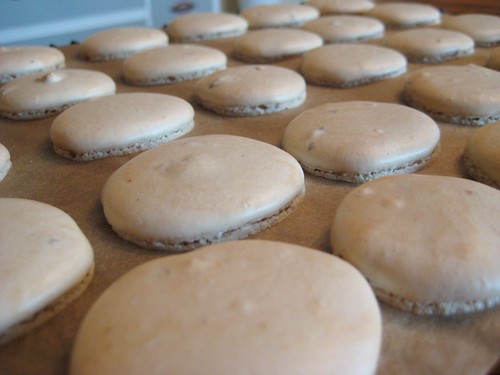
Rap the baking sheet firmly against the counter or other flat surface. This helps the macarons hold their rounded shape and helps the pied, or "little foot", to form. Dry the batter at room temperature, uncovered, for 15 minutes. A slight crust should form on top of the macarons. On rainy days, it helps to dehumidify the room. If the batter circles do not stick to your finger when you touch them, the drying process is complete. On a dry and sunny day, the drying process takes approximately 30 minutes.

After the macarons have sufficiently dried you are ready to bake them. Place the oven racks in the center of the oven. Preheat to 375 degrees. Stack the baking sheet with the batter circles into an empty baking sheet and slide both into the oven. Bake for 15 to 18 minutes until slightly crisp and crackled on top. If the insides of the macarons are still soft after 15 minutes lower the oven temperature to 300 degrees, cover the tray with foil, and bake for another 2 to 3 minutes. Remove the baking sheet from the oven and cool on a wire rack. When the macarons are completely cooled, remove them from the baking sheet.

To make buttercream:
Cut butter into small pieces and put in a medium bowl. Stir the butter with a spatula until it becomes smooth and creamy like mayonnaise, set aside. Put water and granulated sugar in a small saucepan and stir well. Heat the mixture over medium low heat until the sugar is completely dissolved and the mixture begins to become syrupy. Scoop some syrup with a spoon and drop it into a small amount of water. Then try to scoop the syrup out of the water and make a ball with it using your fingers. If you can do this, the syrup is the right density. While heating the syrup, break an egg into a bowl and beat it lightly with a hand mixer. Pour the syrup like a thread into the bowl and beat it at high speed. Reduce the speed to medium and then to slow, and continue beating until the bottom of the bowl is no longer hot and the mixture becomes white and heavy.

Add the creamed butter in 3 batches into the syrup beating with the hand mixture each time you add it. When the mixture is well mixed the process is done. Stir a drop or two of vanilla extract and whatever flavoring you are adding. When the mixture is well stirred it is done. Spread the cream between the macaron puffs and sandwich together. Now they are ready to eat!

2011-02-13 cookies 003
Not runny, very important
2011-02-13 cookies 022
A sprinkle of cocoa
2011-02-13 cookies 025
Little feet
2011-02-13 cookies 039
Getting creamed
2011-02-13 cookies 0352011-02-13 cookies 045
Stuffed!
2011-02-13 cookies 053
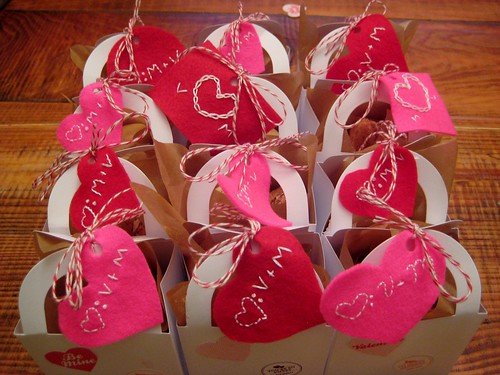
Valentines presents ready to go
2011-02-13 cookies 060
Just a peek at the goods


March 4, 2011

Crack Cake aka Pineapple Upside Down Cake Reinvented

Lately I've got a case of the winter blues. I thought Portland was going to skip over its rainy storm weather since we've had a very mild winter thus far. But after 5 years I should have known better 'cause we've been getting slaughtered lately. It's enough to make a girl start looking at last minute plane tickets outta here and spend long periods of time dreaming of warm sun and fruity drinks. So when I saw a large pineapple display at the store this week I thought, well, it's a start. I got that pineapple home and starting chopping it up only to realize it's not quite pineapple season and that sucker was tart. Like lip puckering, tawlk lawk dis tawt. So I immediately thought what if I made a pineapple upside down cake, not like the ones of olden days with canned pineapple and maraschino cherries, but a really amazing fresh and well done version.

I went in search of a recipe and whaddya know that wonderful blog
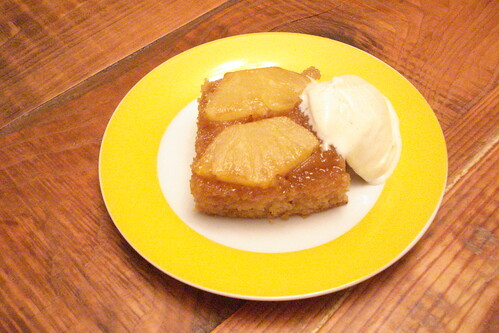
Smitten Kitchen had a perfect recipe, yup, of course it did. And it just so happened I had all the ingredients I needed at home. Any recipe that starts with a homemade caramel is aces in my book and this one did NOT disappoint. I took it out of the oven and the smell was intoxicating. I waited until it was just cool enough, slapped some vanilla ice cream on a slice, and immediately proclaimed (to no one at all) "that's some crack cake right there!". This is going to make many a reappearance come pineapple season. Mark my words.

Pineapple Upside Down Cake
Source:
Smitten Kitchen

Topping:

1/2 medium pineapple, peeled, quartered lengthwise, and cored
3/4 stick unsalted butter
3/4 cup packed light brown sugar

Batter:
1 1/2 cups all-purpose flour
2 teaspoons baking powder
1/4 teaspoon salt
3/4 stick unsalted butter, softened
1 cup granulated sugar
2 large eggs
1 teaspoon vanilla
1 tablespoon dark rum
1/2 cup unsweetened pineapple juice
2 tablespoons dark rum for sprinkling over cake

Preheat oven to 350°F.

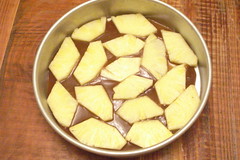
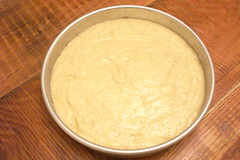
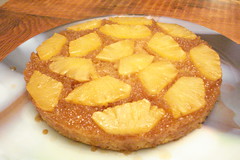
Make topping: Cut pineapple crosswise into 3/8-inch-thick pieces. Melt butter in a small saucepan. Add brown sugar and simmer over moderate heat, stirring, four minutes. Remove from heat and pour into a 9" cake pan. Arrange pineapple on top of sugar mixture in concentric circles, overlapping pieces slightly.

Make batter: Sift together flour, baking powder, and salt. Beat butter in a large bowl with an electric mixer until light and fluffy, then gradually beat in granulated sugar. Add eggs, one at a time, beating well after each addition. Beat in vanilla and rum. Add half of flour mixture and beat on low speed just until blended. Beat in pineapple juice, then add remaining flour mixture, beating just until blended. (Batter may appear slightly curdled.)

Spoon batter over pineapple topping and spread evenly. Bake cake in middle of oven until golden and a tester comes out clean, about 45 minutes. Let cake stand for five minutes. Run a knife around the edges to loosen the cake. Invert a plate over cake pan and invert cake onto plate (keeping plate and pan firmly pressed together). Replace any pineapple stuck to bottom of pan. Sprinkle rum over cake and cool on plate on a rack.

Serve cake just warm or at room temperature. And add some vanilla ice cream, you won't regret it.

Do ahead: Cake may be made one day ahead and chilled, covered. Bring to room temperature before serving.

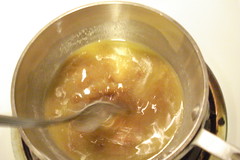
makingcaramelallnestledin

Caramel making and nesting

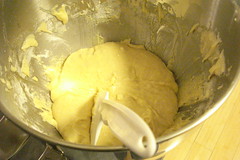
thebatterready

Batter making

krakencloseup

Some rum for sprinkling on the final cake

readytoeat

Pretty as a picture

November 9, 2010

Cranberry Apple Butter

I remember my grandmother making apple butter year after year when I was a kid, always thinking it tasted nothing like butter (and a tad disappointed with that fact). I'm not sure how she was making hers but I remember thinking how insanely talented my grandmother was. If only I knew how easy she was getting off. This is one of the easiest recipes you'll ever make. I guarantee it. That fact is largely due to using a crock pot and an immersion blender but you can still make this recipe even if you don't have those tools.

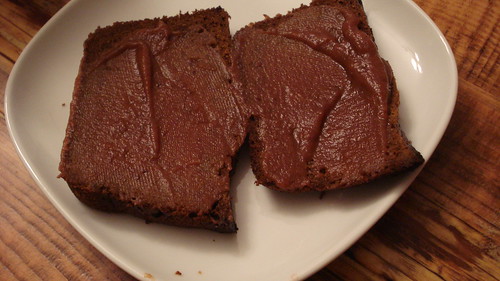
This recipe was very good. I would've preferred it a little bit thicker, however, I loved how the tartness of the cranberry played off the sweetness of the apple. This recipe made quite a bit of apple butter so this would be a perfect gift to jar up and hand out for the holidays. Impress your friends with your grandma-like skills. We ate this on pumpkin bread and regular toast for breakfast for weeks. Enjoy!

Slow Cooker Cran Apple Butter
source: Mommie Cooks

10-12 Apples, Chopped
3 Cups of Whole Cranberries
1/2 Cup of Brown Sugar
1/2 Cup of White Sugar
1 tsp of Cinnamon
1/2 tsp of Nutmeg
1/4 tsp Ginger
1/4 tsp Cloves
4 Shakes of Salt

Instructions

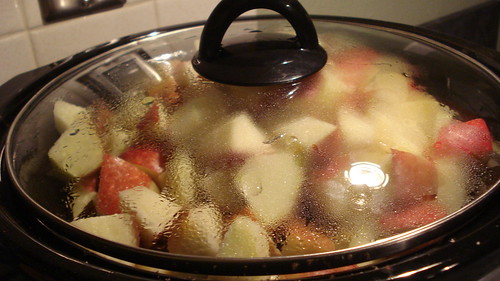
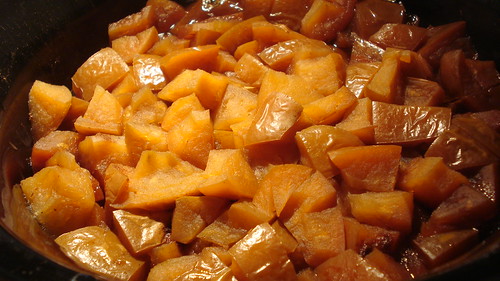
Throw it all in your slow cooker and cook it on low for 12 hours. You can also do this using a dutch oven in your regular oven at 400 degrees. Emulsify it smooth with an immersion blender or by batches in a regular blender.

DSC01131
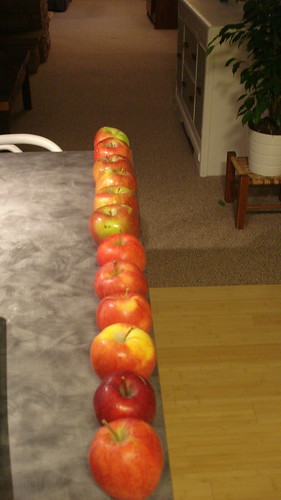
All lined up ready to be chopped

DSC01137
The beginning

DSC01143
12 hours later

DSC01148
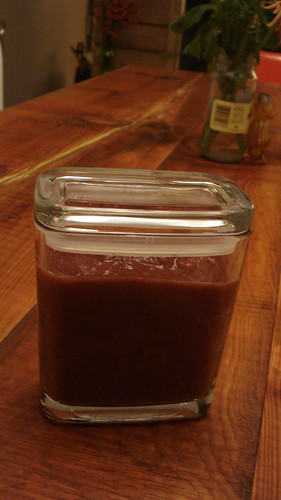
Pretty in jars

DSC01152
Even better on pumpkin bread

November 2, 2010

Chicken and Pepper Stew With Olives & Cranberries

I know, this sounds like a strange combination of flavors. That's exactly why I wanted to try it. I thought to myself, "That sounds weird, but I like all those things so let's try it out!" V came over for some pre-halloween crafting and I made us a feast.

The original recipe arrived in my email from Real Simple. I realize that I post a lot of recipes from them, but its just so convenient to have recipes that are delicious randomly emailed to you daily! I cannot keep up with all the amazing recipes out there on the internet!

In any case, to get back on track, Here is the recipe as I made it, only a few substitutions. (dried cranberries instead of raisins, chicken breast tenders instead of thighs, and just less of everything because I didn't want to feed 8 people.)

Chicken and Pepper Stew With Olives & Cranberries
Makes about 4 to 6 servings, depending how hungry you are!

Ingredients:

1/4 cup all-purpose flour
1/2 teaspoon smoked paprika (but regular would work too)
kosher salt and black pepper
10 boneless, skinless chicken breast tenders (about 2 to 3 pounds)
1 tablespoons olive oil
1 each of red, yellow and green bell peppers, sliced.
4 cloves garlic, sliced
1 1/2 cups chicken broth
1 cup pitted olives (I used kalamata)
1/4 cup dried cranberries
1 cups long-grain white rice

Directions:

1. In a large bowl, combine the flour, paprika, 1/2 teaspoon salt, and 1/4 teaspoon pepper. Add the chicken and toss to coat.
2. Heat 1 tablespoon of the oil in a large pot over medium-high heat. In batches, brown the chicken, turning, 6 to 8 minutes; transfer to a plate as it browns and add more oil as necessary.
3. Add the bell peppers, garlic, 1/4 cup of the broth, 1 1/4 teaspoon salt, and 1/4 teaspoon pepper to the pot. Cook, stirring and scraping up any browned bits, until the peppers begin to soften, 4 to 6 minutes.
4. Add the olives, cranberries, and the remaining 1 cup of broth and bring to a boil. Nestle the chicken in the vegetables and simmer, covered, for 15 minutes.
5. Uncover and simmer until the chicken is cooked through and the sauce is slightly thickened, 15 to 20 minutes. (Maybe longer, I might have also used too much liquid)
6. Twenty minutes before the stew is done, cook the rice according to the package directions. Serve with the stew.

2010-10-20 yum 002

I thought this would have been pretty tasty with some feta cheese on top but I didn't think of it when I was at the store. It was kind of a salty sweet combo with the olives and cranberries. The chicken was falling apart and would have been extra delicious if I had used thighs, but the chicken tenders are what I had on hand. This also heated up nicely for lunch the next day!

I always forget to take pictures of the process, but seriously, this was delicious!

September 6, 2010

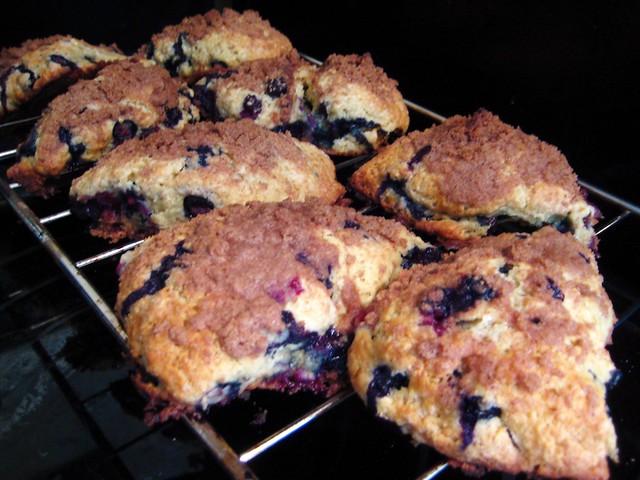
Blueberry Streusel Scones

Having newly discovered my love of baking, thanks to those cupcakes I posted about whenever that was, I decided to make some scones last weekend for breakfast. Scones are another new love of mine, since I recently discovered that scones are delicious and flaky like a biscuit and not hard as rocks as I had been led to believe by a certain big coffee company's poor excuse for scones! In any case, I had been wanting to make something with the blueberries that popped up in our front yard and I found this tasty recipe on Joy of Baking.

Without further ado:
Blueberry Streusel Scones!

Ingredients:
Blueberry Streusel Scones:
-2 cups (260 grams) all-purpose flour
-1/3 cup (65 grams) granulated white sugar
-2 teaspoons (10 grams) baking powder
-1/8 teaspoon salt
-6 tablespoons (85 grams) chilled, unsalted butter, cut into pieces
-1 cup (150 grams) fresh blueberries
-1 large egg, lightly beaten
-1 teaspoon (5 grams) pure vanilla extract
-1/2 cup (120 ml) milk or cream
-Brushing tops of scones:
-Milk or Cream

Streusel Topping:
-1/4 cup (55 grams) brown sugar
-1/4 cup (35 grams) all purpose flour
-1/2 teaspoon ground cinnamon
-2 tablespoons (30 grams) chilled unsalted butter, cut into pieces

Directions:
For the Scones: In a large bowl, whisk together the flour, sugar, baking powder and salt. Cut the butter into small pieces and blend into the flour mixture with a pastry blender or two knives. The mixture should look like coarse crumbs. Gently fold in the blueberries. In a small measuring cup combine the cream, beaten egg and vanilla. Add this mixture to the flour mixture and stir just until the dough comes together. Do not over mix the dough or the scones will be tough.

Transfer the dough to a lightly floured surface and knead the dough gently four or five times and then pat the dough into a circle that is about 7 inches (18 cm) round and about 11/2 inches (4 cm) thick. Cut this circle in half, then cut each half into four pie-shaped wedges (triangles). Place the scones on the baking sheet. Brush the tops of the scones with a little cream or milk.

For the Streusel Topping: In a small bowl whisk together the sugar, flour, and cinnamon. With a pastry blender or two knives, cut in the butter until crumbly. Top each scone with a teaspoon or two of the streusel mixture. Cover and refrigerate any leftover streusel mixture.

Bake the scones until nicely browned, about 18 - 22 minutes or until a toothpick inserted in the center of a scone comes out clean. Transfer to a wire rack to cool slightly. These are best eaten the day they are made but can be covered and stored for a few days. Makes 8 scones.

Note: I did not have any baking powder! so after a little bit of research, I put in about 1 teaspoon of baking soda and about 2 tablespoons of fresh lemon juice. I also discovered mid mix that I did not have vanilla! I just threw in a tiny extra sugar. The scones still turned out delicious though probably not perfect. We ate them all up over the next few days and I marvelled at my newly acquired baking skills. These also weren't nearly as sweet as we expected they would be, given the streusel topping. Super tasty and a great consistency, even with my jankity improvisations!

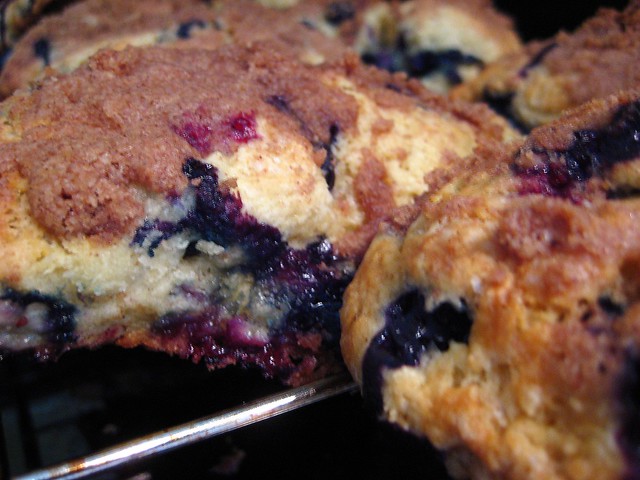
Sadly, none of my photos turned out so hot, but you can get the idea:

Scones made with blueberries picked out of our front yard!

2010-08-29 scones 003

June 14, 2010

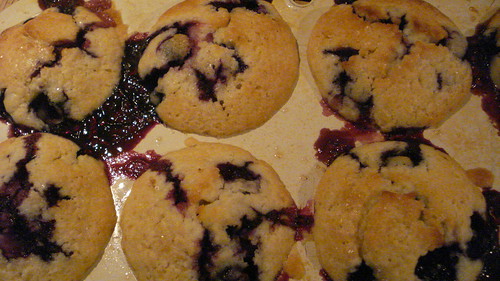
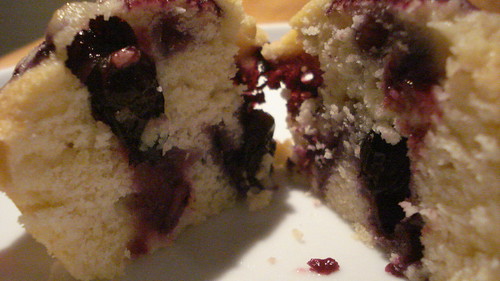
Infallible Lemon Blueberry Muffins

Alright, people. I've been on hiatus, yet again, and during that time it seems I lost my ability to bake. And not just to bake well, but to bake the easiest thing of all, what some may call my specialty - the muffin. Luckily enough for me I managed to pick what would appear to be a recipe so good it's impossible to mess up. Because I tried, not once, but twice. You see, when a recipe tells you to cream the butter and sugar, don't forget the sugar until the last minute, when upon licking the beater it occurs to you that something is off. And certainly don't add the lemon juice in early instead of said sugar, making it nearly impossible to cream the butter. But if you do both of those things, most definitely do them with this recipe. Because despite all that drama I still managed to put forth muffins so lemony and crumbly that I couldn't eat less than two in one sitting. Six times in a row.

Alice’s Blueberry Muffins

From Sweet Savory Life

Ingredients:

4 tablespoons butter, softened

2 tablespoons vegetable oil

1 cup of sugar

zest and juice of 1 lemon

2 eggs

2 tsp. of vanilla extract

1/2 cup of sour cream

2 cups of AP Flour

2 tsp. of baking powder

1/2 tsp. of salt

1.5 cups of fresh or frozen blueberries

*optional 1/4 cup turbinado sugar/sugar crystals

Directions:

Preheat oven to 350 degrees. In a medium mixing bowl, cream butter, oil, lemon zest, and sugar for 3 minutes until light in color and creamy. Add eggs, sour cream, lemon juice, and vanilla beating for an additional 2 minutes. Add salt, baking powder, and all-purpose flour gently mixing everything for an additional minute until everything is fully incorporated, approx. 2 minutes. Batter will be nice and thick. Gently fold in blueberries and pour batter into muffin tin lined with paper cups 3/4 cup full. Top each muffin with a sprinkle of turbinado sugar or sugar crystals.Bake for 30 minutes or until done. Makes 12 regular sized muffins.

DSC00691

DSC00698


June 24, 2009

Strawberry Overload

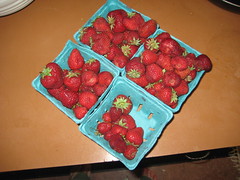
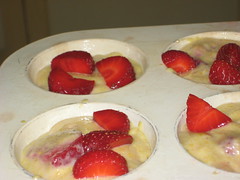
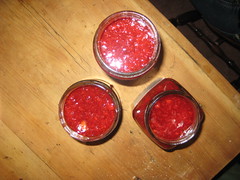
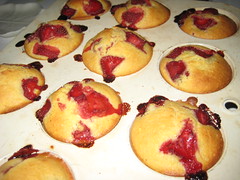
On a recent trip back from The Oregon Gardens, which are amazing and totally worth the short trip and $10, my mom and I stopped at one of the many roadside fruit stands to check it out. We picked a great one and scored an entire flat of strawberries for $14! That is seriously cheap. So now, after giving two pints away and eating them every morning for breakfast, I was faced with what to make/bake with the 4 pints I still had. I decided on Strawberry Cornmeal Muffins and a batch of Strawberry Freezer Jam! And it's no coincidence that these two items go together splendidly, nosiree.

Strawberry Cornmeal Muffins (taken from Eating Out Loud)
1 cup cornmeal
1 cup flour
1/2 cup granulated sugar
2 teaspoons baking powder
1/2 teaspoon salt
1 beaten egg
1/4 cup oil
1 cup milk
1 cup chopped strawberries, plus 1/2 cup for garnish

In a large mixing bowl, combine cornmeal, flour, sugar, baking powder, and salt. Add beaten egg, oil and milk, stirring until just combined. Fold in 1 cup chopped strawberries. I used smaller berries and simply cut them in half. I suggest chopping the berries no larger than 1/2″.

Fill muffin cups 3/4 full, then garnish with a few chopped berries. Bake at 400F (200C) for 20-25 minutes or until testing done.

Allow the muffins to cool before removing from the muffin tin. I ran a sharp knife around the edge of each muffin, then popped them out of the tin.

These were freaking fantastic. Moist and delicate, easy and quick, and they made the whole house smell amazing. I wanted to smear them with butter and jam the instant they came out of the oven. The freezer jam, on the other hand, was only slightly successful. I don't remember where I originally pulled the recipe from so I'm not going to post it. Also, I'm unsure of what method we finally went with as Michelle and I were awfully confused on what to do between the recipe I got off the internet and the print out in the box of pectin. Ultimately, my sources (Michelle) tell me that the jam is delicious but still pretty runny. I guess that means we didn't use enough pectin. I'm going to have to try my hand at this again; I'm not going down without a fight, jam! We should have called the JAMLINE number that was listed on the box of pectin but I was too scared I would end up getting lectured by a grandmother in a rocking chair with a serious passion for jam. And now:

STRAWBERRY PHOTO MONTAGE!


20090624_strawberries_00120090624_strawberries_006

20090624_strawberries_00920090624_strawberries_013

20090624_strawberries_02020090626_strawberries_021

April 28, 2009

Land of Giant and Farmer's Markets

Michelle and I have a Monday night tradition-food and wine and tube. This last Monday it was time to use up some homemade tomato sauce that DP and I whipped up over the weekend using some amazing yellowfoot mushrooms from the Farmer's Market. The sauce turned out incredibly well and we served it over some delicate homemade spinach fettucine that was also purchased at the market. And I tell ya, if you're of the mindset that pasta is pasta is pasta, think again and try the fresh stuff....(drool)....

So, there was no way I was letting that sauce go to waste and I quickly thought of Chicken Parmesan for a fast and easy dinner. Served alongside were some roasted baby asparagus (also picked up at the Farmer's Market-god I love that place) served simply with garlic salt and lemon pepper. In all that eating haste I forgot to grab the camera, so you'll just have to trust us that it was damn delicious. What we DID manage to document was the BIG CRUMB COFFEE CAKE we made for dessert.

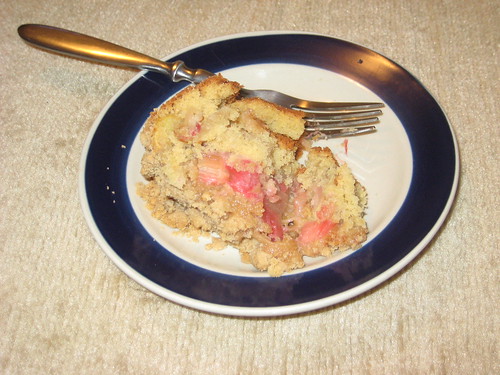
I snagged a few stalks of rhubarb at the good ol' FM thinking it was time to try my hand with them since I never had. I took this recipe from one of my flagship food blogs Smitten Kitchen. I can honestly say that I never fear when using a recipe from this blog; the woman has class. This turned out spectacular and my only regret was not getting enough fruit to load into it, which is my own damn fault. But, my oh my, the crumbs were GIGANTIC.

Big Crumb Coffeecake with Rhubarb
Adapted from Smitten Kitchen

Butter for greasing pan

For the rhubarb filling:
1/2 pound rhubarb, trimmed (I also threw in an apple because I was short on rhubarb)
1/4 cup sugar
2 teaspoons cornstarch
1/2 teaspoon ground ginger

For the crumbs:
1/3 cup dark brown sugar
1/3 cup granulated sugar
1 teaspoon ground cinnamon
1/2 teaspoon ground ginger
1/8 teaspoon salt
1/2 cup melted butter
1 3/4 cups cake flour (I used all-purpose)

For the cake:
1/3 cup sour cream
1 large egg
1 large egg yolk
2 teaspoons vanilla extract
1 cup cake flour (again, used all-purpose)
1/2 cup sugar
1/2 teaspoon baking soda
1/2 teaspoon baking powder
1/4 teaspoon salt
6 tablespoons softened butter, cut into 8 pieces.

1. Preheat oven to 325 degrees. Grease an 8-inch-square baking pan. For filling, slice rhubarb 1/2 inch thick and toss with sugar, cornstarch and ginger. Set aside.

2. To make crumbs, in a large bowl, whisk together sugars, spices, salt and butter until smooth. Stir in flour with a spatula. It will look like a solid dough.

3. To prepare cake, in a small bowl, stir together the sour cream, egg, egg yolk and vanilla. Using a mixer fitted with paddle attachment, mix together flour, sugar, baking soda, baking powder and salt. Add butter and a spoonful of sour cream mixture and mix on medium speed until flour is moistened. Increase speed and beat for 30 seconds. Add remaining sour cream mixture in two batches, beating for 20 seconds after each addition, and scraping down the sides of bowl with a spatula. Scoop out about 1/2 cup batter and set aside.

4. Scrape remaining batter into prepared pan. Spoon rhubarb over batter. Dollop set-aside batter over rhubarb; it does not have to be even.

5. Using your fingers, break topping mixture into big crumbs, about 1/2 inch to 3/4 inch in size. They do not have to be uniform, but make sure most are around that size. Sprinkle over cake. Bake cake until a toothpick inserted into center comes out clean of batter (it might be moist from rhubarb), 45 to 55 minutes. Cool completely before serving.


20090427_coffeecake_003
Monster crumbs
20090427_coffeecake_005
Fresh from the oven
20090427_coffeecake_008
In need of some vanilla ice cream

April 24, 2009

Criss Cross Applesauce

So in order to give you all the impression that we whip up something nightly, I've decided to start documenting anything remotely photo-worthy. And by me I mean me yelling, "Michelle get the camera, I'm doing something!". Because sometimes, when it comes to blogging at least, it's quantity over quality. I shed a small tear during my morning blog roll if my favorite foodies don't update daily (shout out to smitten kitchen, simply recipes and culinary in the desert-you guys rule large amounts of foodie ass).

I've been sitting on some apples gone wrinkle-y for a while now so I picked up some cider and lemons to turn them into applesauce. Mich was shouting "Apple Butter!" from her blanket fortress on the couch but we discovered that that takes 12-15 hours in a slow cooker, so we'll save that for the inevitable next time that one of us lets apples go south.

Raspberry Applesauce
adapted from Joy of Cooking

4 apples of any sort, peeled, cored and cut into inch size pieces (you don't have to peel them but it's a personal preference
1/2 cup of apple juice or cider (less if you're using really juicy apples)
1 lemon, squeezed
1 cinnamon stick (I was out so I used whole cloves)
1/2 pint of raspberries

Put all ingredients in a medium size saucepan, cover and cook on low heat until apples are soft and most of the liquid has cooked down, about 20 minutes. Remove the cinnamon stick (or cloves). Add to the pot:

1/3 cup sugar (I used a combination of brown and white sugar and really you can tinker with this to your liking, some might cut all of the sugar out and decide to let the fruit stand on its own)
1 tsp cinnamon
1/2 tsp ground ginger
1/2 tsp freshly grated nutmeg

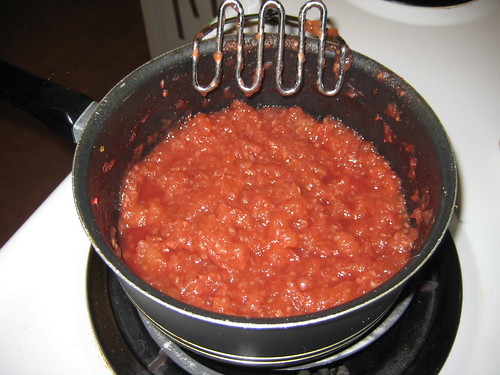
Stir until the sugar has dissolved and turn off the heat. At this point you can decide what sort of texture you want your applesauce to have. If you want it slightly chunky, just mash it up roughly with a potato masher, which is what I did. Since I added the raspberries, I would have liked a food sieve to get the seeds out, but I don't.

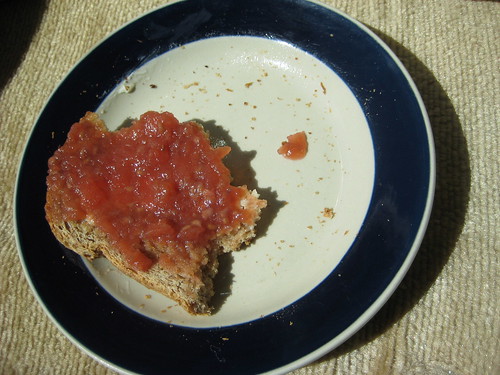
This was a great way to use up mealy apples! Given my pet peeve of spoiled food, I get a small thrill when I find a way to make use of something that would otherwise be thrown out. And this was great on toast or just the way it is.

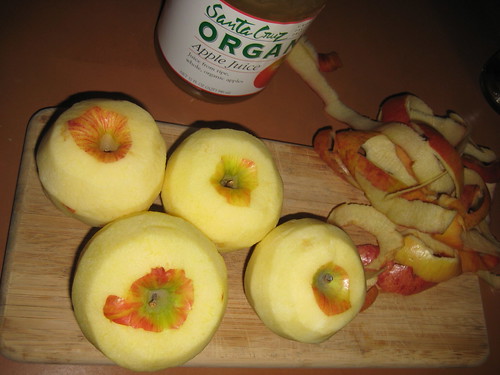
20090423_applesauce_001
Peeled and ready

20090423_applesauce_002
Mushed!

20090424_applesauce_004
Mmmmmm toast.