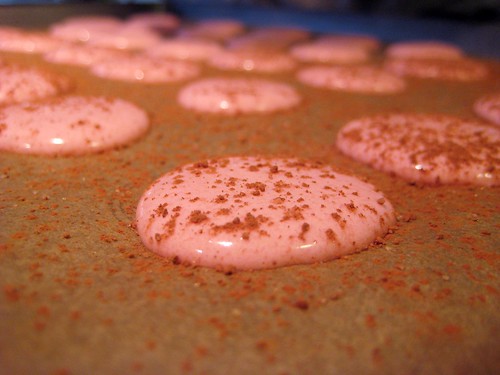
These little cookie monsters are hard to make but I think we had success in the end. They turned out really well, as did the darling packaging we made. We ended up making two different kinds of macarons. The first was a fig cookie with orange liqueur buttercream filling. The second was a pink colored cookie with fresh strawberry buttercream and a sprinkle of Dagoba's spicy chocolate powder on top. We did half of the strawberry batch with coconut on top but unfortunately those didn't turn out because we didn't cook them long enough. In the end we impressed ourselves with pulling off this baking feat. It left me wanting to experiment even more with the french macaron! Here is the detailed process of this labor of love.
Fig Macarons with Orange Liqueur Buttercream or
Pink Macarons with Fresh Strawberry Buttercream and Spicy Cocoa Topping
Adapted from I Love Macarons by Hisako Ogita
Macaron batter:
2/3 cup (3 ounces/85 grams) ground almonds
1 1/2 cups (5.25 ounces/150 grams) powdered sugar
3 large egg whites, at room temperature
5 tablespoons/65 grams granulated sugar
1 teaspoon vanilla extract, or seeds from 1/2 vanilla bean
Additions:
Additions:
2 tablespoons ground dried figs or
red food coloring
Orange Liqueur Buttercream or Fresh Strawberry Buttercream:
7 tablespoons (3.5 ounces/100 grams) unsalted butter, softened
3 tablespoons (1.4 ounces/40 milliliters) water
3 tablespoons (1.4 ounces/40 grams) granulated sugar
1 egg
vanilla extract
Additions:
Additions:
2 tablespoons orange liqueur, such as Cointreau or
4 tablespoons fresh strawberry puree
Toppings:
shredded unsweetened coconut or
Dagoba's spicy cocoa powder
To make macaron batter:
Cut a sheet of parchment paper (or silpat) to fit your baking sheet. Draw 1 inch circles on paper, spacing them at least 1/2 inch apart. This patter will be your guide for squeezing out the macaron batter. In a food processor, grind almonds and powdered sugar together to a fine powder. Sift the mixture through a medium-mesh sieve twice. Set aside.
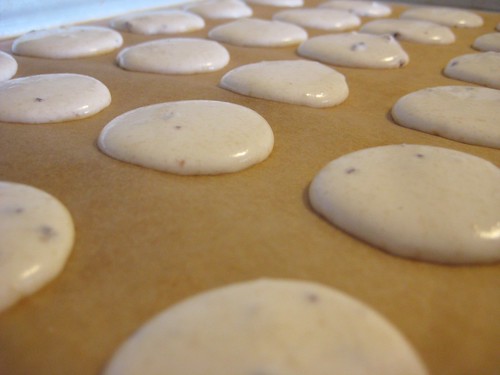
In a stainless steel mixing bowl, beat egg whites (in a stand mixer or with a hand mixer) on high speed until they are foamy. Gradually add the granulated sugar to the egg whites. Add vanilla and continue to beat the meringue until it is stiff, firm, and has a glossy texture. Make sure this is VERY stiff. Just when you think it's stiff enough, beat a little more. This part is crucial to not ending up with runny macaron circles (we found out later).
Add half of the sifted flour mixture and stir with a spatula while scooping it up from the bottom of the bowl. Add the rest of the flour and mix it lightly in a circular motion. At this point add any flavors, such as the fig bits, or coloring you desire. Feel free to experiment with a variety of dried fruits or coloring, we did! After you run out of flour or have added your flavoring, press and spread out the batter against the bowl's sides. Scoop the batter from the bottom and turn it upside down. This is called making the macaronnage. Repeat this process about 15 times but not more than 20. When the batter becomes nicely firm and drips slowly as you scoop it with a spatula, the mixture is done. This is called the macaronner.. Attach a 0.4 inch tip to a pastry bag. Twist the bag to hold the tip tightly. This prevents the batter from leaking out. Place the pastry bag, tip down, inside a deep measuring cup and pour the macaronner batter into it. After pouring the batter into the bag. clip the bag top to prevent the batter from coming out. You can also use a rubber band. Using the parchment outlined in circles, squeeze small circles of batter onto a cookie sheet, making sure that the batter is firm and does not run. At this point sprinkle any coconut or cocoa or other powdered toppings you may want onto the circles.
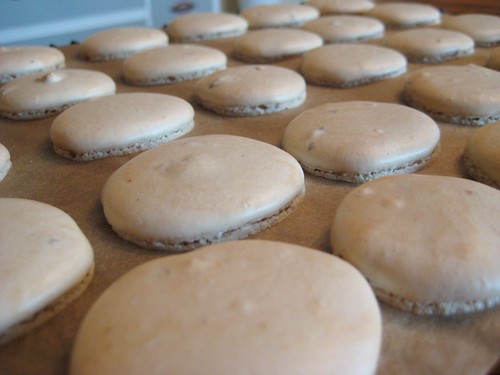
Rap the baking sheet firmly against the counter or other flat surface. This helps the macarons hold their rounded shape and helps the pied, or "little foot", to form. Dry the batter at room temperature, uncovered, for 15 minutes. A slight crust should form on top of the macarons. On rainy days, it helps to dehumidify the room. If the batter circles do not stick to your finger when you touch them, the drying process is complete. On a dry and sunny day, the drying process takes approximately 30 minutes.
After the macarons have sufficiently dried you are ready to bake them. Place the oven racks in the center of the oven. Preheat to 375 degrees. Stack the baking sheet with the batter circles into an empty baking sheet and slide both into the oven. Bake for 15 to 18 minutes until slightly crisp and crackled on top. If the insides of the macarons are still soft after 15 minutes lower the oven temperature to 300 degrees, cover the tray with foil, and bake for another 2 to 3 minutes. Remove the baking sheet from the oven and cool on a wire rack. When the macarons are completely cooled, remove them from the baking sheet.
To make buttercream:
Cut butter into small pieces and put in a medium bowl. Stir the butter with a spatula until it becomes smooth and creamy like mayonnaise, set aside. Put water and granulated sugar in a small saucepan and stir well. Heat the mixture over medium low heat until the sugar is completely dissolved and the mixture begins to become syrupy. Scoop some syrup with a spoon and drop it into a small amount of water. Then try to scoop the syrup out of the water and make a ball with it using your fingers. If you can do this, the syrup is the right density. While heating the syrup, break an egg into a bowl and beat it lightly with a hand mixer. Pour the syrup like a thread into the bowl and beat it at high speed. Reduce the speed to medium and then to slow, and continue beating until the bottom of the bowl is no longer hot and the mixture becomes white and heavy.
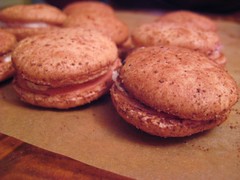
Add the creamed butter in 3 batches into the syrup beating with the hand mixture each time you add it. When the mixture is well mixed the process is done. Stir a drop or two of vanilla extract and whatever flavoring you are adding. When the mixture is well stirred it is done. Spread the cream between the macaron puffs and sandwich together. Now they are ready to eat!
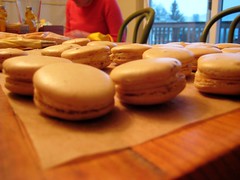
Not runny, very important
A sprinkle of cocoa
Little feet
Getting creamed
Stuffed!
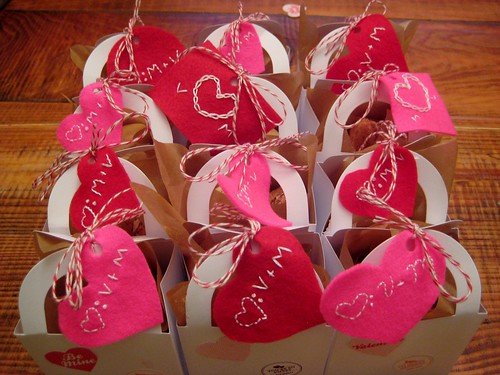
Valentines presents ready to go
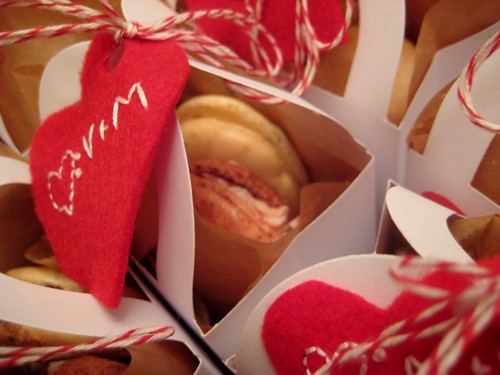
Just a peek at the goods

I changed the date/time stamp on this!!! also these were amazing and fun!!!!! also we have to make them again for easter!!!! yellow and pink ones!!!!
ReplyDeleteYES!! I was just at Grand Central and they were advertising St Patrick's Day ones with pistachio buttercream and green cookie. I wanna make those too!!
ReplyDelete